Virtual Machine Instances
- Creating a Virtual Machine Instance
- Deleting a Virtual Machine Instance
- Changing an Instances Hardware Profile
- Adding an additional block storage device to an existing Instance
- Expanding a Block Storage device
- Deleting a Block Storage Device from an Instance
- Adding a Network Adapter to an Instance
- Removing a Network Adapter from an Instance
- Creating an Instance Check-Point
- Restoring an Instance to a Checkpoint
- Deleting an Instance Checkpoint
Creating a Virtual Machine Instance
This guide will cover Creating a Virtual Machine Instance within Enseva Azure
Creating a Virtual Machine Instance
- Navigate to the Tenant Portal
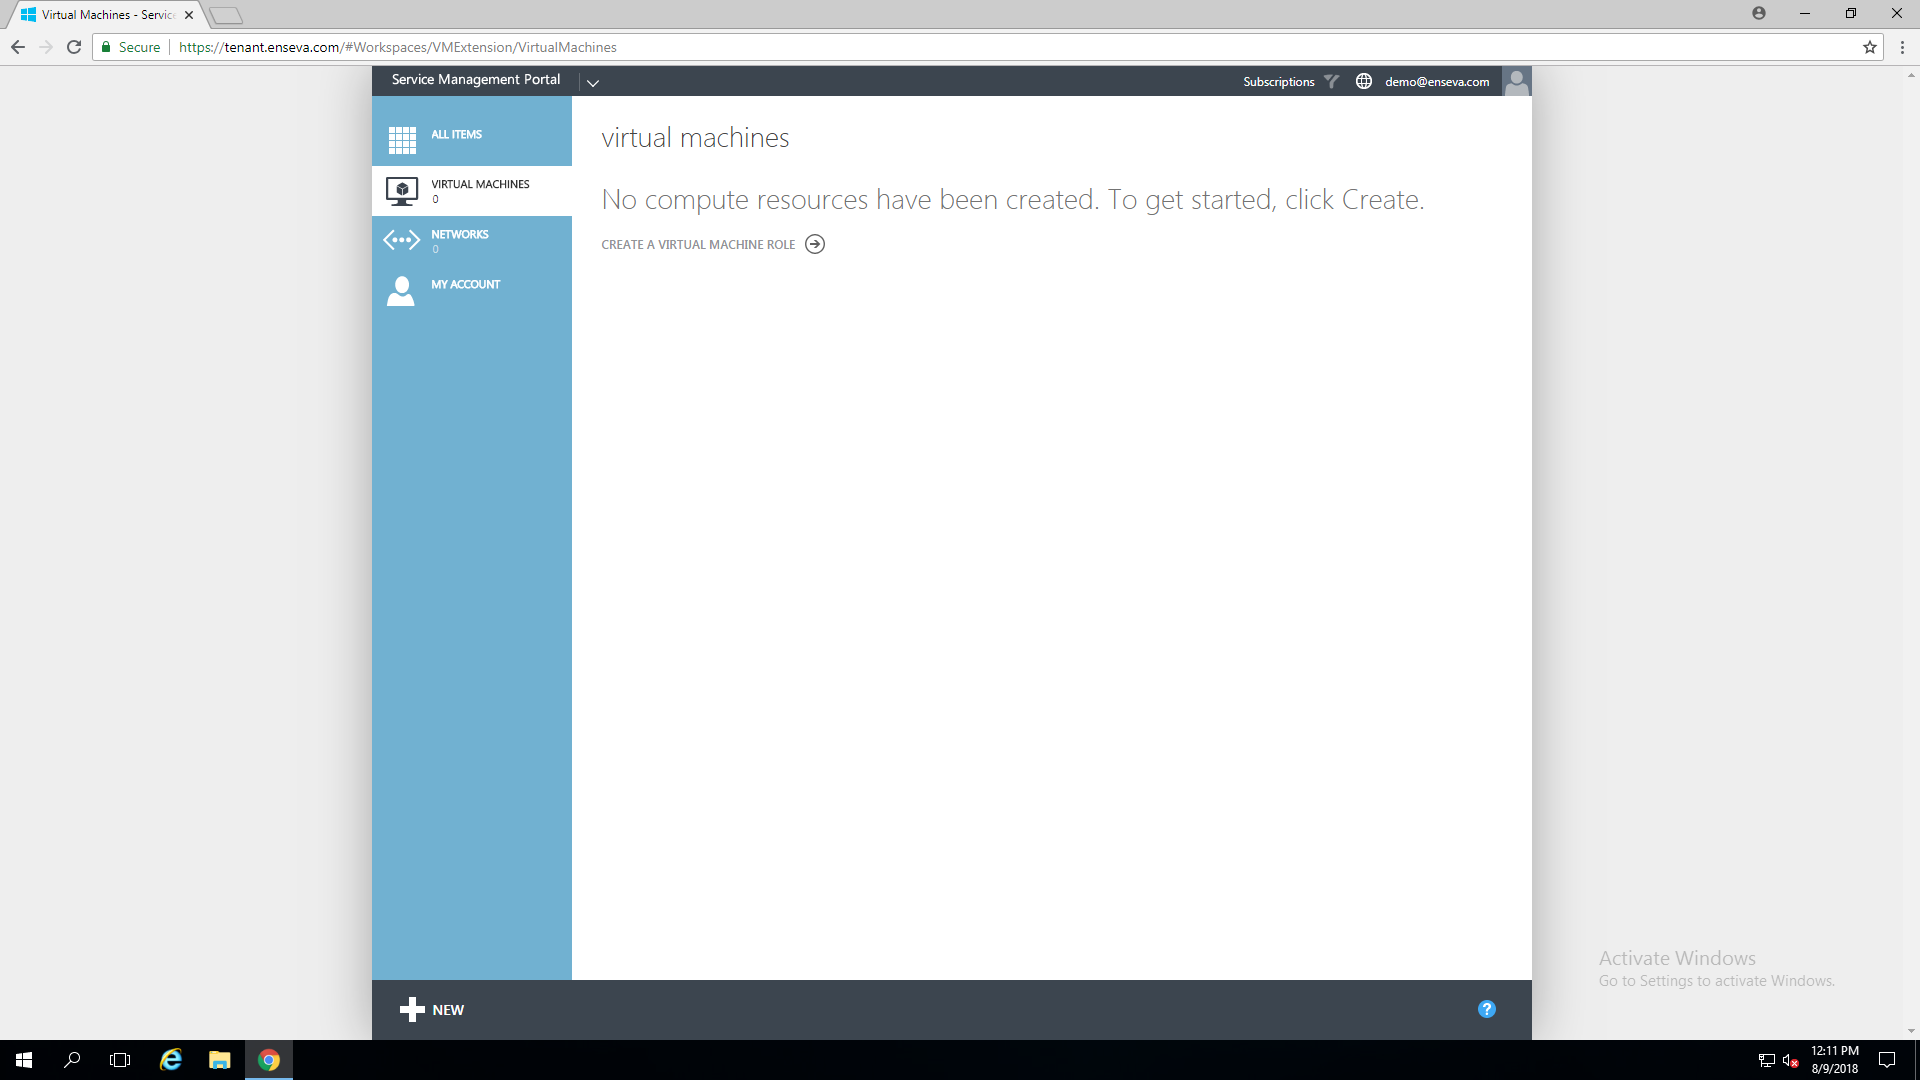
Enseva Azure allows cloud administrators to quickly provision Windows and Linux virtual machine instances. All that is required is an Enseva Azure account and a valid subscription.
For the purposes of this tutorial, it is assumed that you have already logged into the Enseva Azure portal and are the owner of one or more subscriptions.
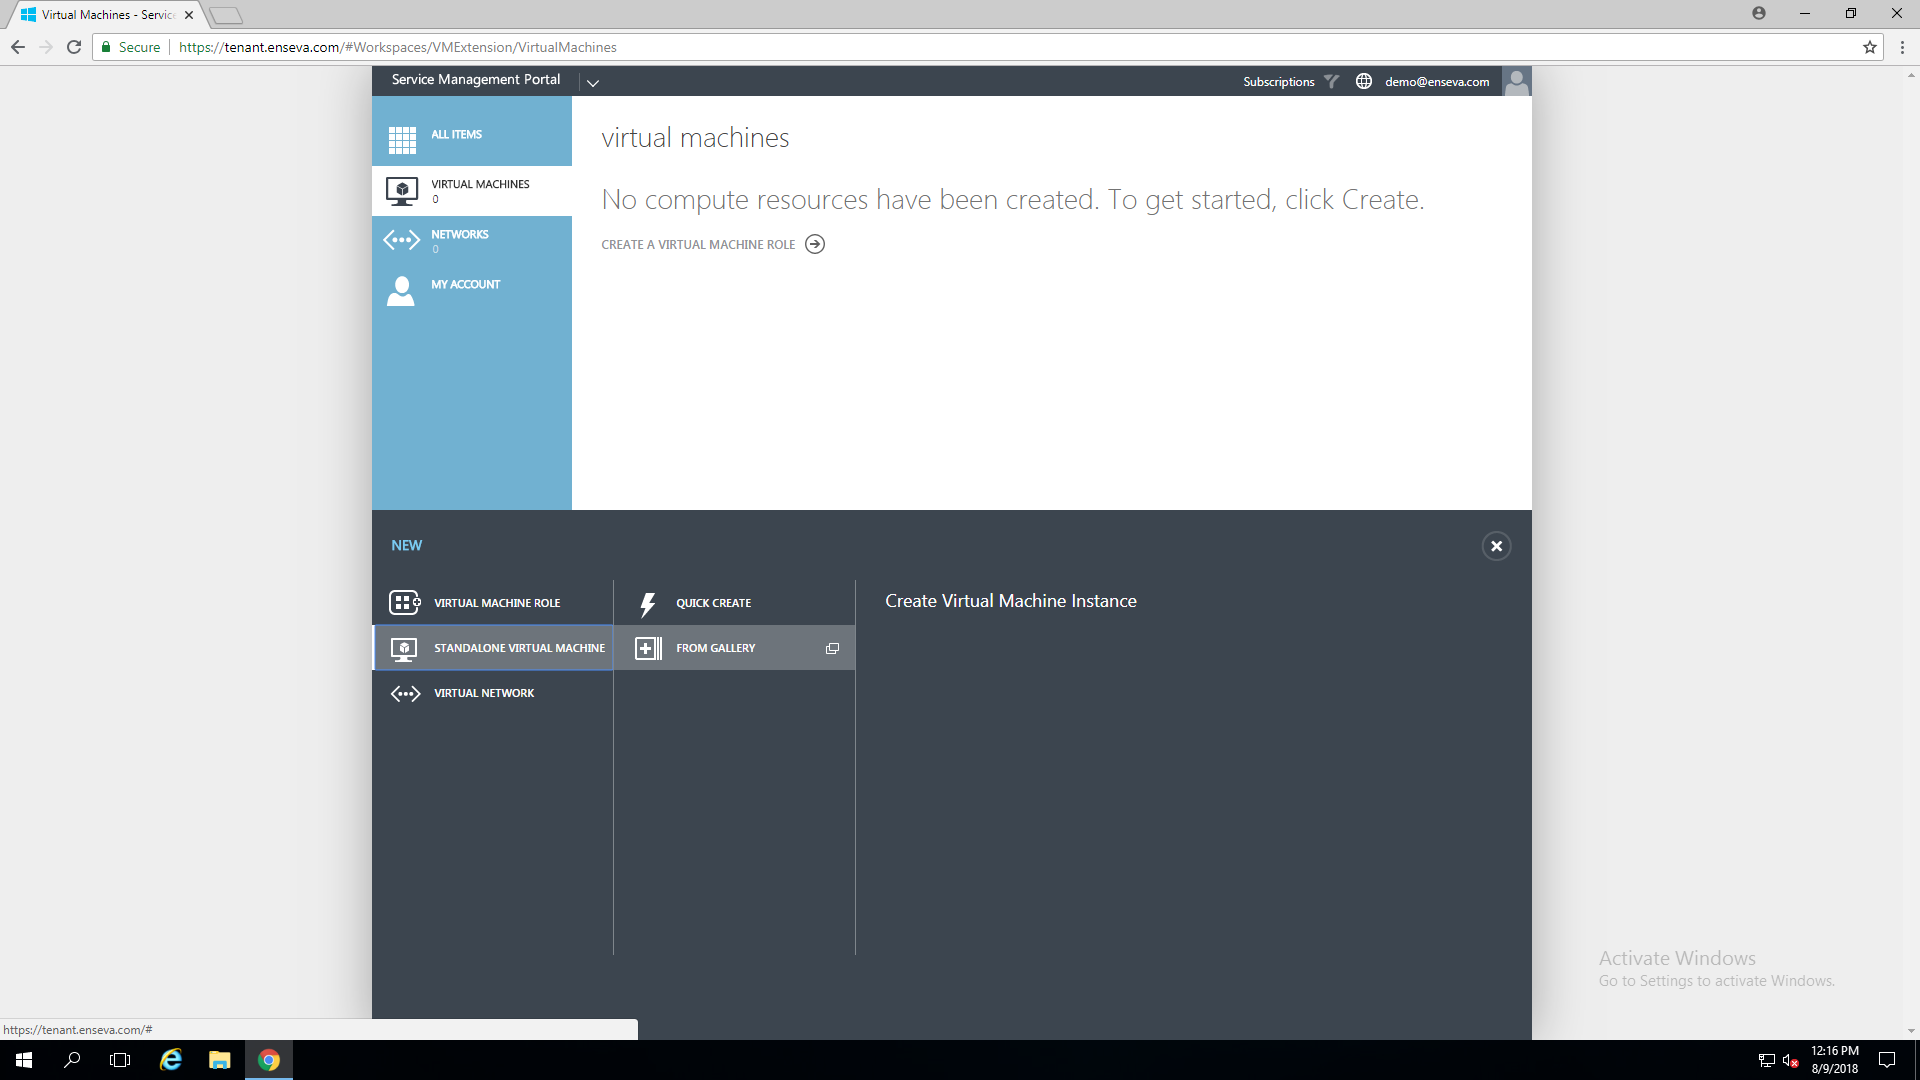
- Select New
In the bottom left hand corner, select 'New.' This will expand the New menu, allowing you to start configuring new services.
- Standalone Virtual Machine
Select 'Standalone Virtual Machine' then select 'From Gallery.' This will initiate the Virtual Machine Configuration wizard that will walk you through the process of creating a virtual machine instance.
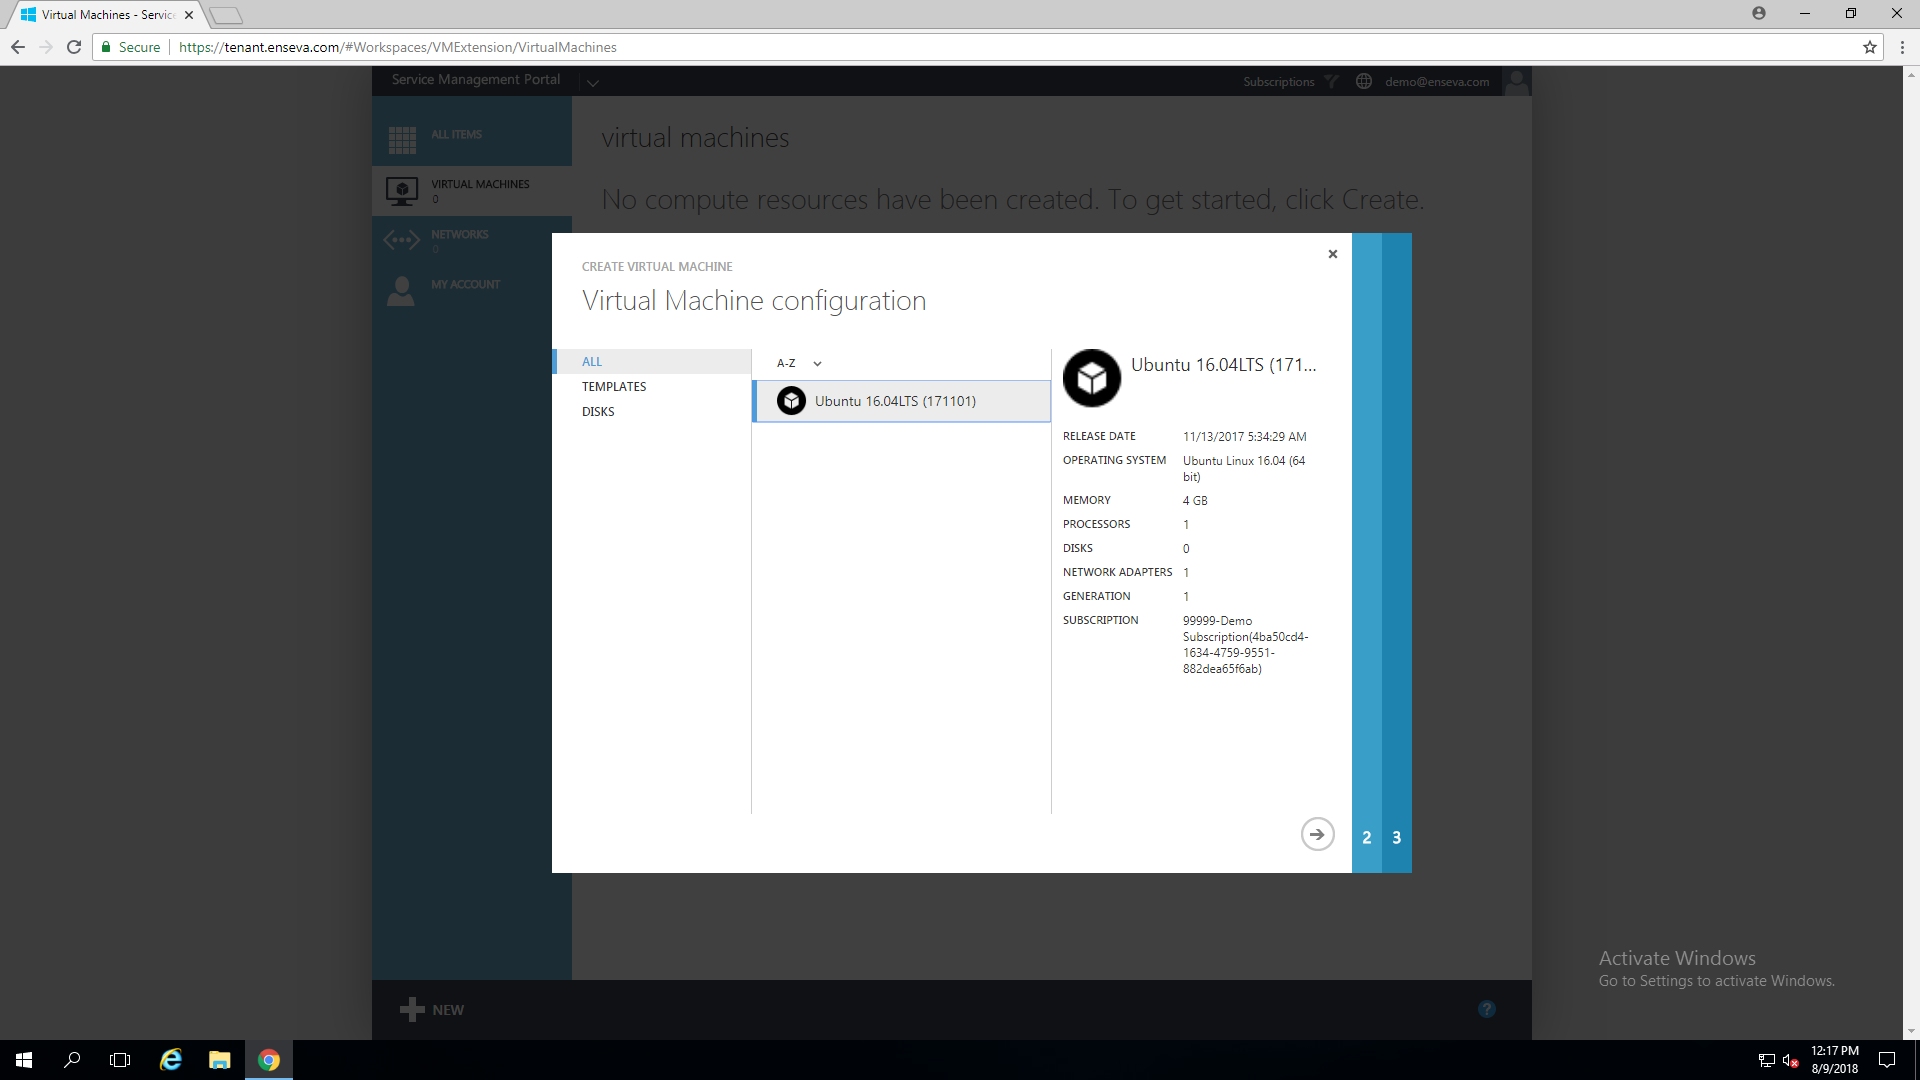
- Select a Template
From the Virtual Machine configuration page, select a template to create your virtual machine instance from, then select the next arrow in the bottom right corner of the page. For the purpose of this tutorial, we'll be creating a new Ubuntu instance.
In the pane further to the right, an overview of the template will be presented. Please note that new virtual machine instances will be created with an SP1 hardware profile (1 vCPU Core with 4GB of Memory) however the hardware profile may be altered after instance creation to adjust CPU, Memory and Disk sizes to a accommodate your needs.
- Specify VM Name and Credentials
You will now be provided an opportunity to provide your instance with a friendly name and a desired login password.
Enseva Azure utilizes Microsoft’s AVMA activation process which permits Windows virtual machine instances to activate with the Hypervisor.
A product key does not need to be entered for this process to take place.
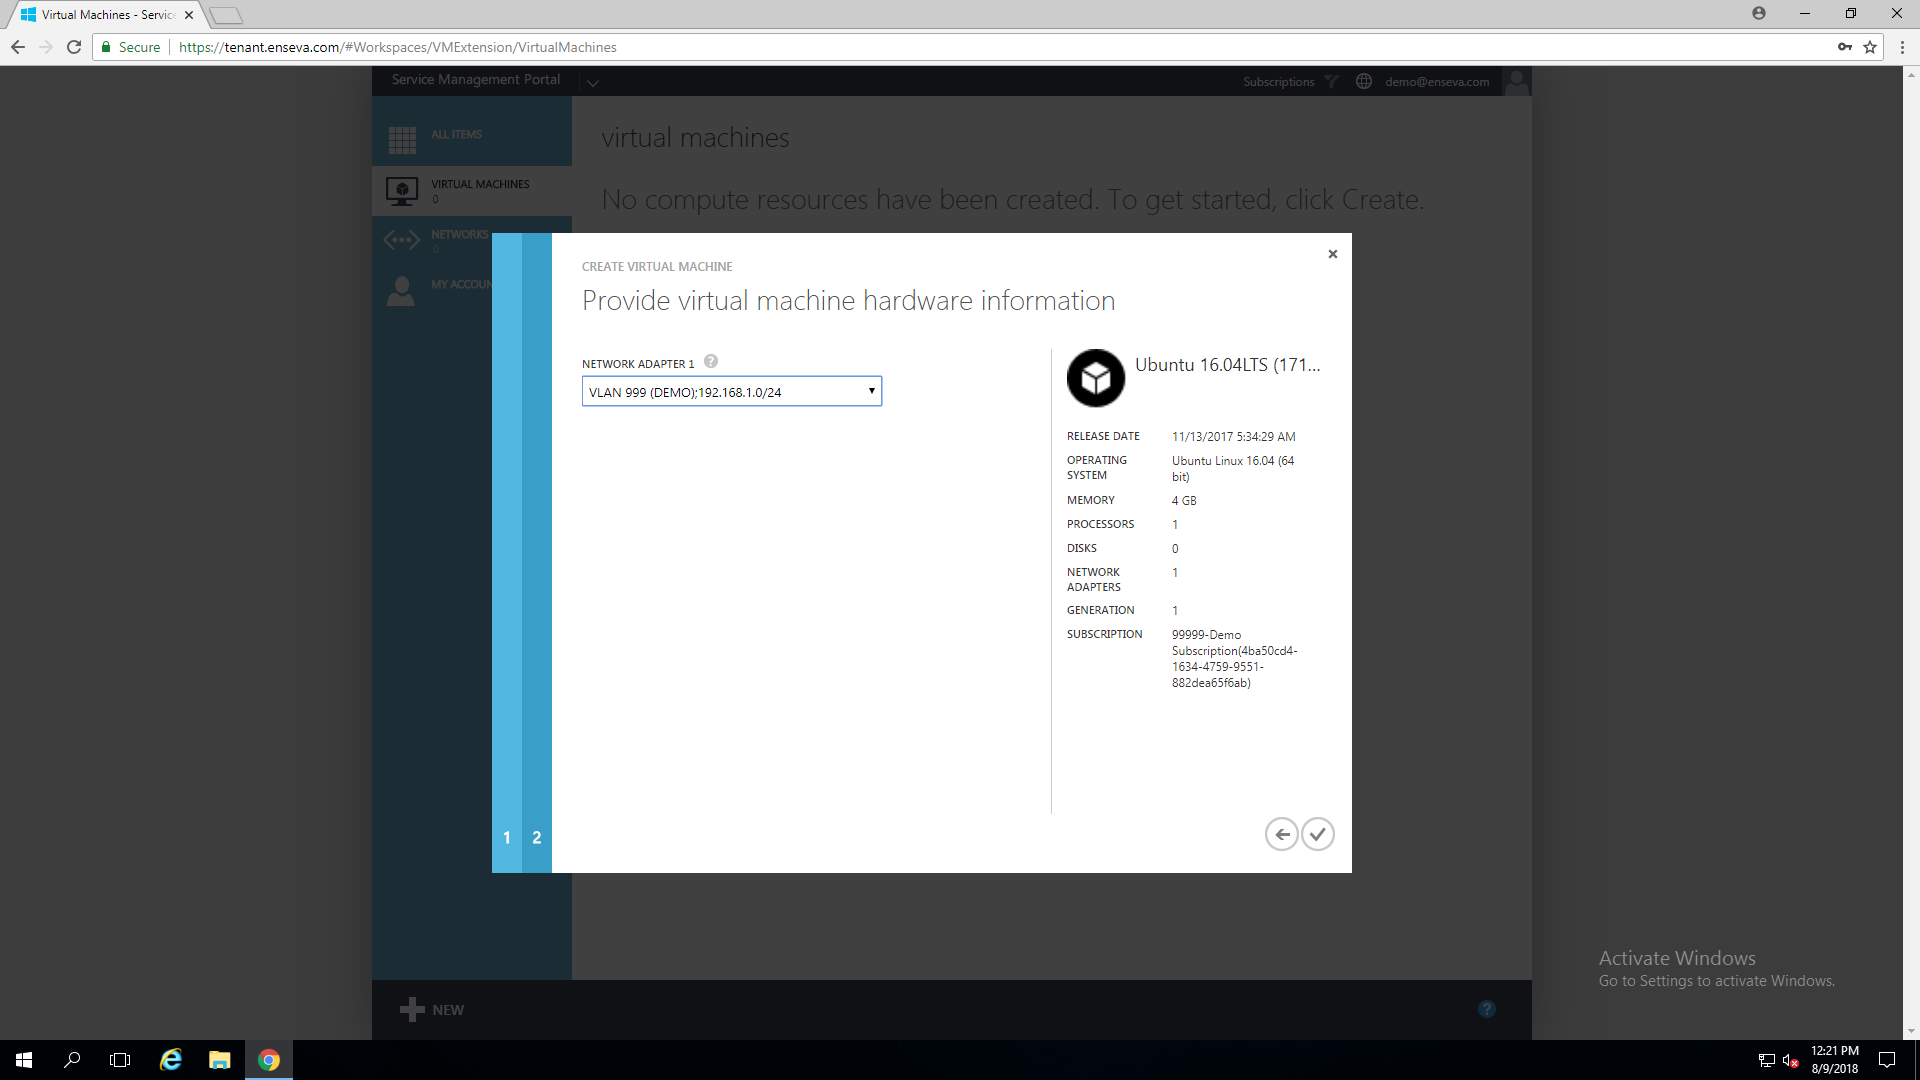
- Select a Virtual Network Adapter
In the final wizard step you are able to leave the virtual network adapter disconnected or select the network you would like the new instance to be attached to. If you choose not to attach the instance to a network now, you may attach the instance to network(s) after the creation process is completed. Click the Check button to start the instance creation process.
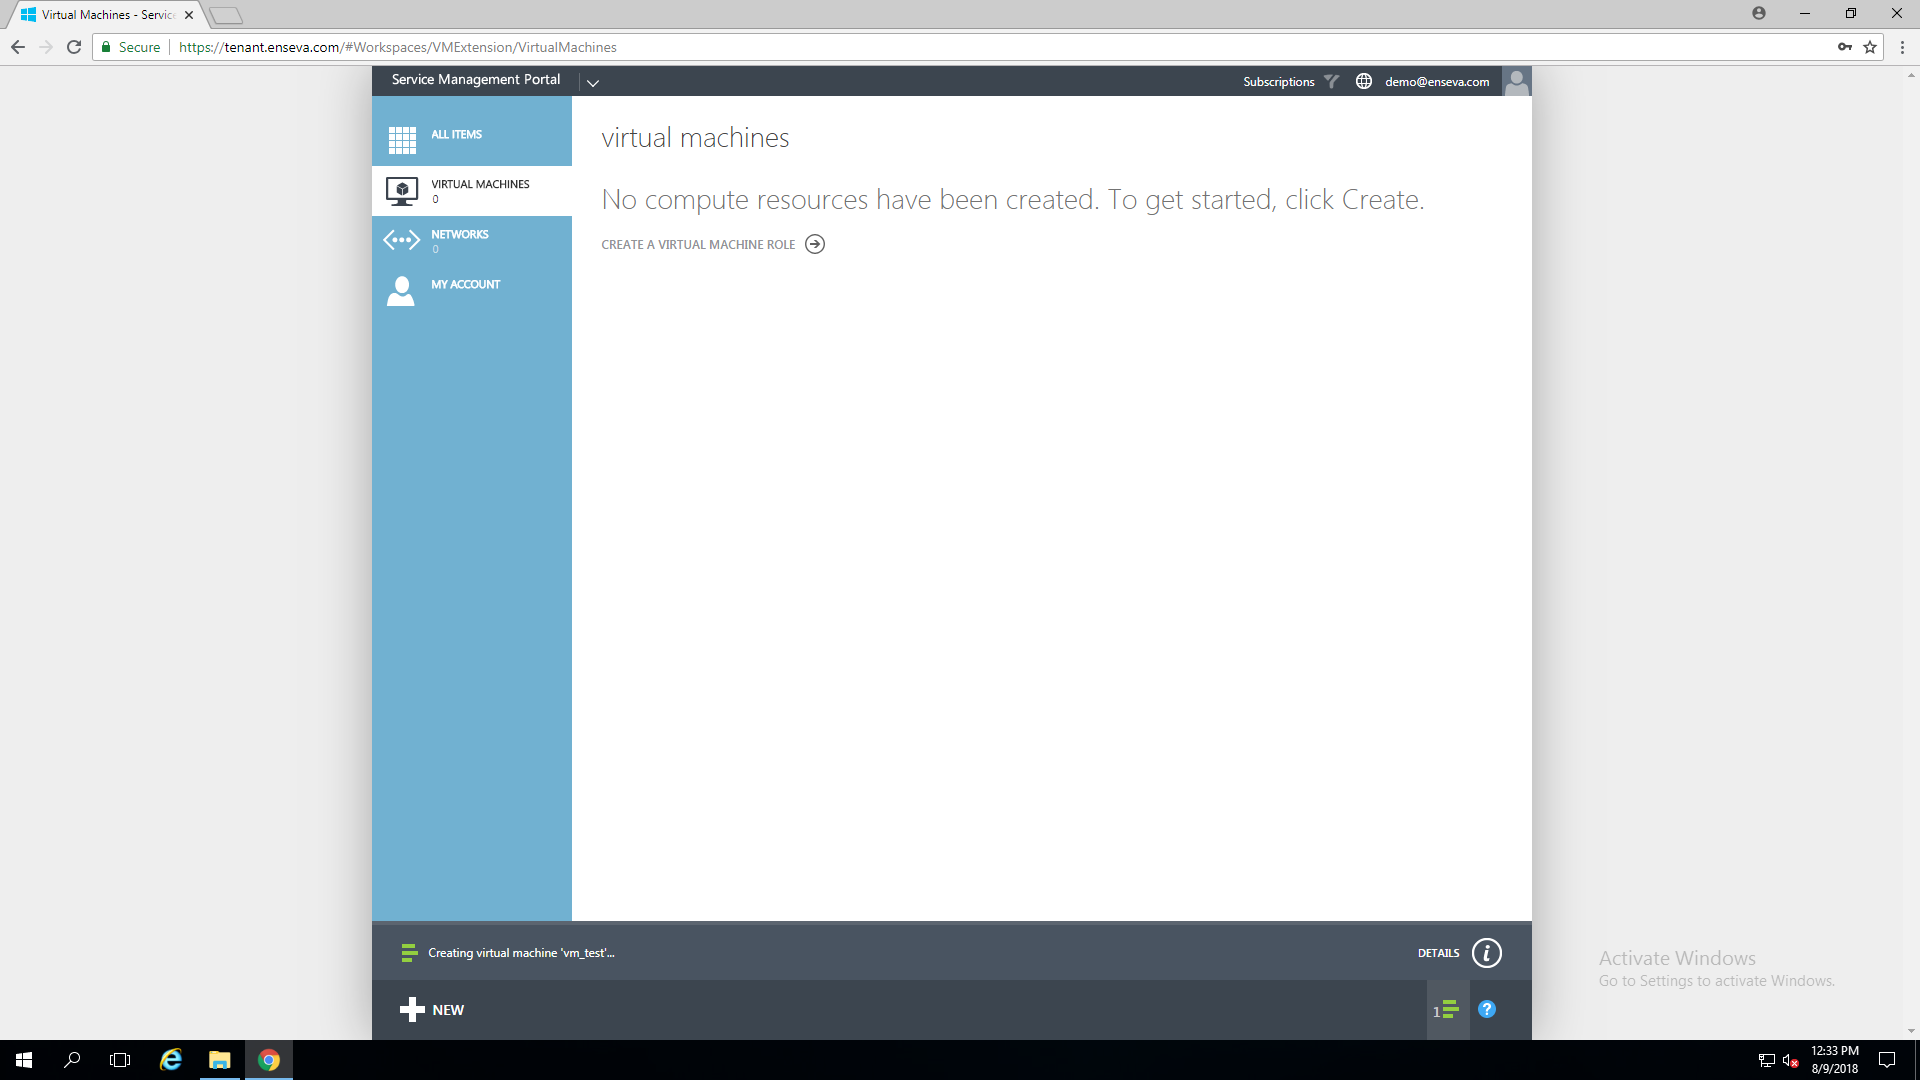
- Wait for Creation
You will notice a progress bar indicating the status of your virtual machines provisioning. Please note that this may take a few moments. You will also notice the status column that indicates 'creating.'
An instance of the template must first be copied to your subscription. The virtual machine will then be powered on so the password you specified in the instance creation wizard can be injected into the operating system allowing you to login for the first time with the desired credentials.
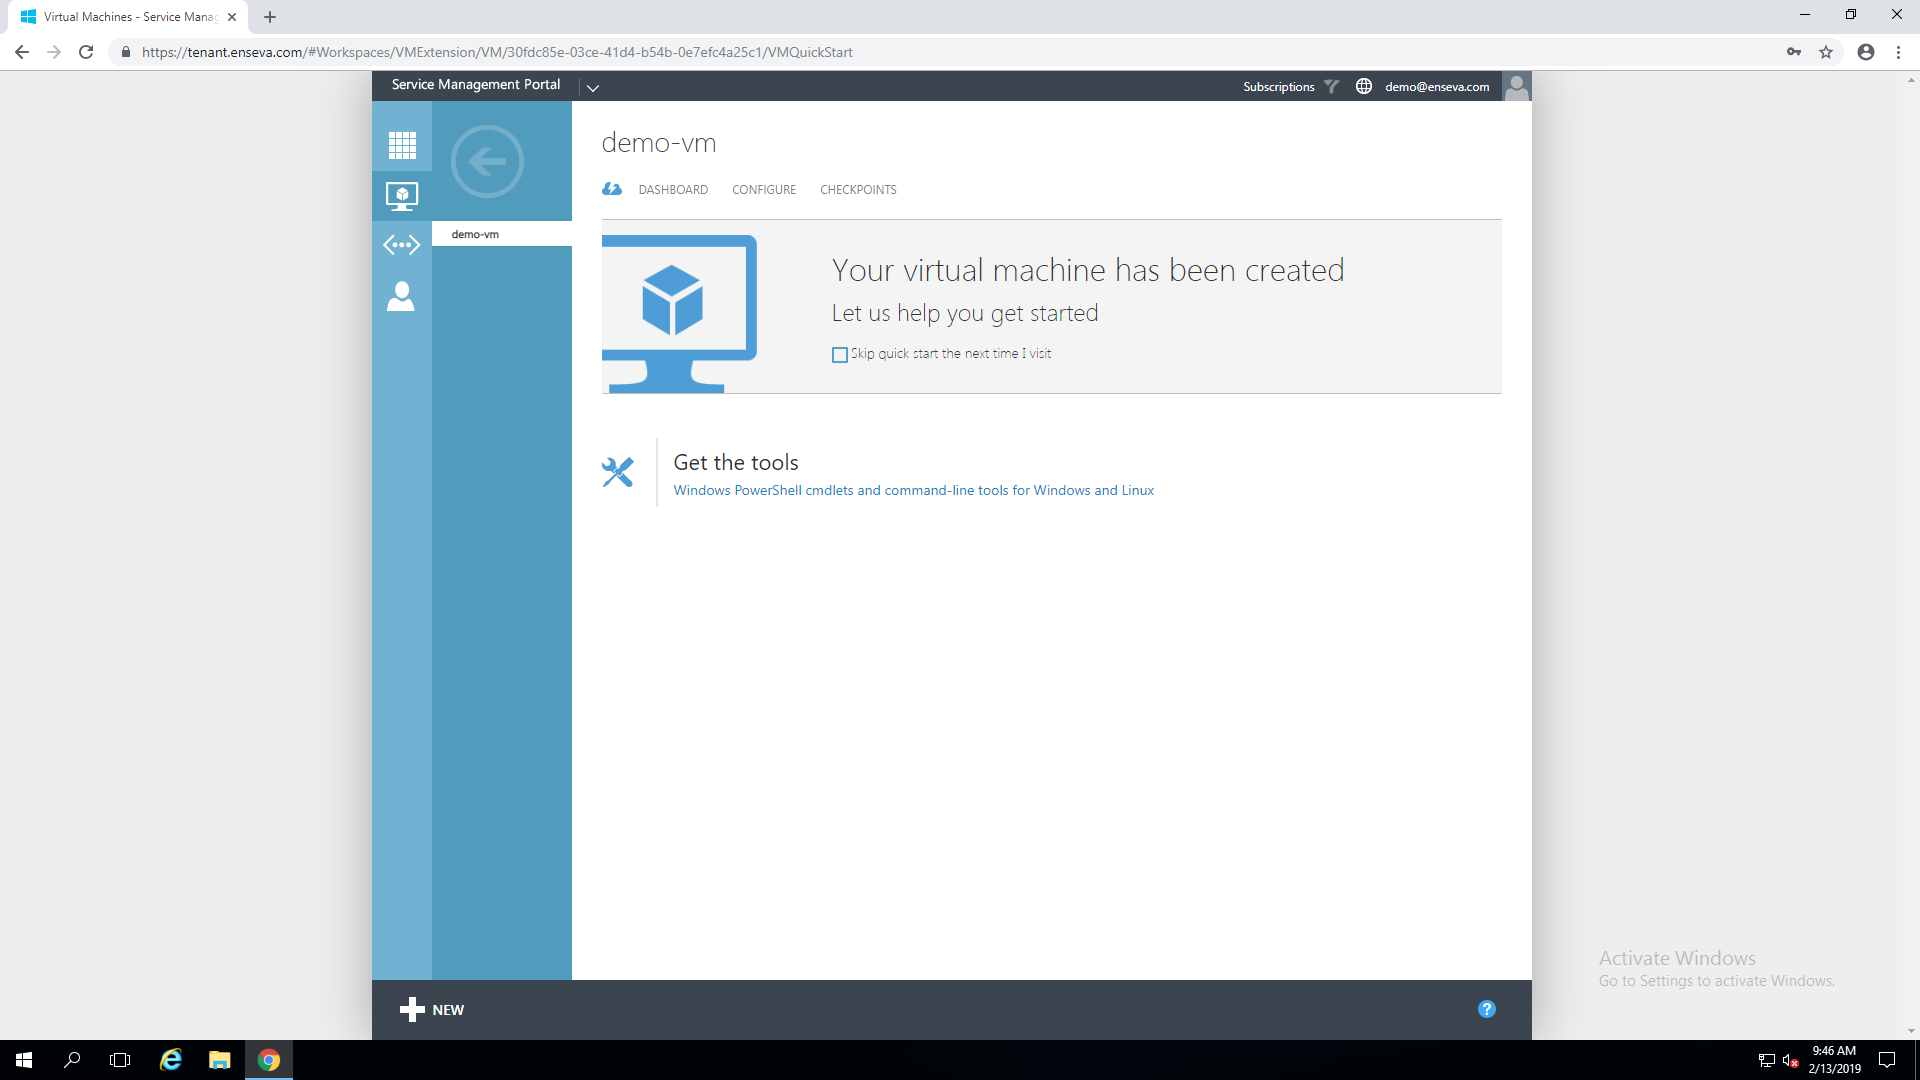
- Confirm Creation
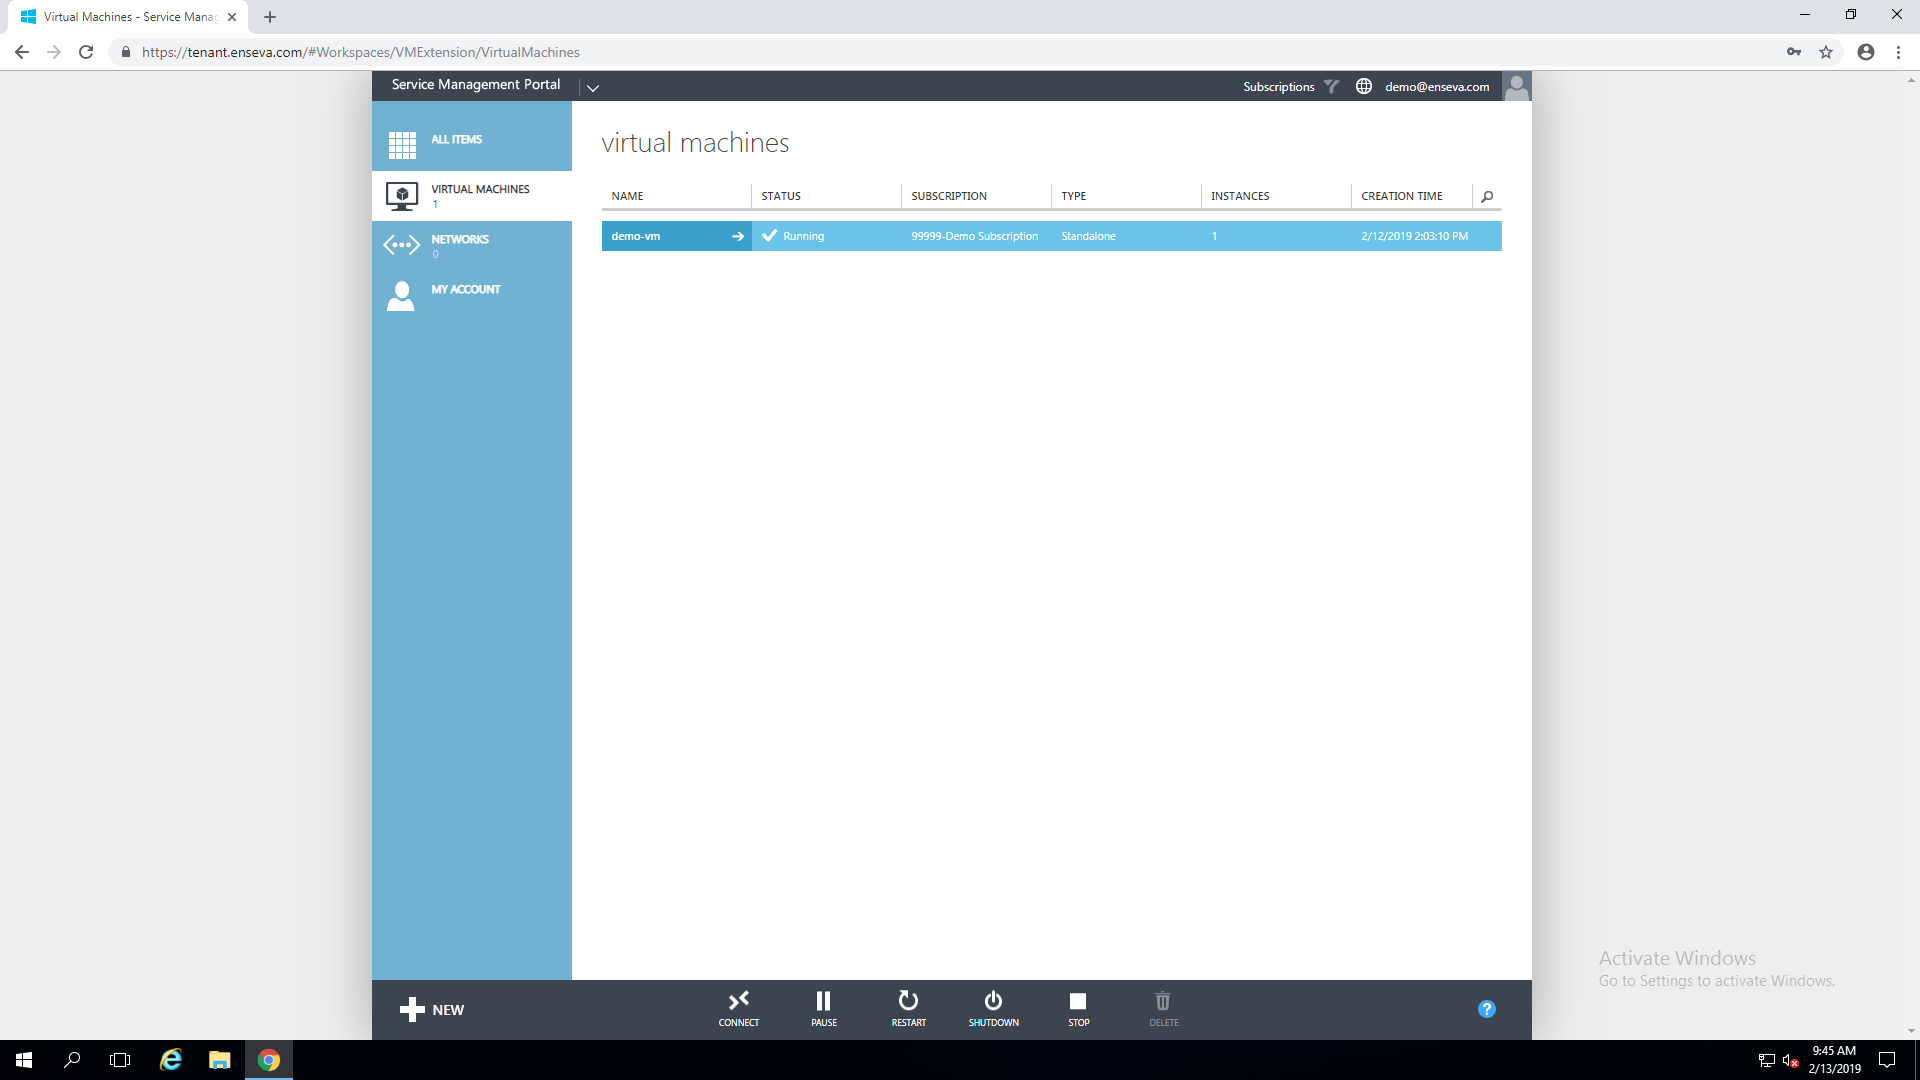
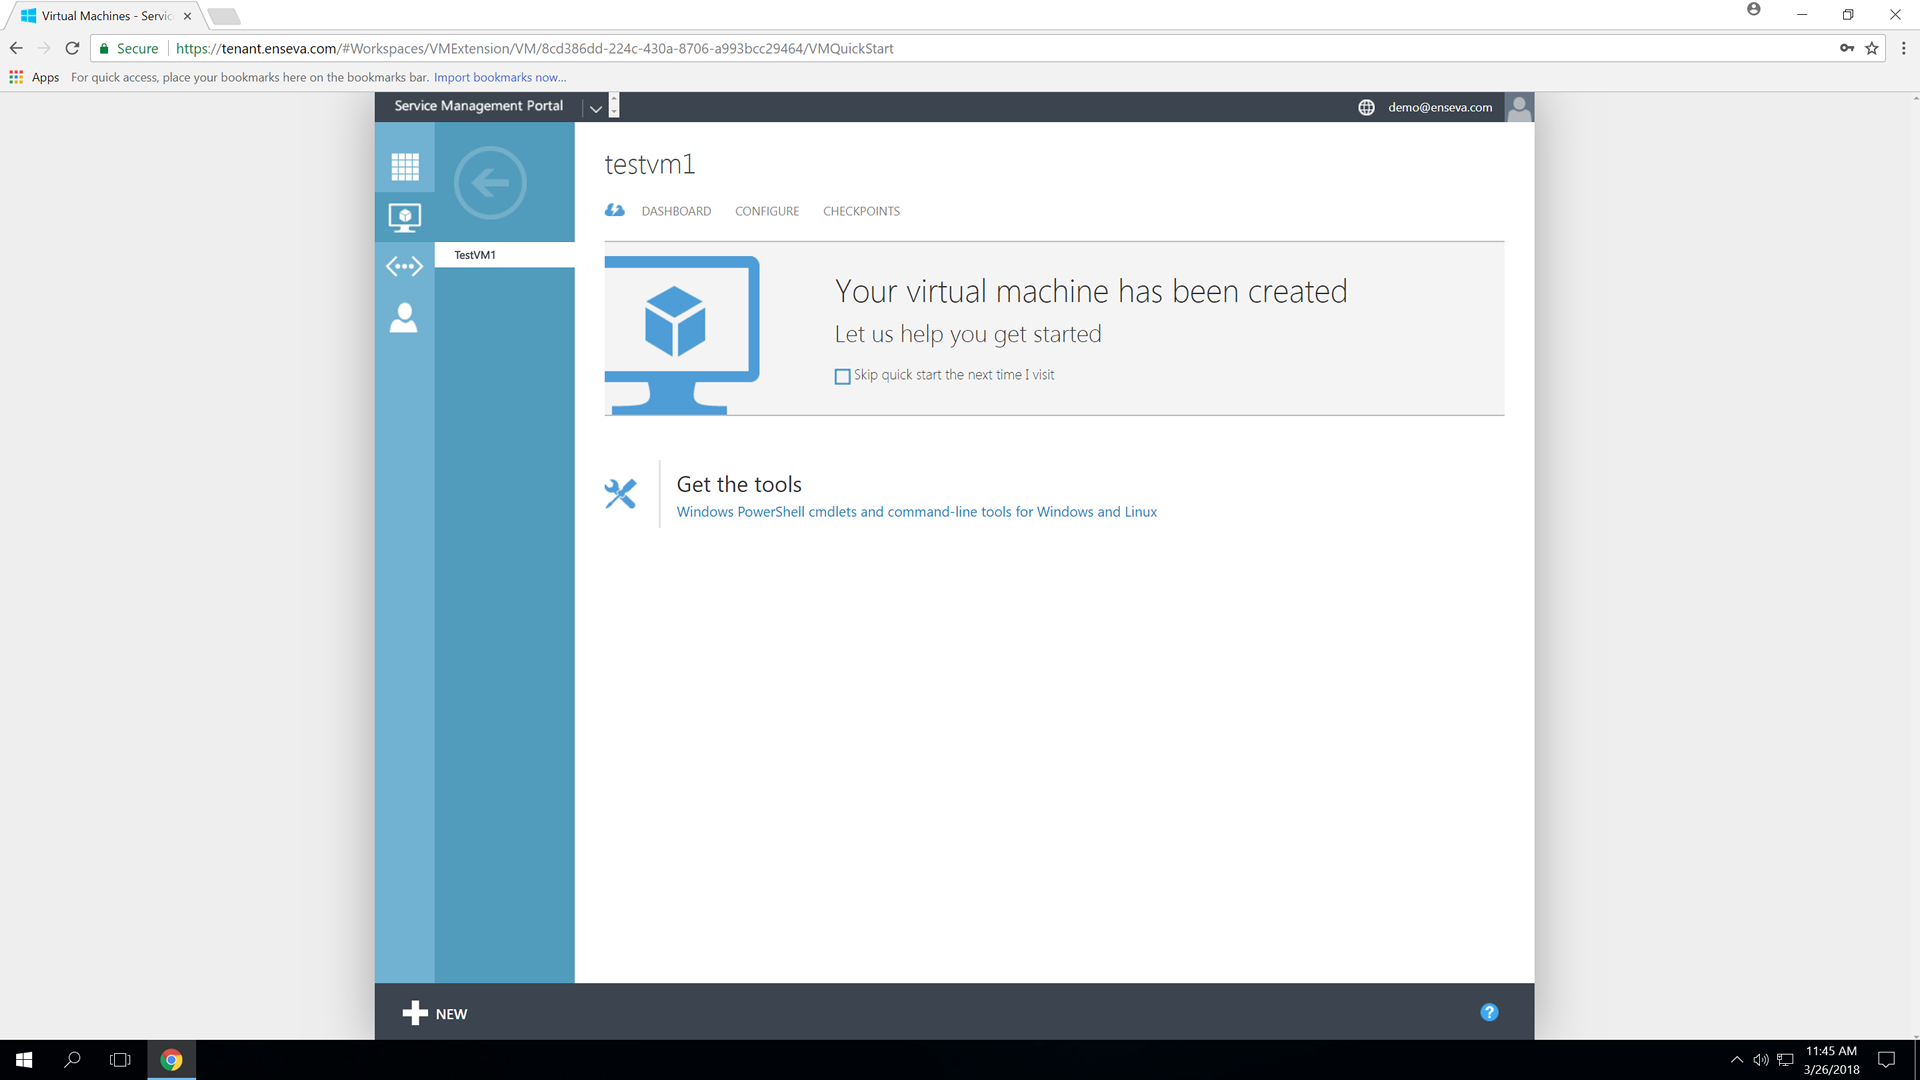
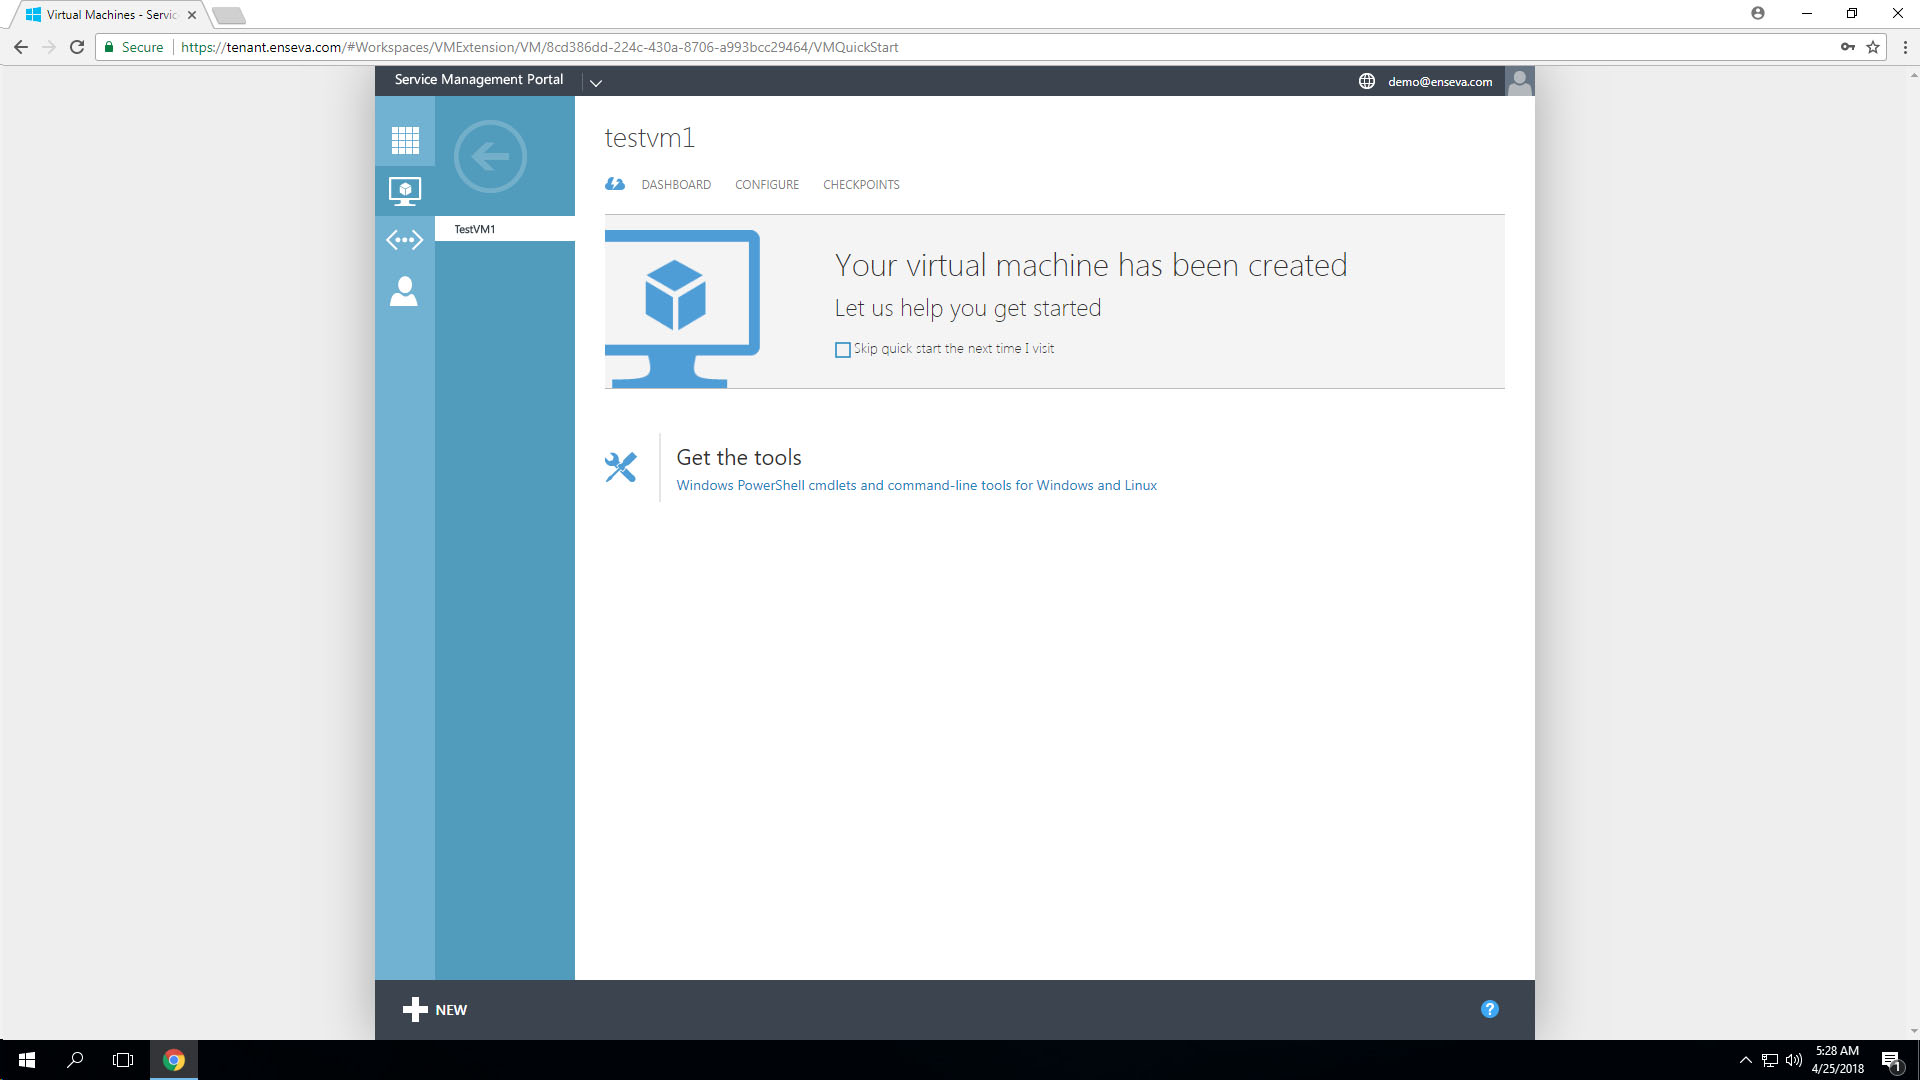
Once your virtual machine has been created, you will notice the status change from 'Creating' to 'Running.'
At this point you are able to pause, restart, shutdown, stop, delete, or connect to your virtual machine instance.
You are now able to manipulate configurations such as networks, hardware profiles, etc.. Please reference related tutorials for more detailed instructions on these actions.


Deleting a Virtual Machine Instance
This guide will cover Deleting a Virtual Machine Instance within Enseva Azure
Deleting a Virtual Machine Instance
- Navigate to the Tenant Portal
Enseva Azure allows cloud administrators to quickly delete Windows and Linux virtual machine instances. All that is required is an Enseva Azure account and a valid subscription
The tenant portal can be accessed from a web browser by visiting this URL: https://tenant.enseva.com
Enter your user credentials and click the 'Submit' button
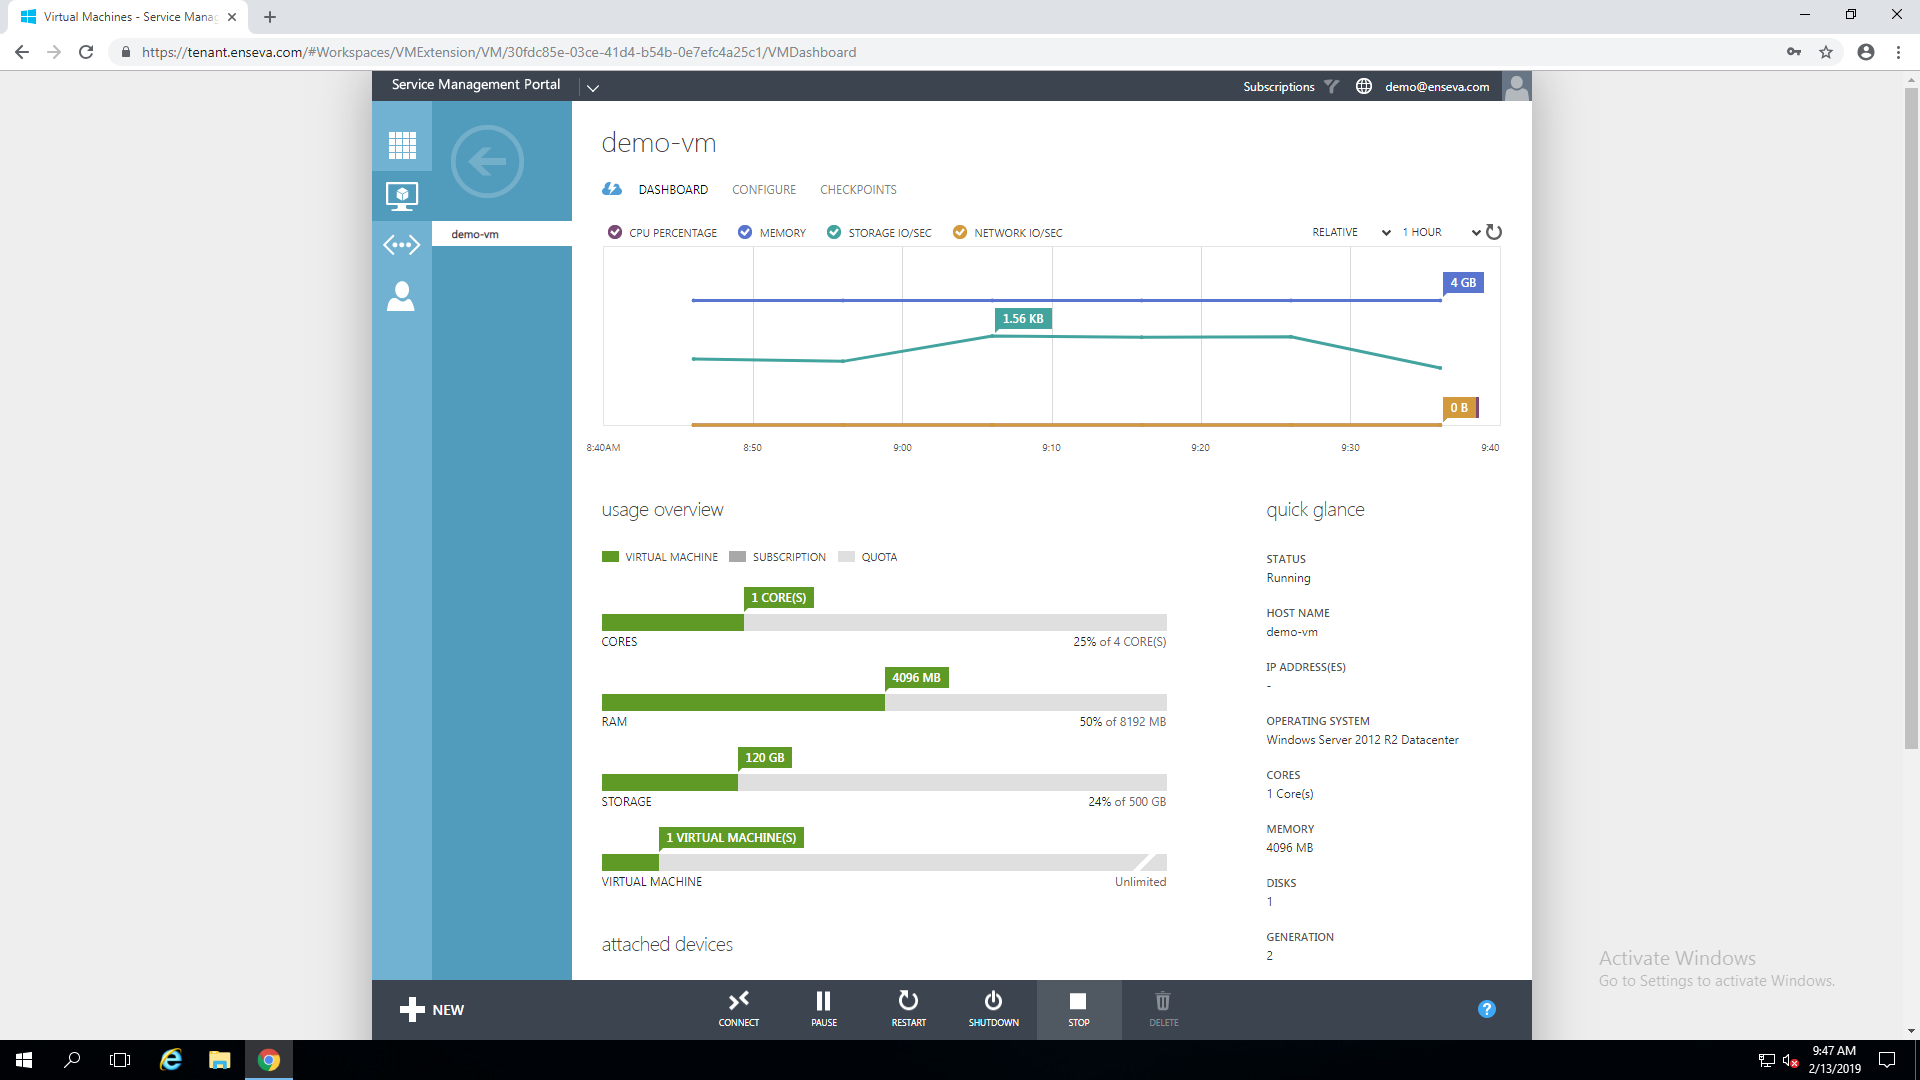
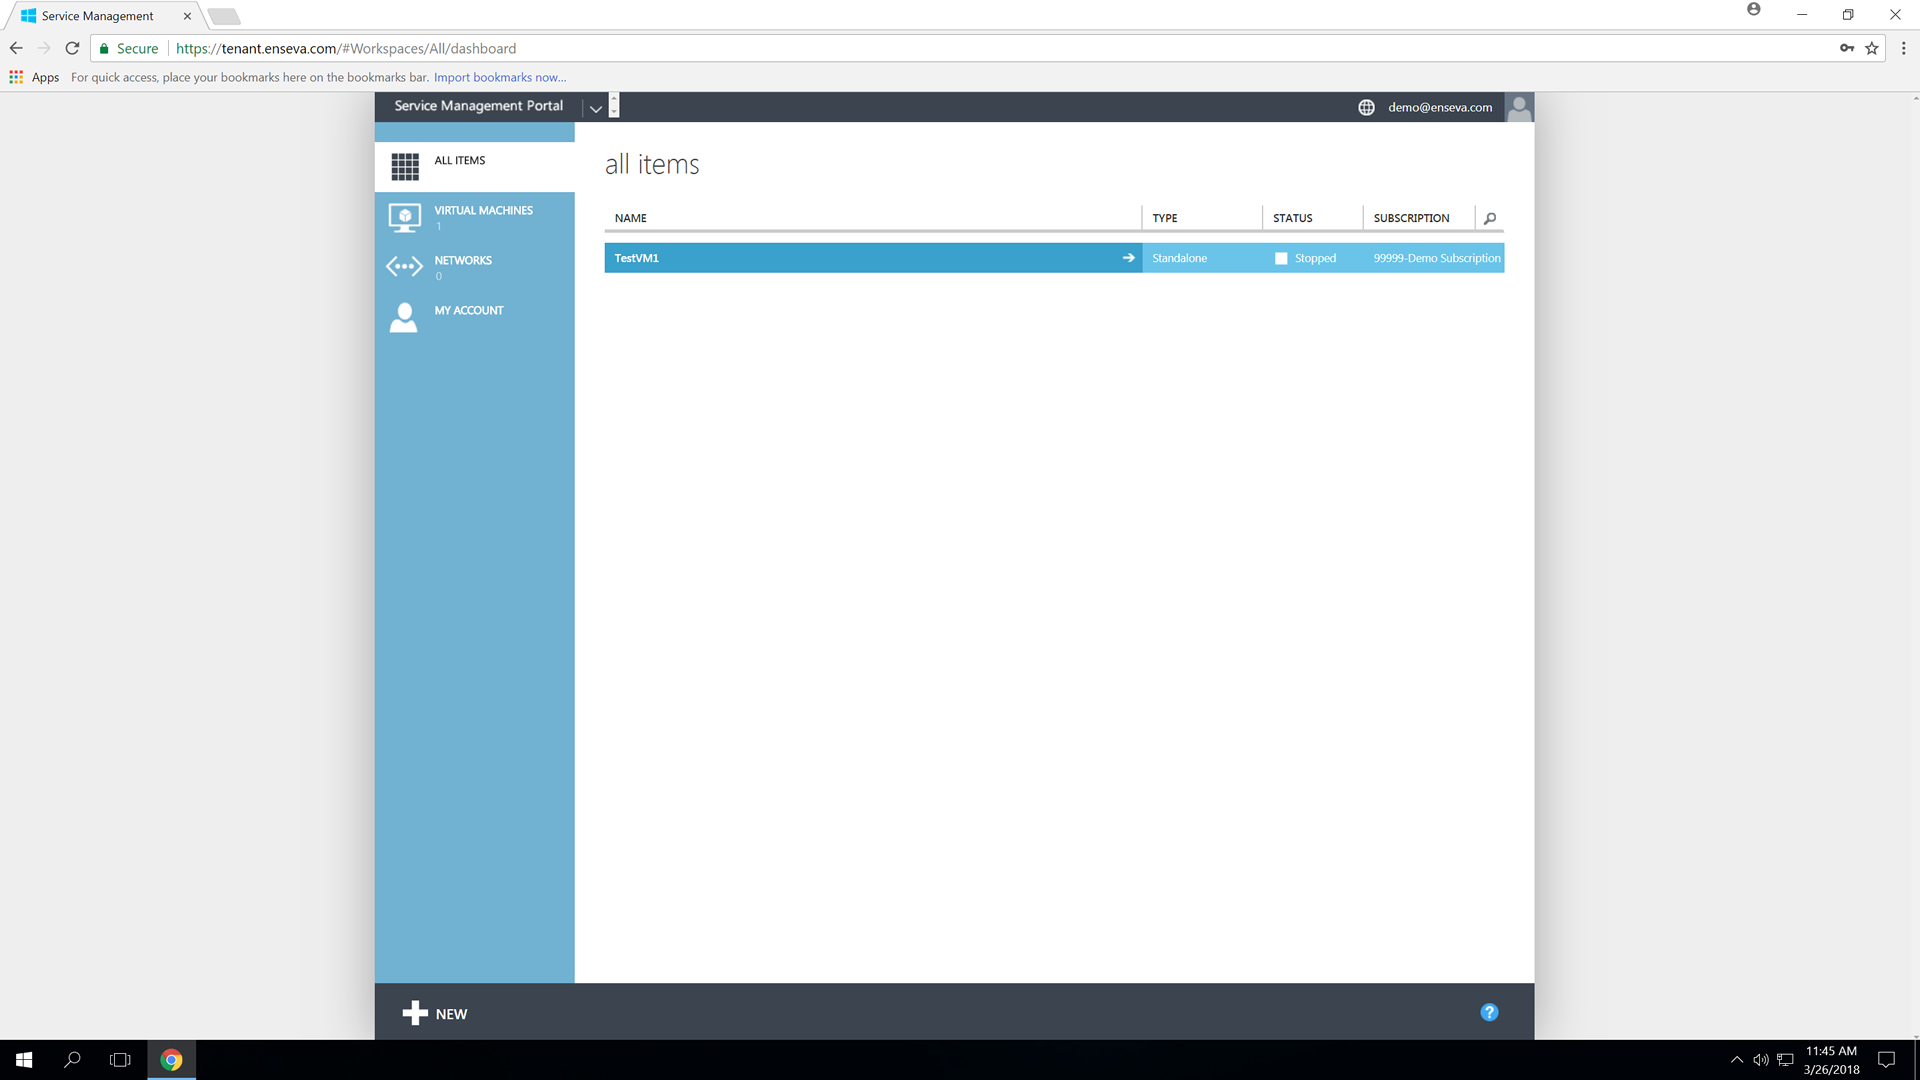
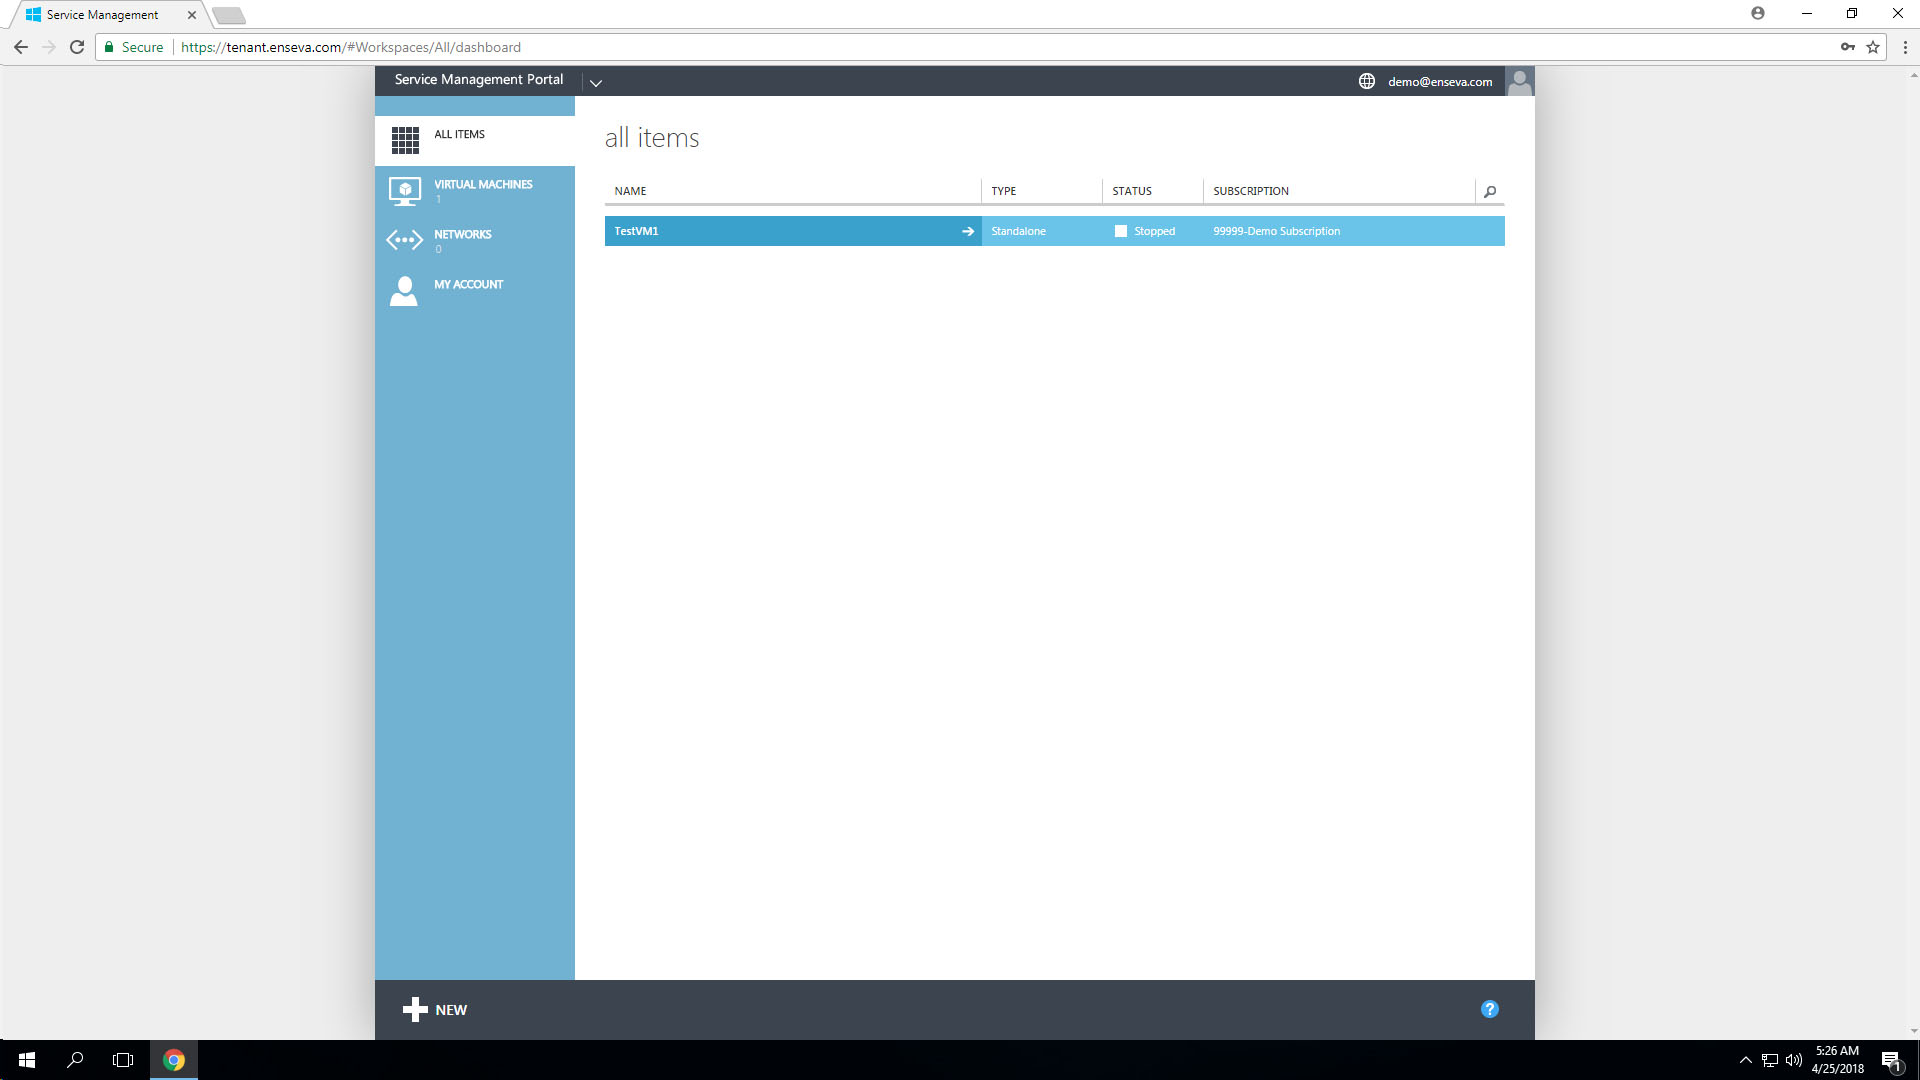
- Select a Virtual Machine
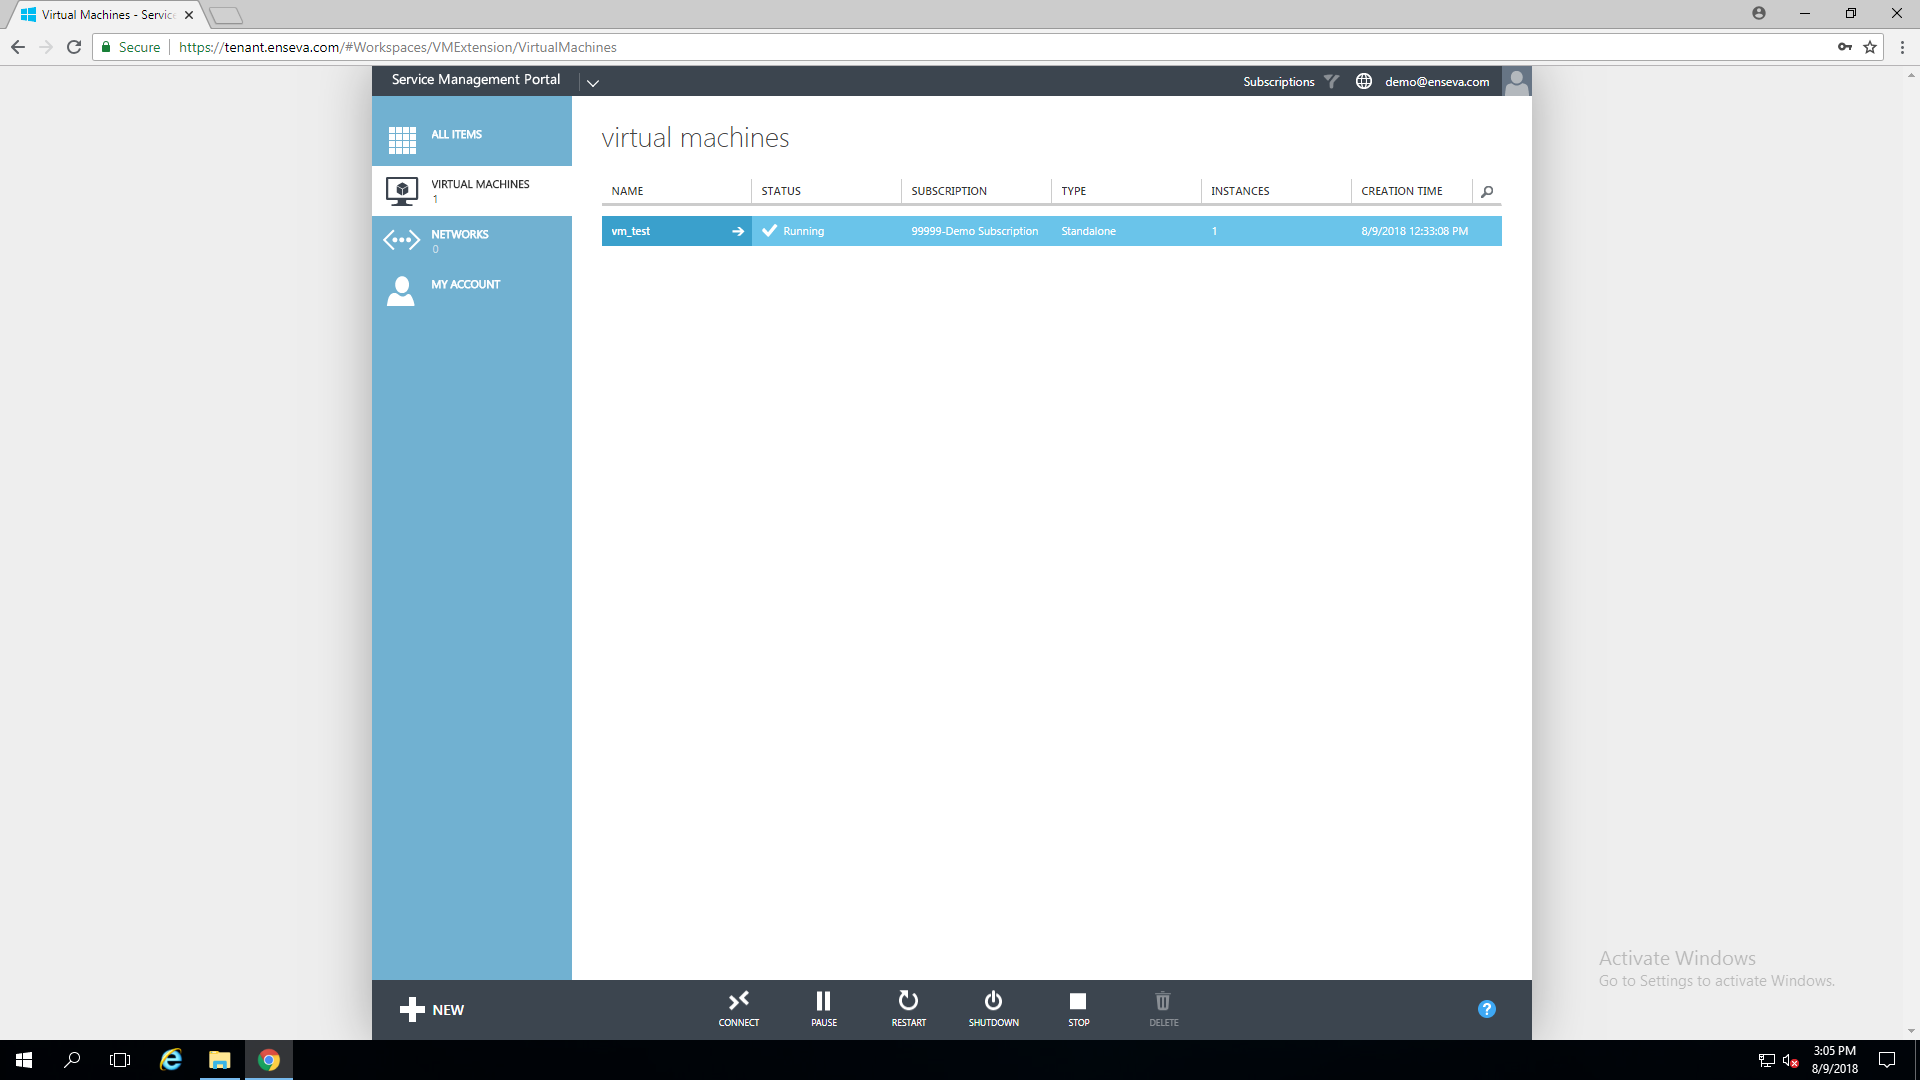
On the left hand side of the page, ensure that 'Virtual Machines' has been selected. You will see a list of virtual machines that are currently setup on your account
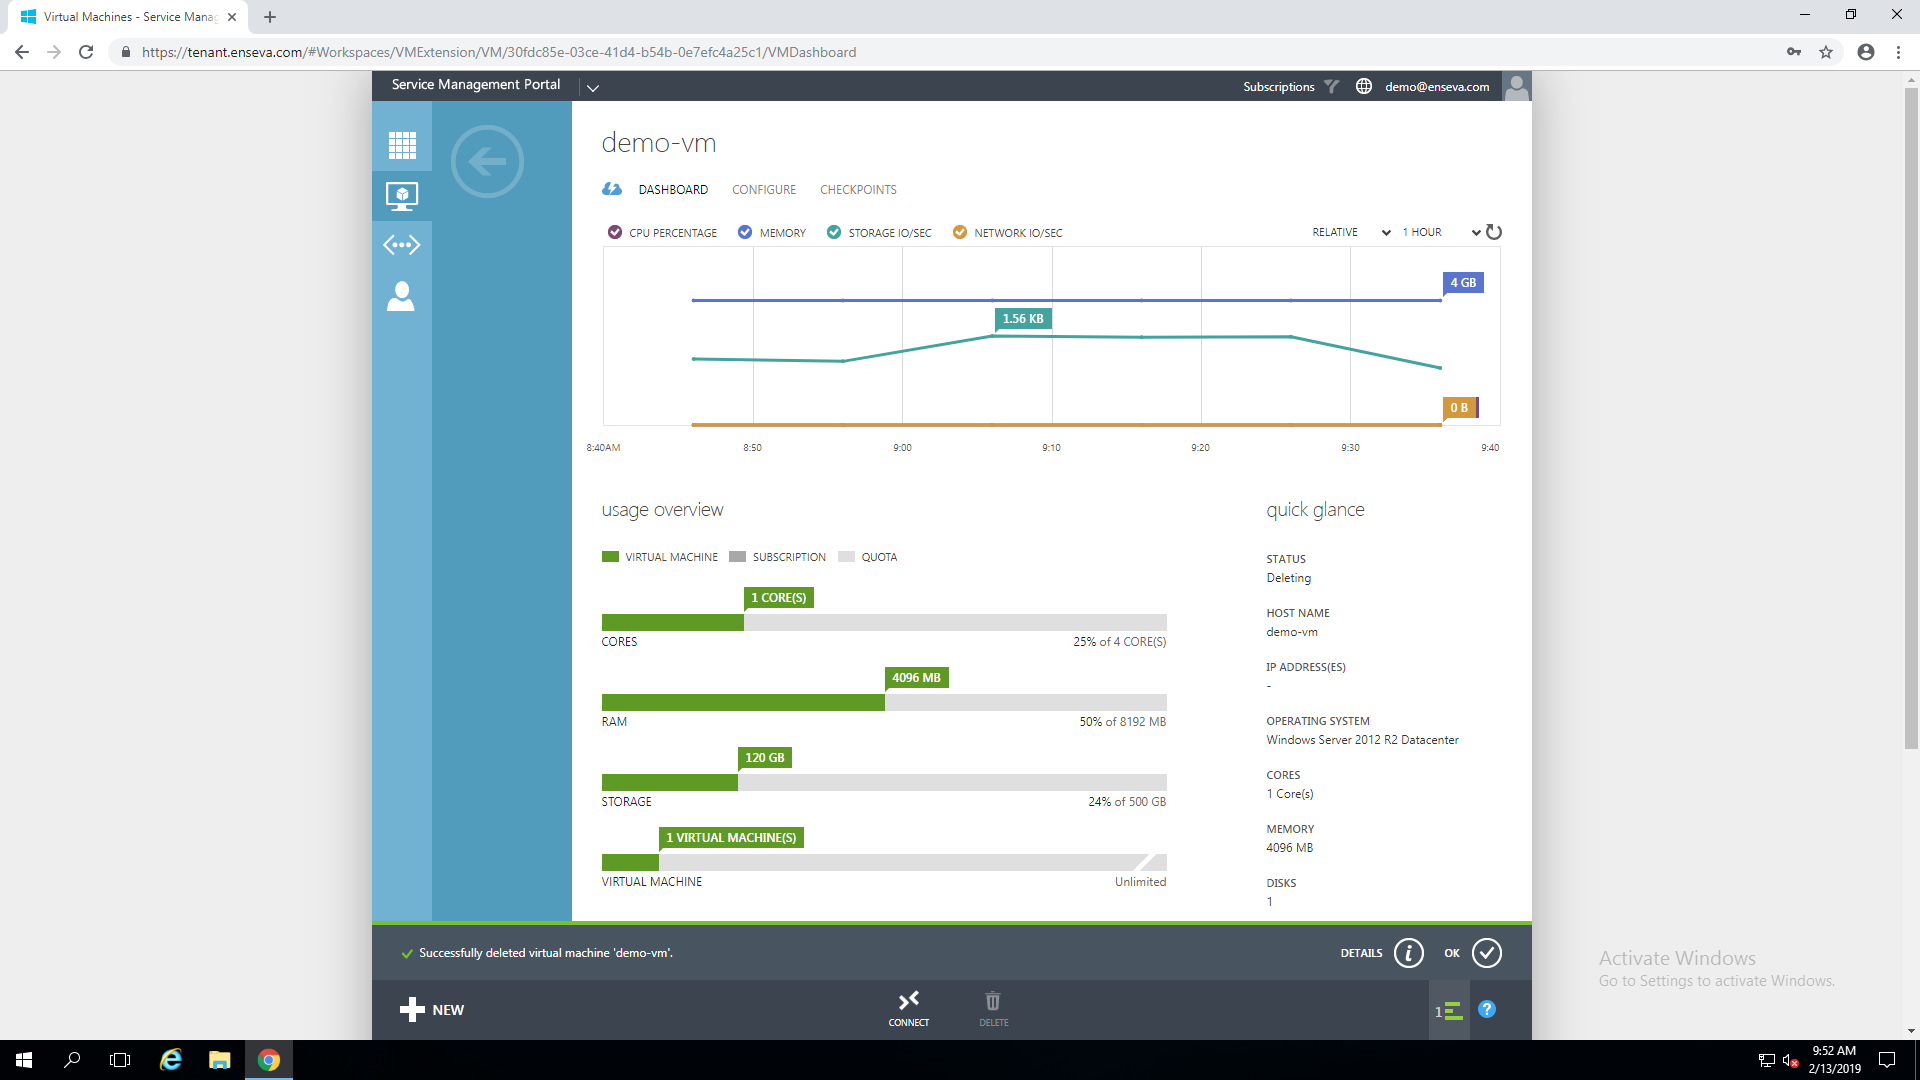
In this tutorial we will be deleting the 'demo-vm' virtual machine
Select the virtual machine you wish to delete, then select 'Dashboard'
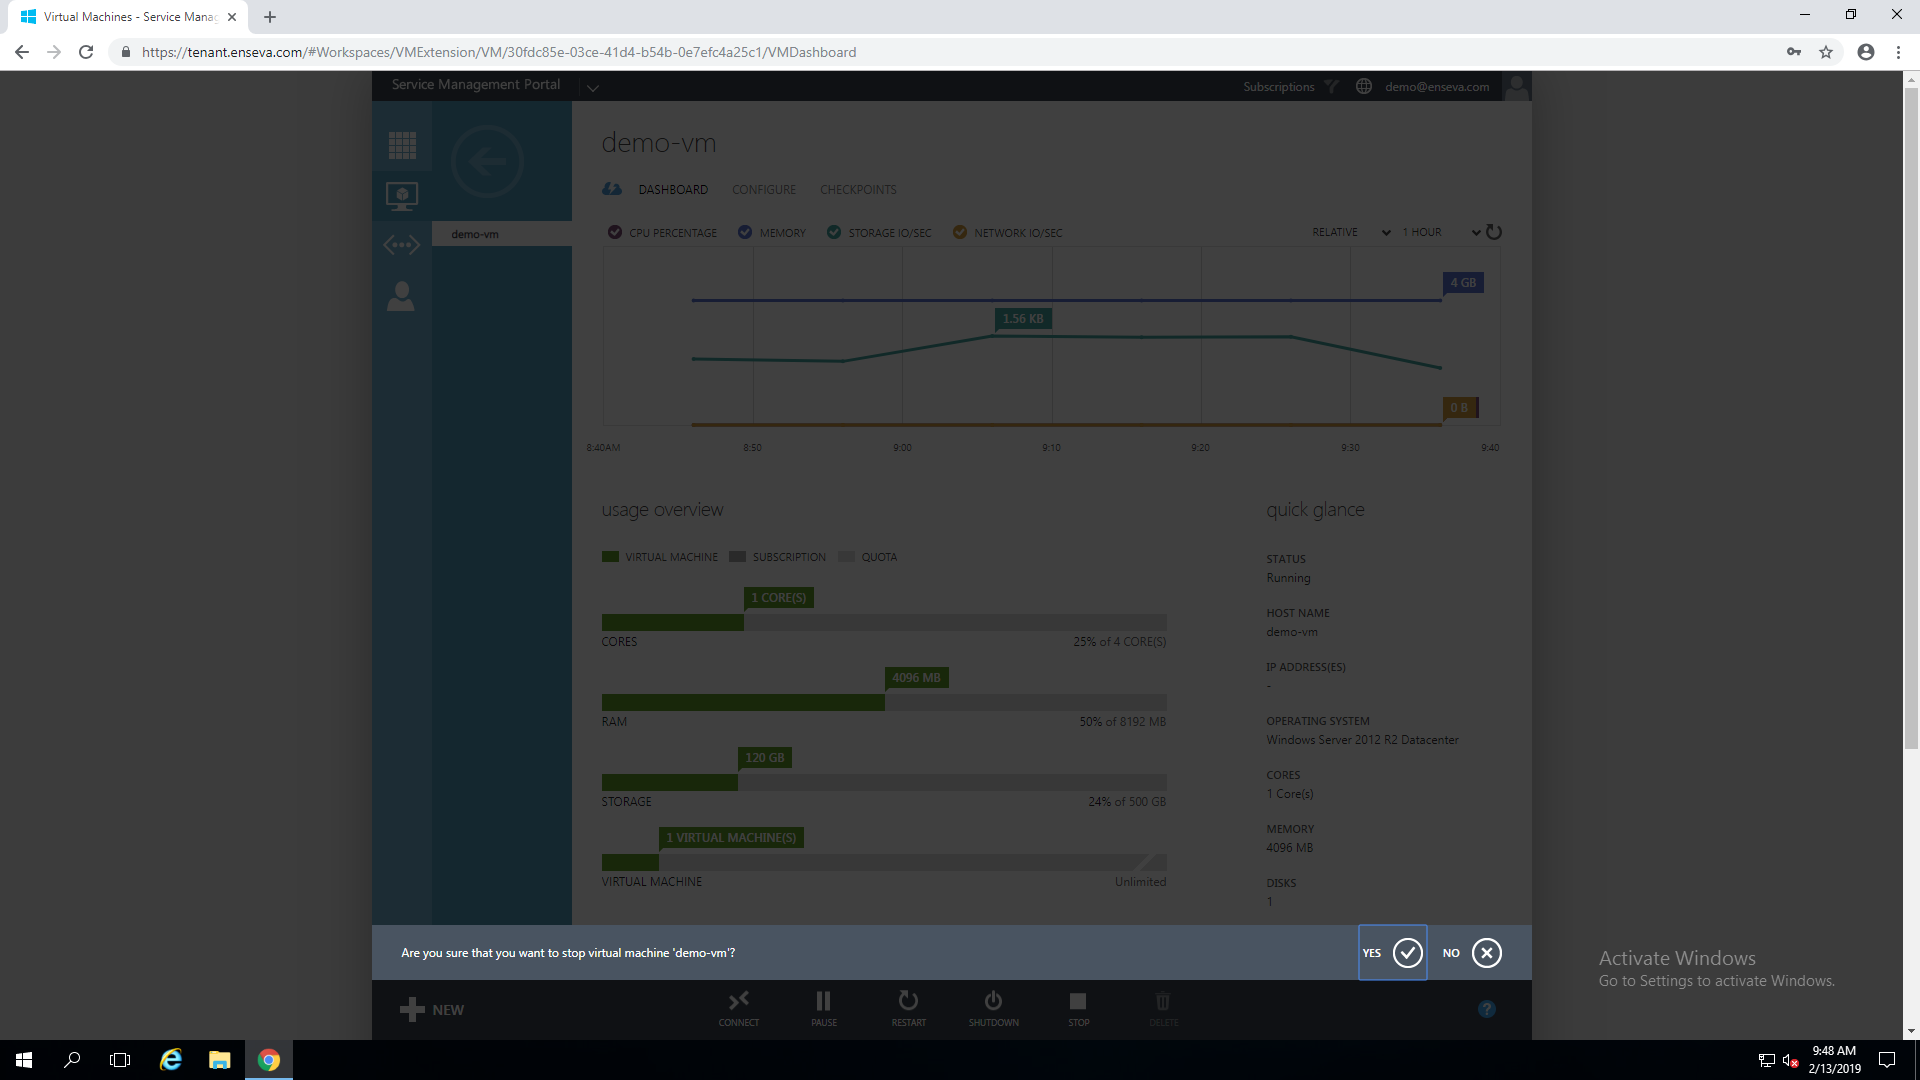
- Stop the Virtual Machine
Before a virtual machine can be deleted, it must be in a stopped state. To stop the virtual machine, click the 'Stop' button at the bottom of the page

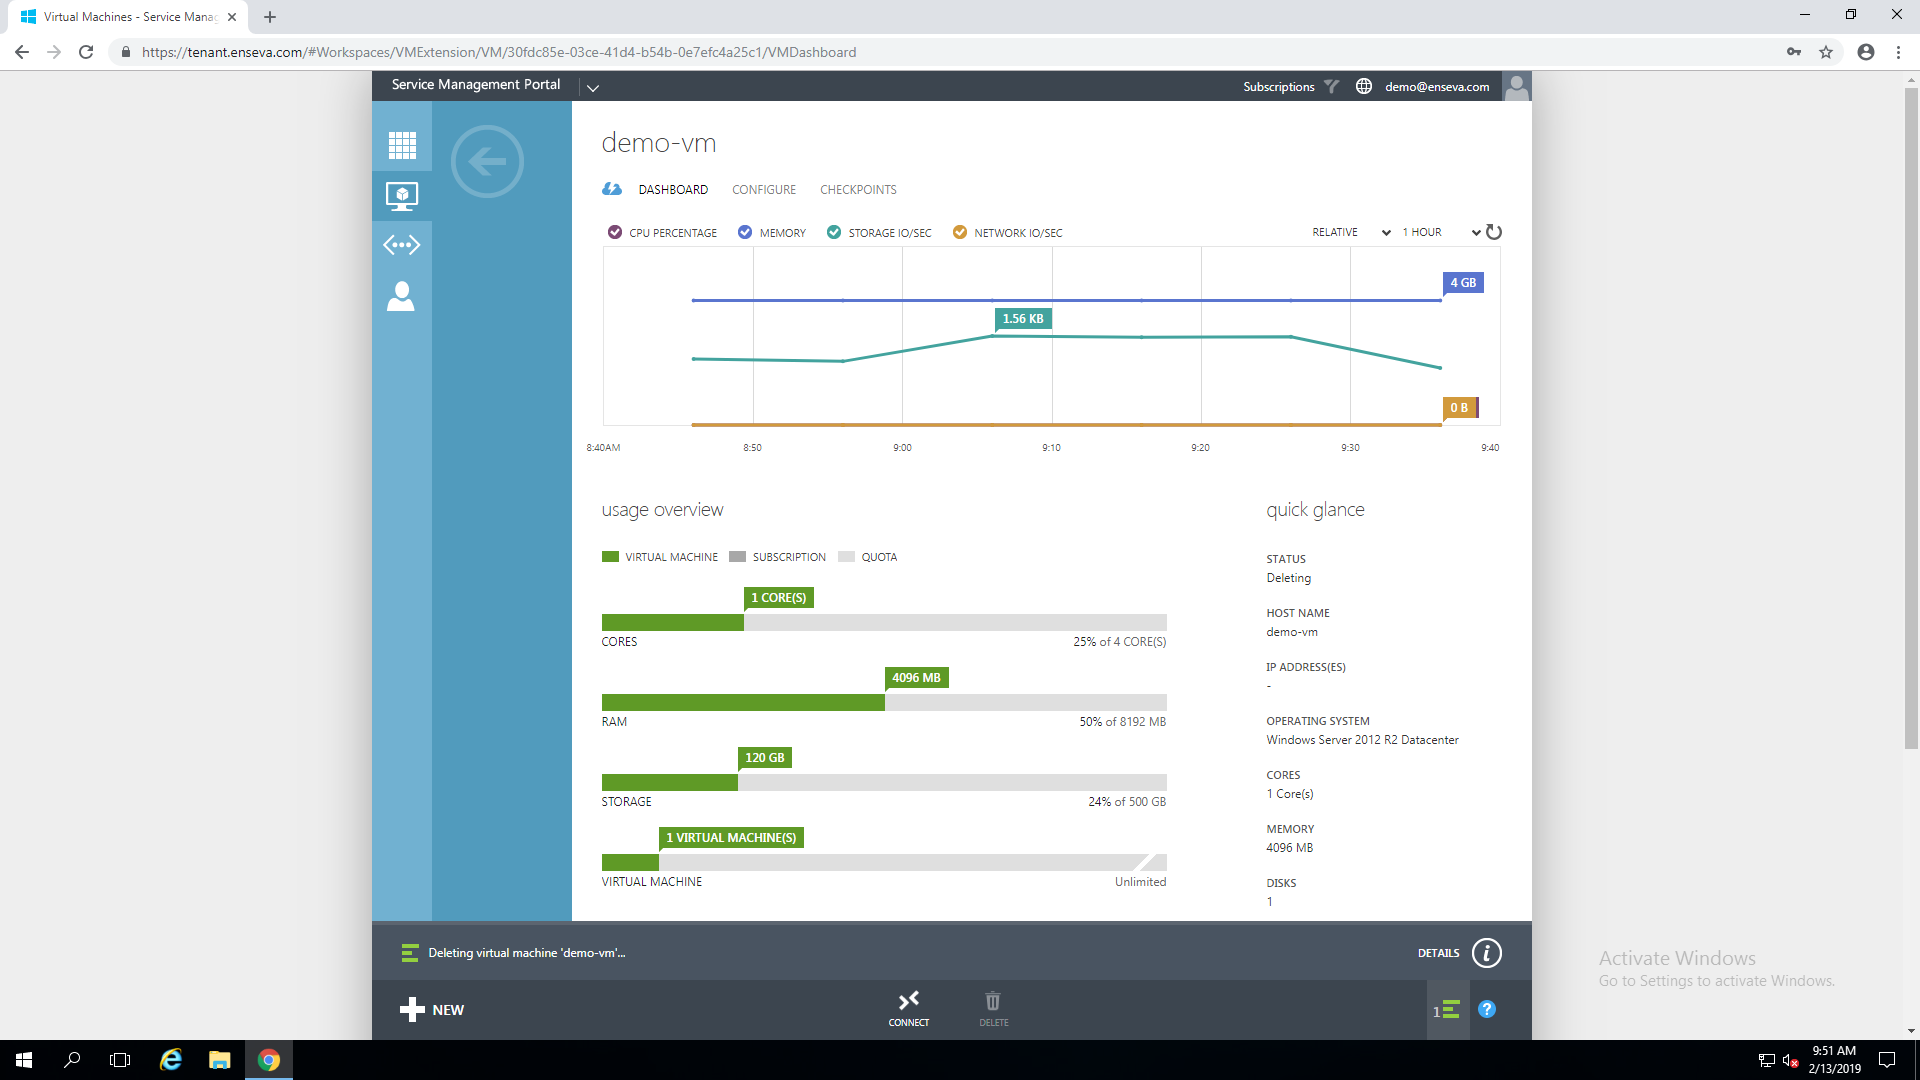
- Delete the Virtual Machine
Once the virtual machine has been stopped, it can now be deleted. To do so, click the 'Delete' button at the bottom of the page


- Confirm Removal
Return to your virtual machine list to confirm removal


Changing an Instances Hardware Profile
Hardware profiles allow administrators to configure the number of vCPU Cores and GB of memory allocated to a virtual machine instance. All virtual machine instances have 120GB block storage devices by default and the virtual disks may be managed independently of the hardware profile that is assigned to a virtual machine instance.
For the purposes of this tutorial, it is assumed that you have already logged into the Enseva Azure portal and are the owner of one or more subscriptions.
Changing an Instance Hardware Profile
-
To change the hardware profile that is assigned to a virtual machine instance, the instance must be first placed in an offline state. Visit related tutorials for details on how to place a virtual machine instance in a stopped state.
With the virtual machine instance already in a stopped state, select the item in the All Items or Virtual Machine menu. This will present an instance welcome message for the instance that was selected.

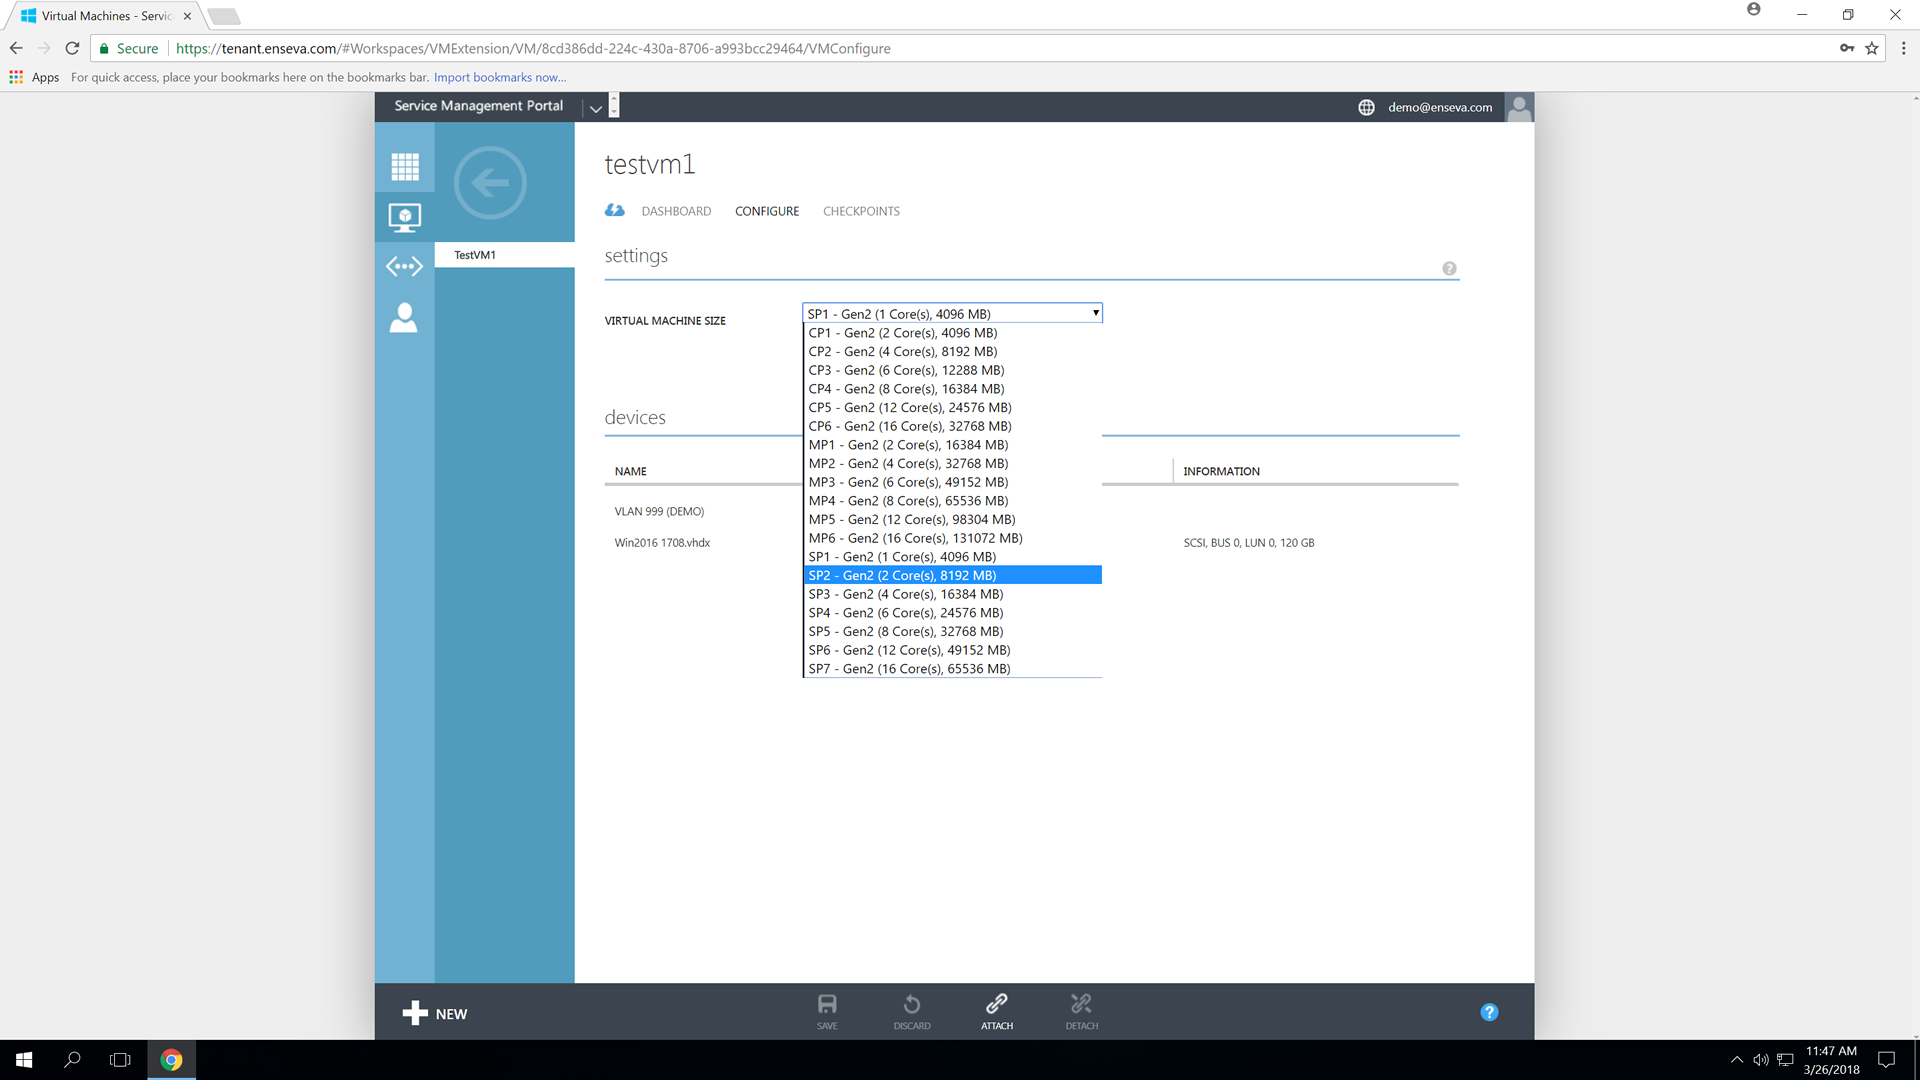
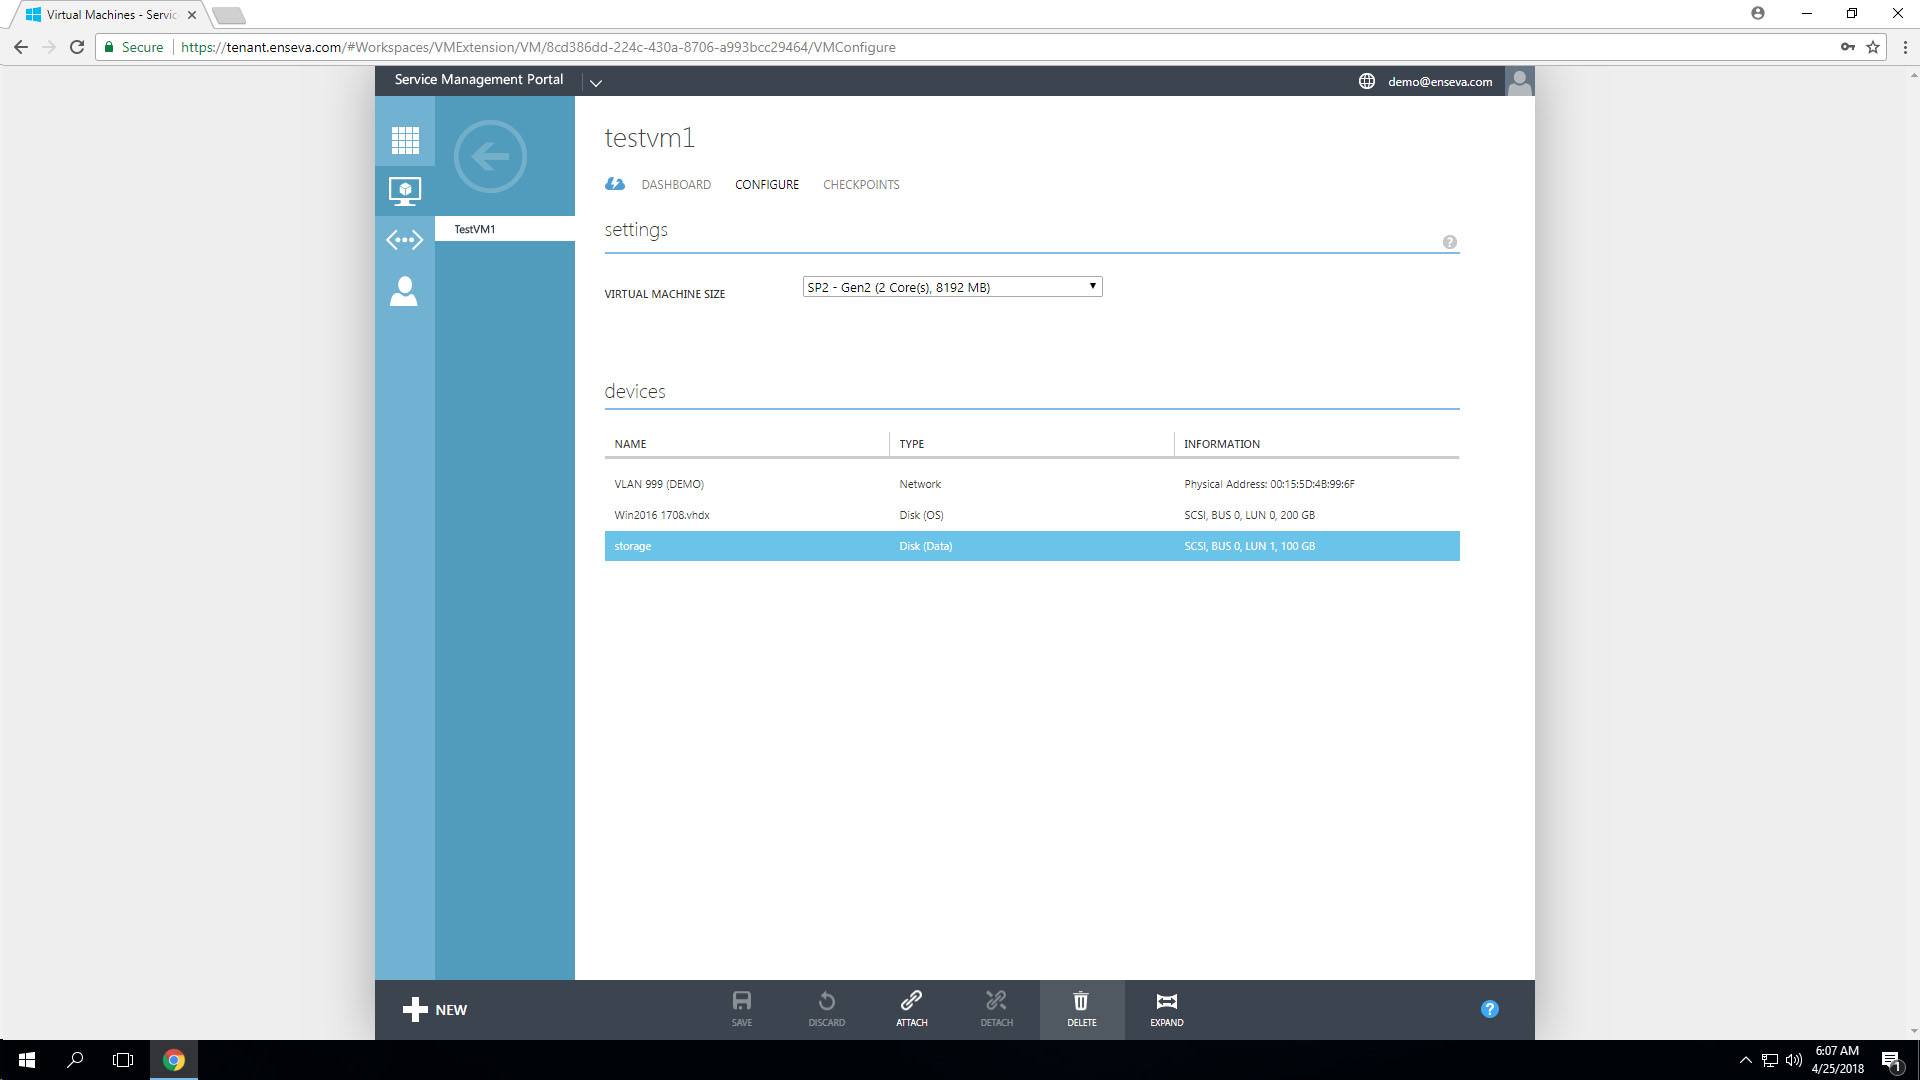
- Select the Configure button at the top of the screen to bring up configuration options for the instance. This menu includes the ability to adjust hardware profiles, add/remove network interface and add/remove/resize block storage devices.

- Using the dropdown menu next to Virtual Machine Size, locate the hardware profile you would like to apply to the virtual machine instance and select it.

- Click Save at the bottom of the screen to apply the new configuration to the instance. A confirmation prompt will ask you to confirm you would like to save the configuration. Select Yes to continue or No to abort.

- Provided no alerts or errors have been presented, your new hardware profile has now successfully been applied. To confirm, you may select Dashboard at the top of the screen to review your virtual machine instance configuration.


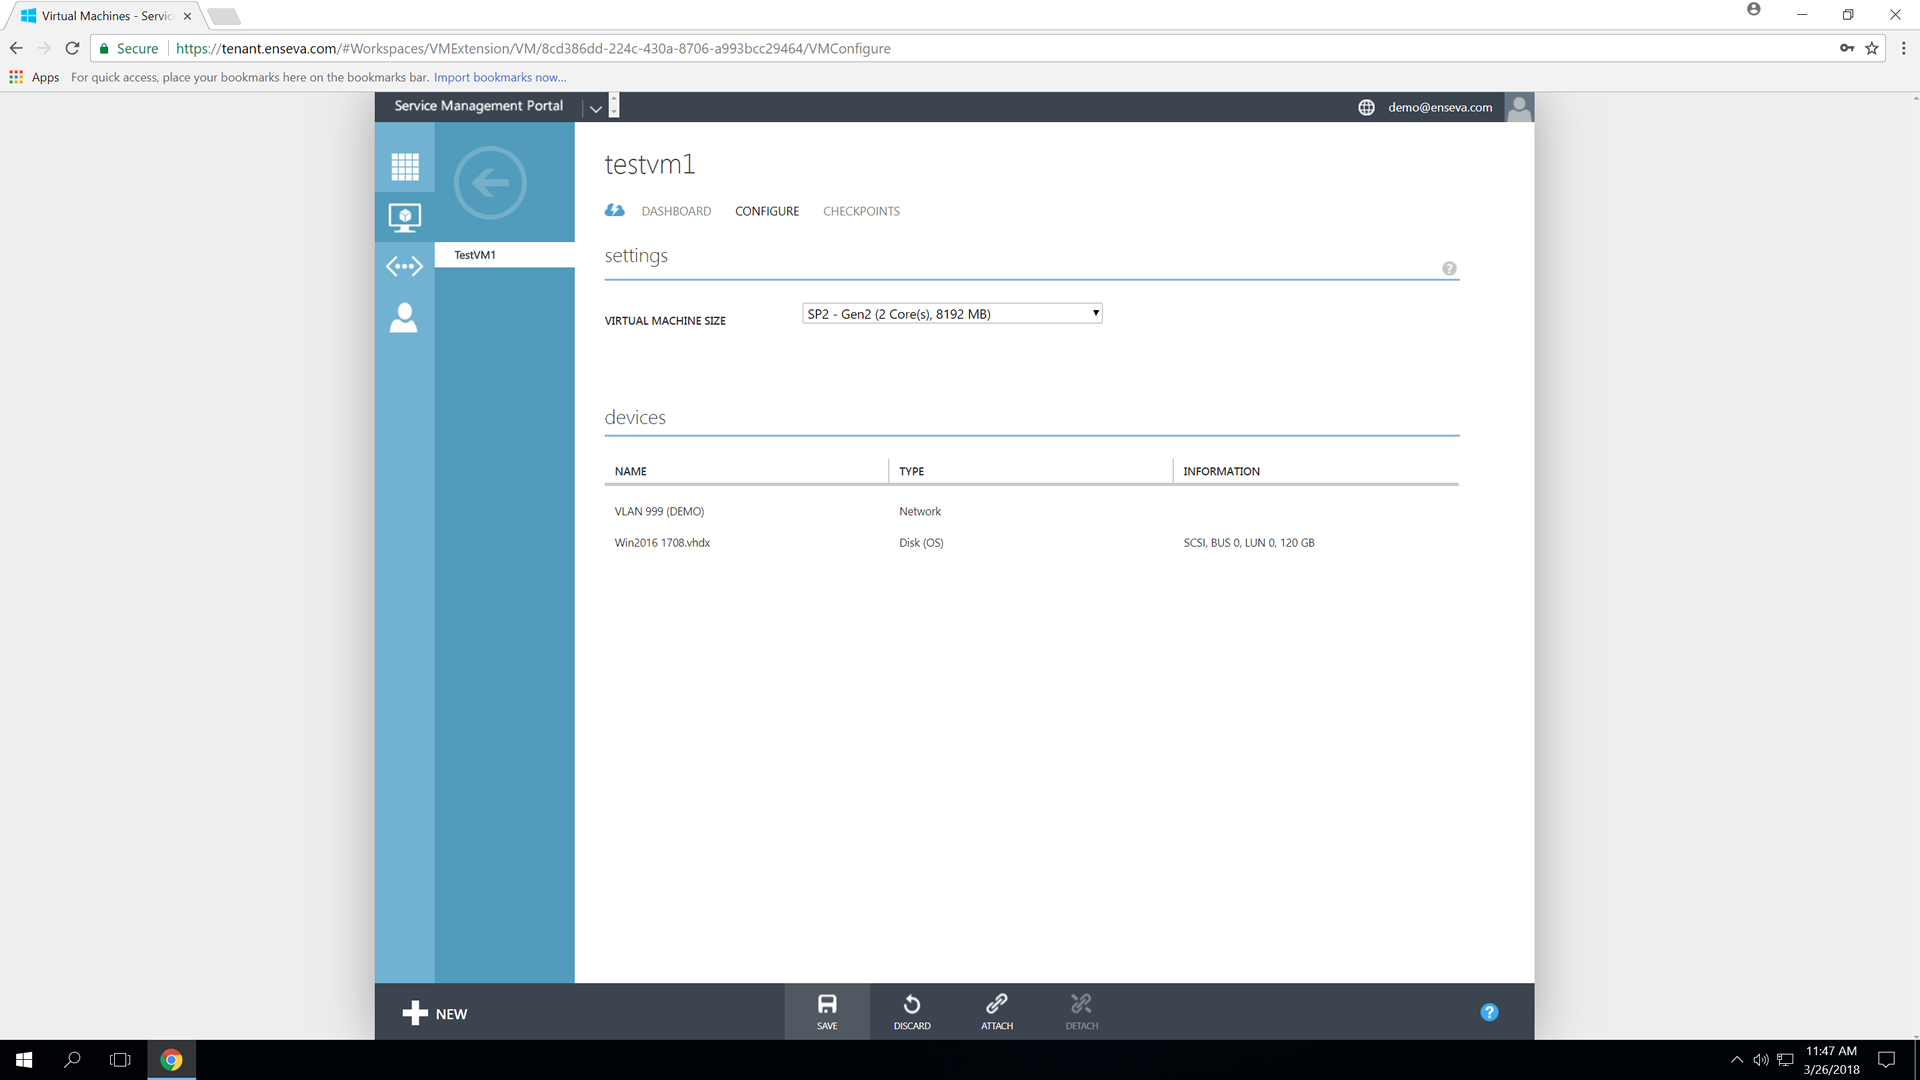

Adding an additional block storage device to an existing Instance
Each virtual machine instance may have multiple disks attached to them. For instance, you may want to keep the disk that is automatically provisioned with the instance for operating system purposes and attach one or more additional disks to store user applications and data.
Changing an Instance Hardware Profile
-
To add an additional block storage device to a virtual machine instance, the instance must be first placed in an offline state. Visit related tutorials for details on how to place a virtual machine instance in a stopped state.
With the virtual machine instance already in a stopped state, select the item in the All Items or Virtual Machine menu. This will present an instance welcome message for the instance that was selected.

- Select the Configure button at the top of the screen to bring up configuration options for the instance. This menu includes the ability to adjust hardware profiles, add/remove network interface and add/remove/resize block storage devices.

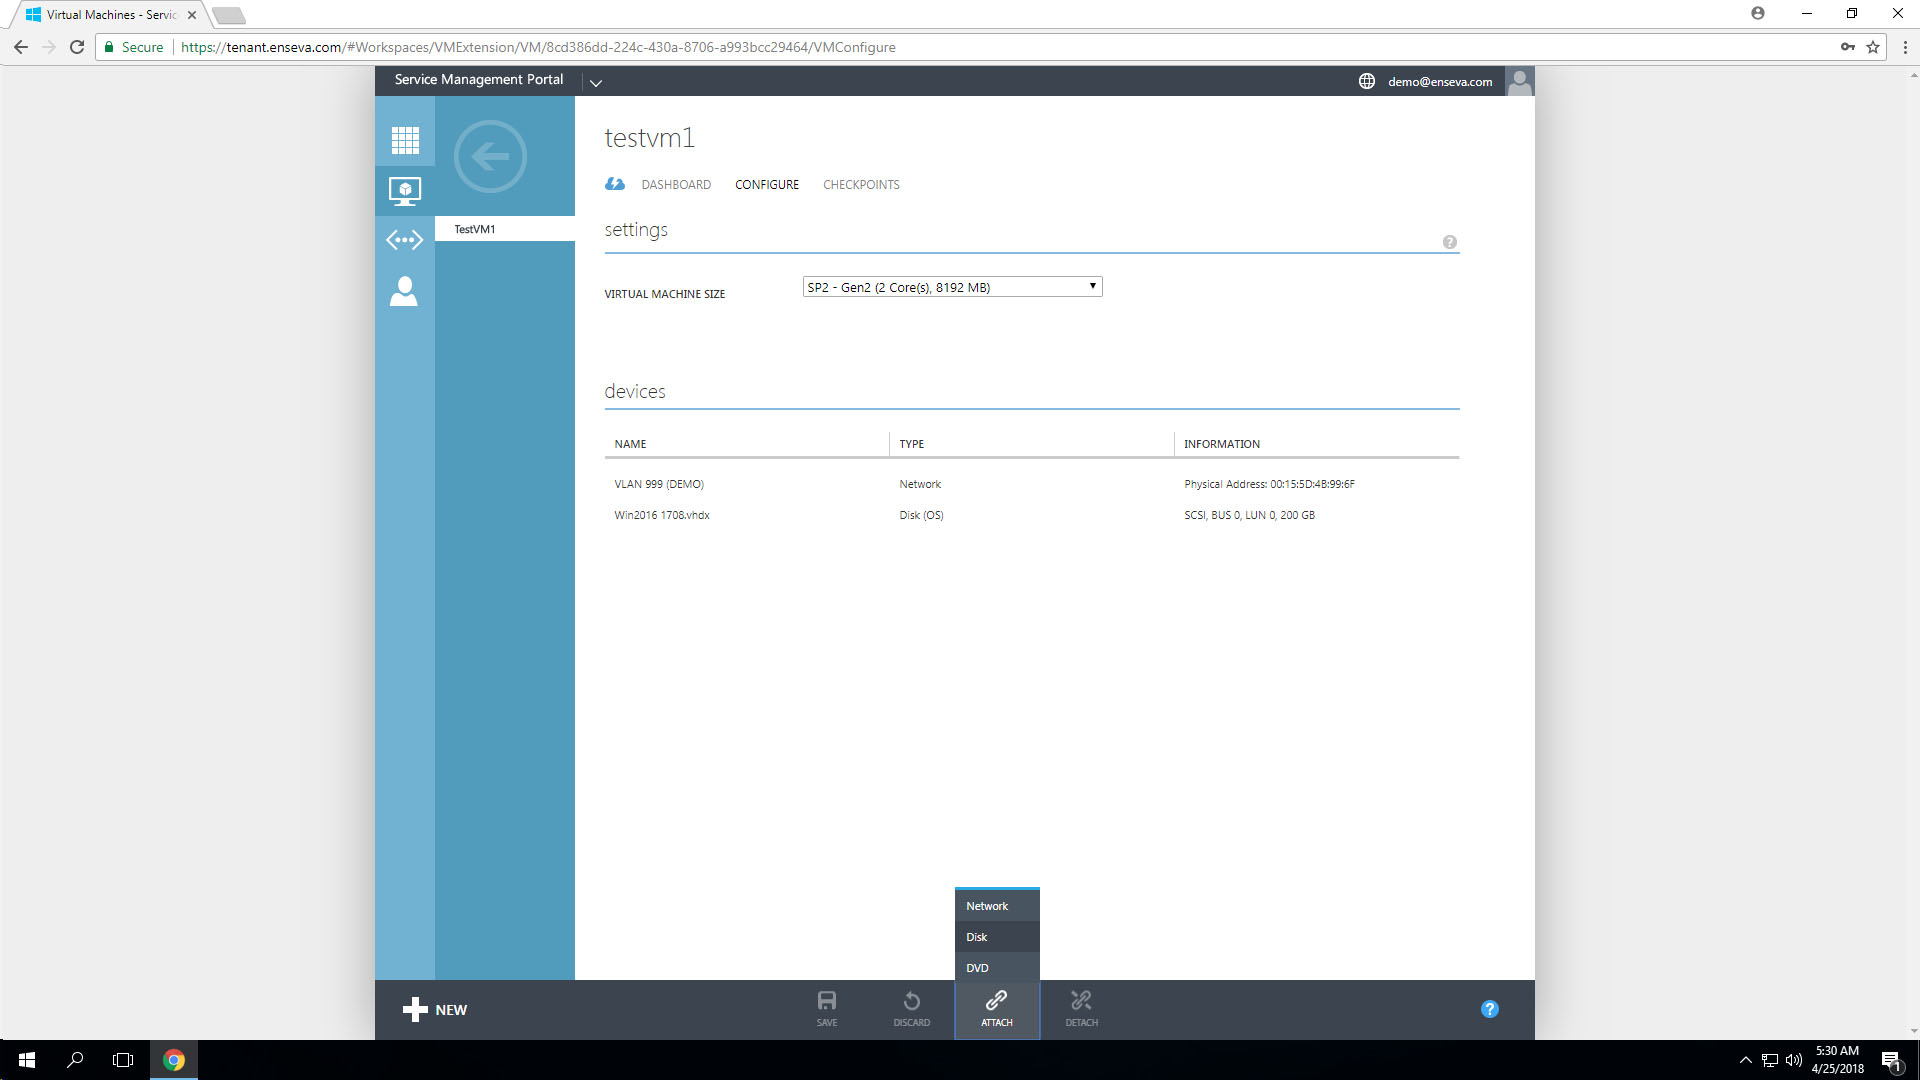
- In the bottom menu, select the Attach button, followed by selecting Disk. This will launch the attach device wizard that will be utilized to add a new block storage device.

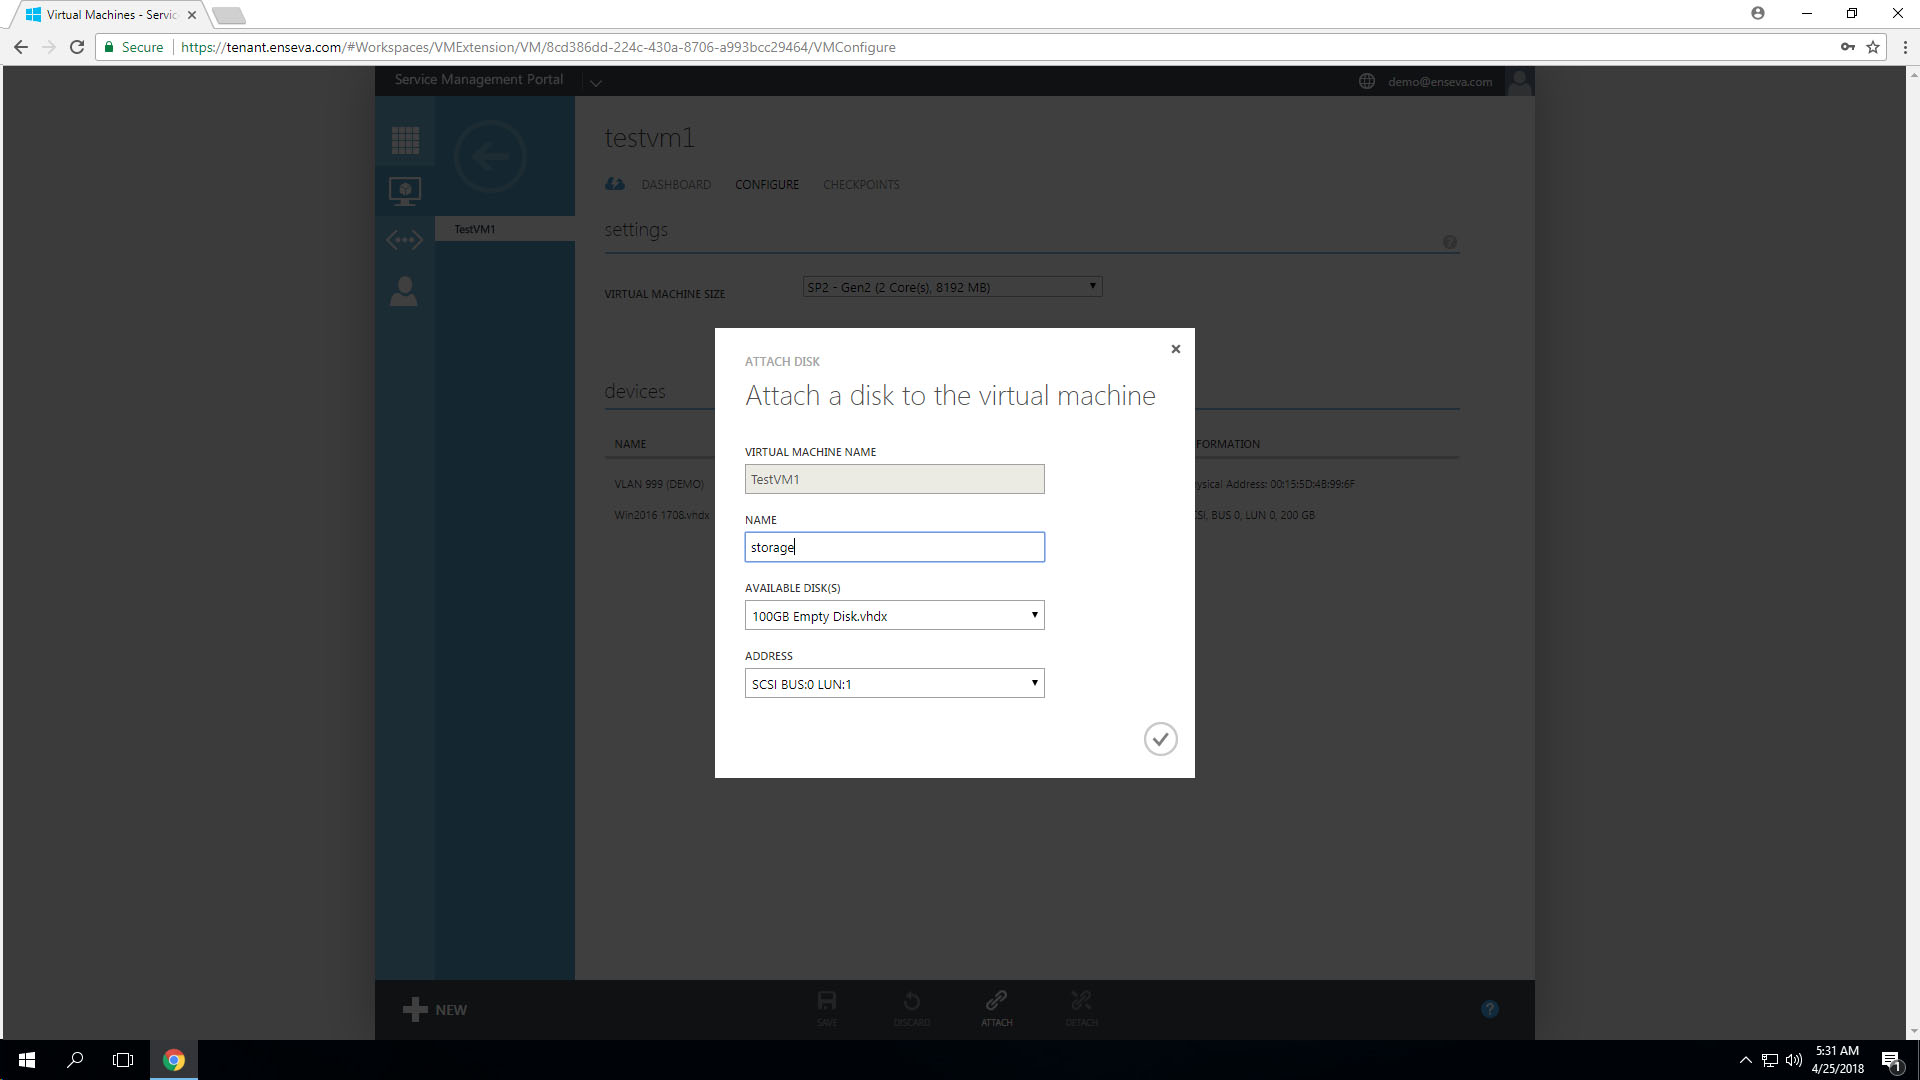
- Within the Attach Disk wizard, we need to specify a name of this disk. For the purposes of this tutorial we will simply label it as "storage" however you may use a name of your choosing. Under the Available Disk(s) options, select 100GB Empty Disk. Disk sizes can be adjusted after their creation. If you require a disk larger than 100GB, please leverage the Expanding a Block Storage Device tutorial to scale the disk to your desired size. Optionally, you may also designat which SCSI Address you would prefer to disk drive to utilize. The default setting will suffice for most situations.

- When all fields are completed, click the Check Box to execute the addition. After a few moments, you should receive a success message. Your disk addition has been completed.

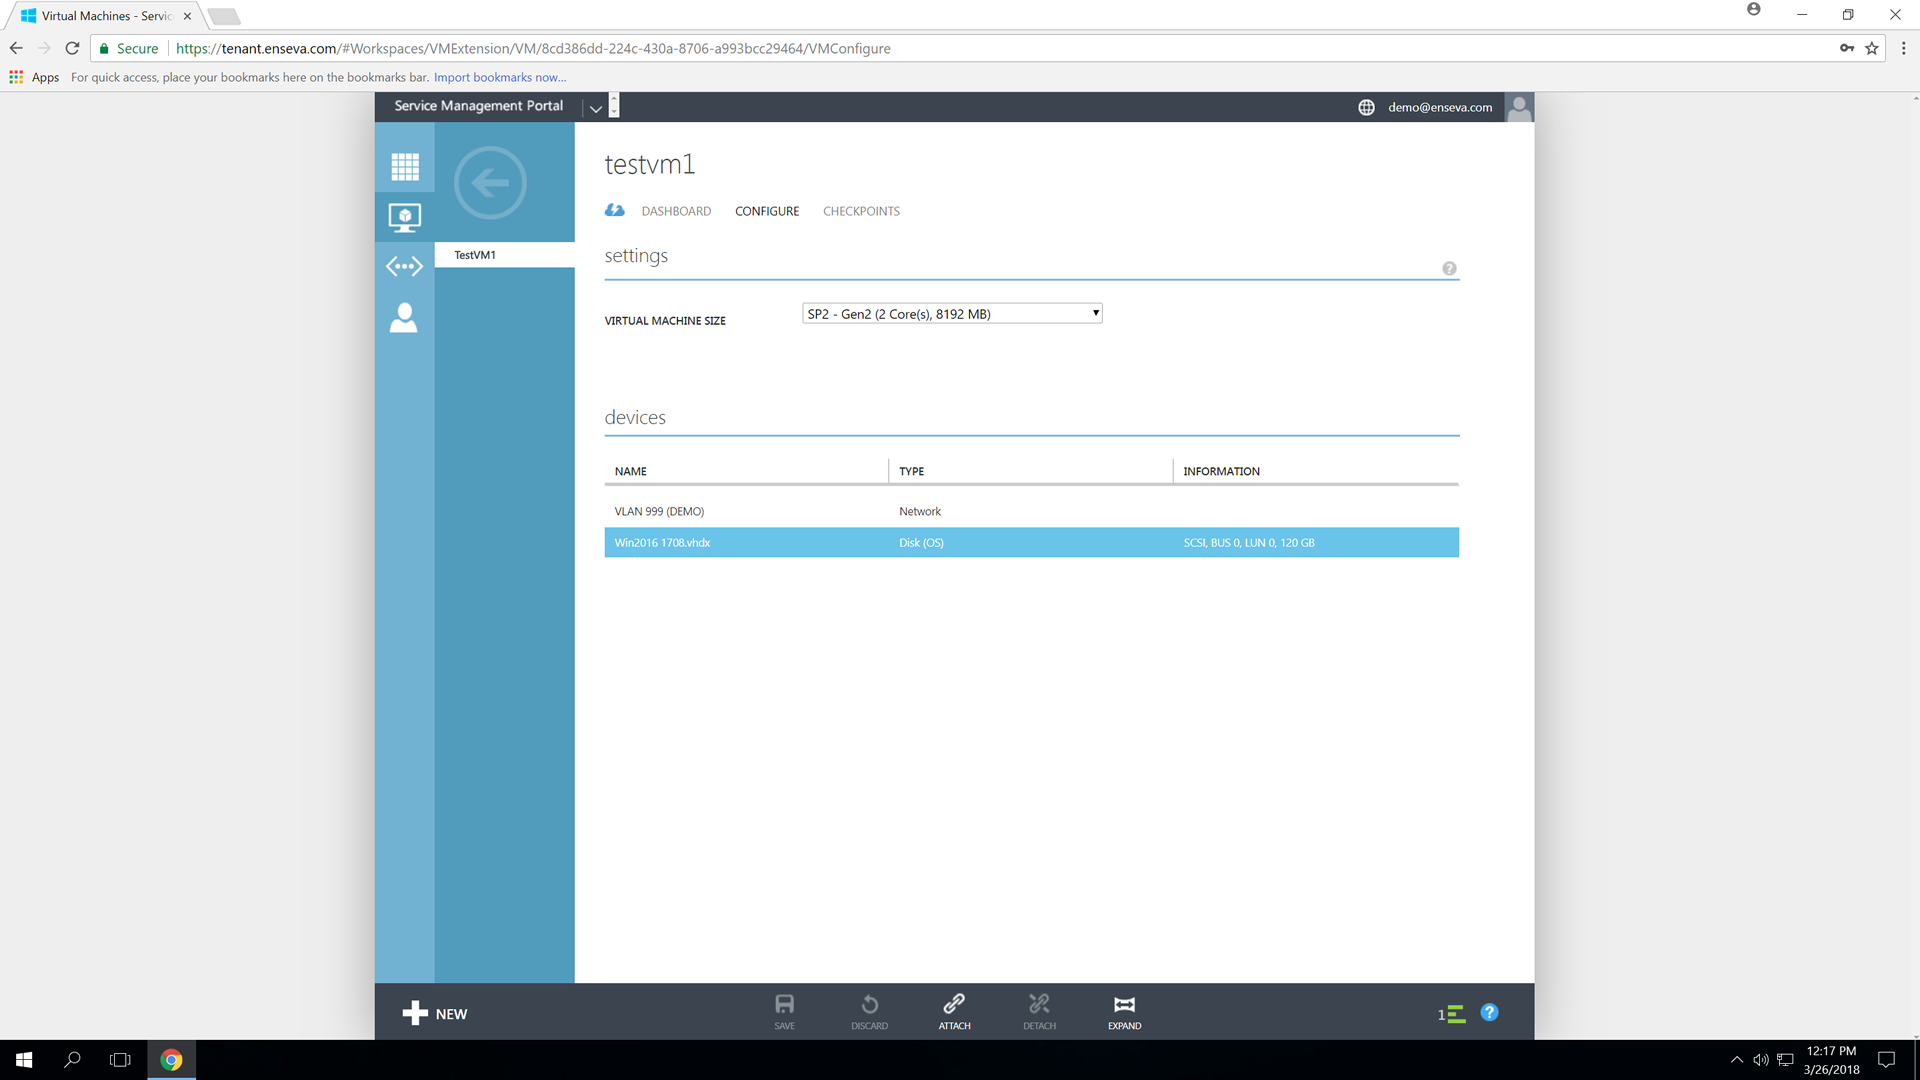
- Please note that although you have successfully added an additional block storage device to your virtual machine instance, you will need to leverage the tools of your respective operating system to format the drive for use.


Expanding a Block Storage device
Enseva Azure allows administrators to expand block storage volumes attached to virtual machine instances with ease. All virtual machine instances have 120GB block storage devices by default and the virtual disks may be managed independently of the hardware profile that is assigned to a virtual machine instance.
For the purposes of this tutorial, it is assumed that you have already logged into the Enseva Azure portal and are the owner of one or more subscriptions.
Expanding a Block Storage Device
-
To change the size of a block storage device that is assigned to a virtual machine instance, the instance must be first placed in an offline state. Visit related tutorials for details on how to place a virtual machine instance in a stopped state.
With the virtual machine instance already in a stopped state, select the item in the All Items or Virtual Machine menu. This will present an instance welcome message for the instance that was selected. - Select the Configure button at the top of the screen to bring up configuration options for the instance. This menu includes the ability to adjust hardware profiles, add/remove network interface and add/remove/resize block storage devices.
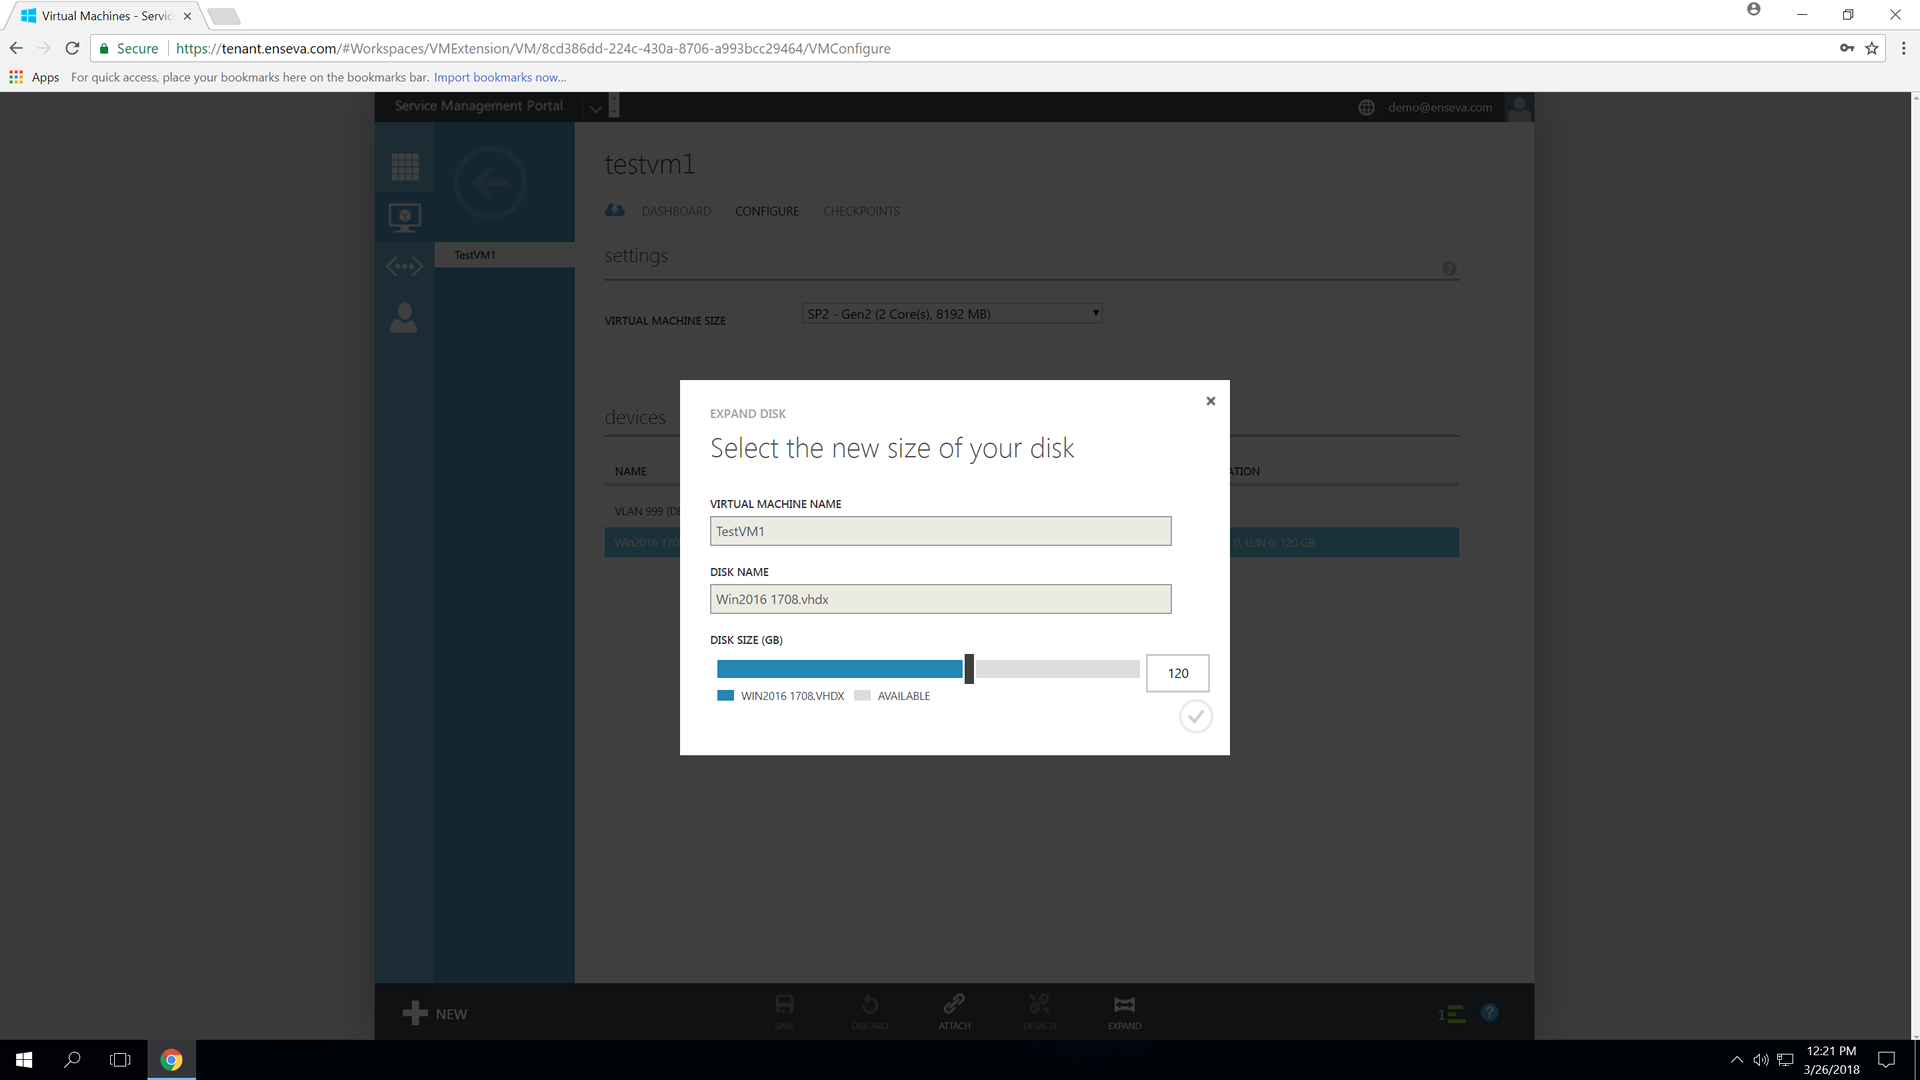
- Select the vhd or vhdx that you would like to enlarge. In this tutorial we are working with a Gen2 virtual machine instance that utilizes a vhdx virtual block disk. The menu at the bottom of the page will update to expose new options.

- Click the Expand option at the bottom of the page to launch the Expand Disk menu. You may either drag the bar to adjust the value of the new size or manually enter the desired value in the number box. After the desired disk size has been selected, clock the Check Button to save the new value.


- After a few moments you will see a success message indicating the virtual block device changes have been completed. Please note that additional configuration changes may need to be introduced to your operating system to make use of the additional capacity such as increasing the partition size.


Deleting a Block Storage Device from an Instance
Each virtual machine instance may have multiple disks attached to them. For instance, you may want to keep the disk that is automatically provisioned with the instance for operating system purposes and attach one or more additional disks to store user applications and data. If you no longer wish to have a particular disk attached to a virtual machine instance, this procedure will assist with deleting it.
Deleting a Block Storage Device from and Instance
-
To Delete a block storage device from a virtual machine instance, the instance must be first placed in an offline state. Visit related tutorials for details on how to place a virtual machine instance in a stopped state.
With the virtual machine instance already in a stopped state, select the item in the All Items or Virtual Machine menu. This will present an instance welcome message for the instance that was selected. - Select the Configure button at the top of the screen to bring up configuration options for the instance. This menu includes the ability to adjust hardware profiles, add/remove network interface and add/remove/resize block storage devices.

- Select the disk you would like to delete and then leverage the bottom menu to select the Delete button, this will launch a confirmation dialog prompting you to confirm you would like to delete the virtual disk. Once this action is completed, it is not possible to retrieve any data located on the disk you are deleting. Click Yes to complete the action.


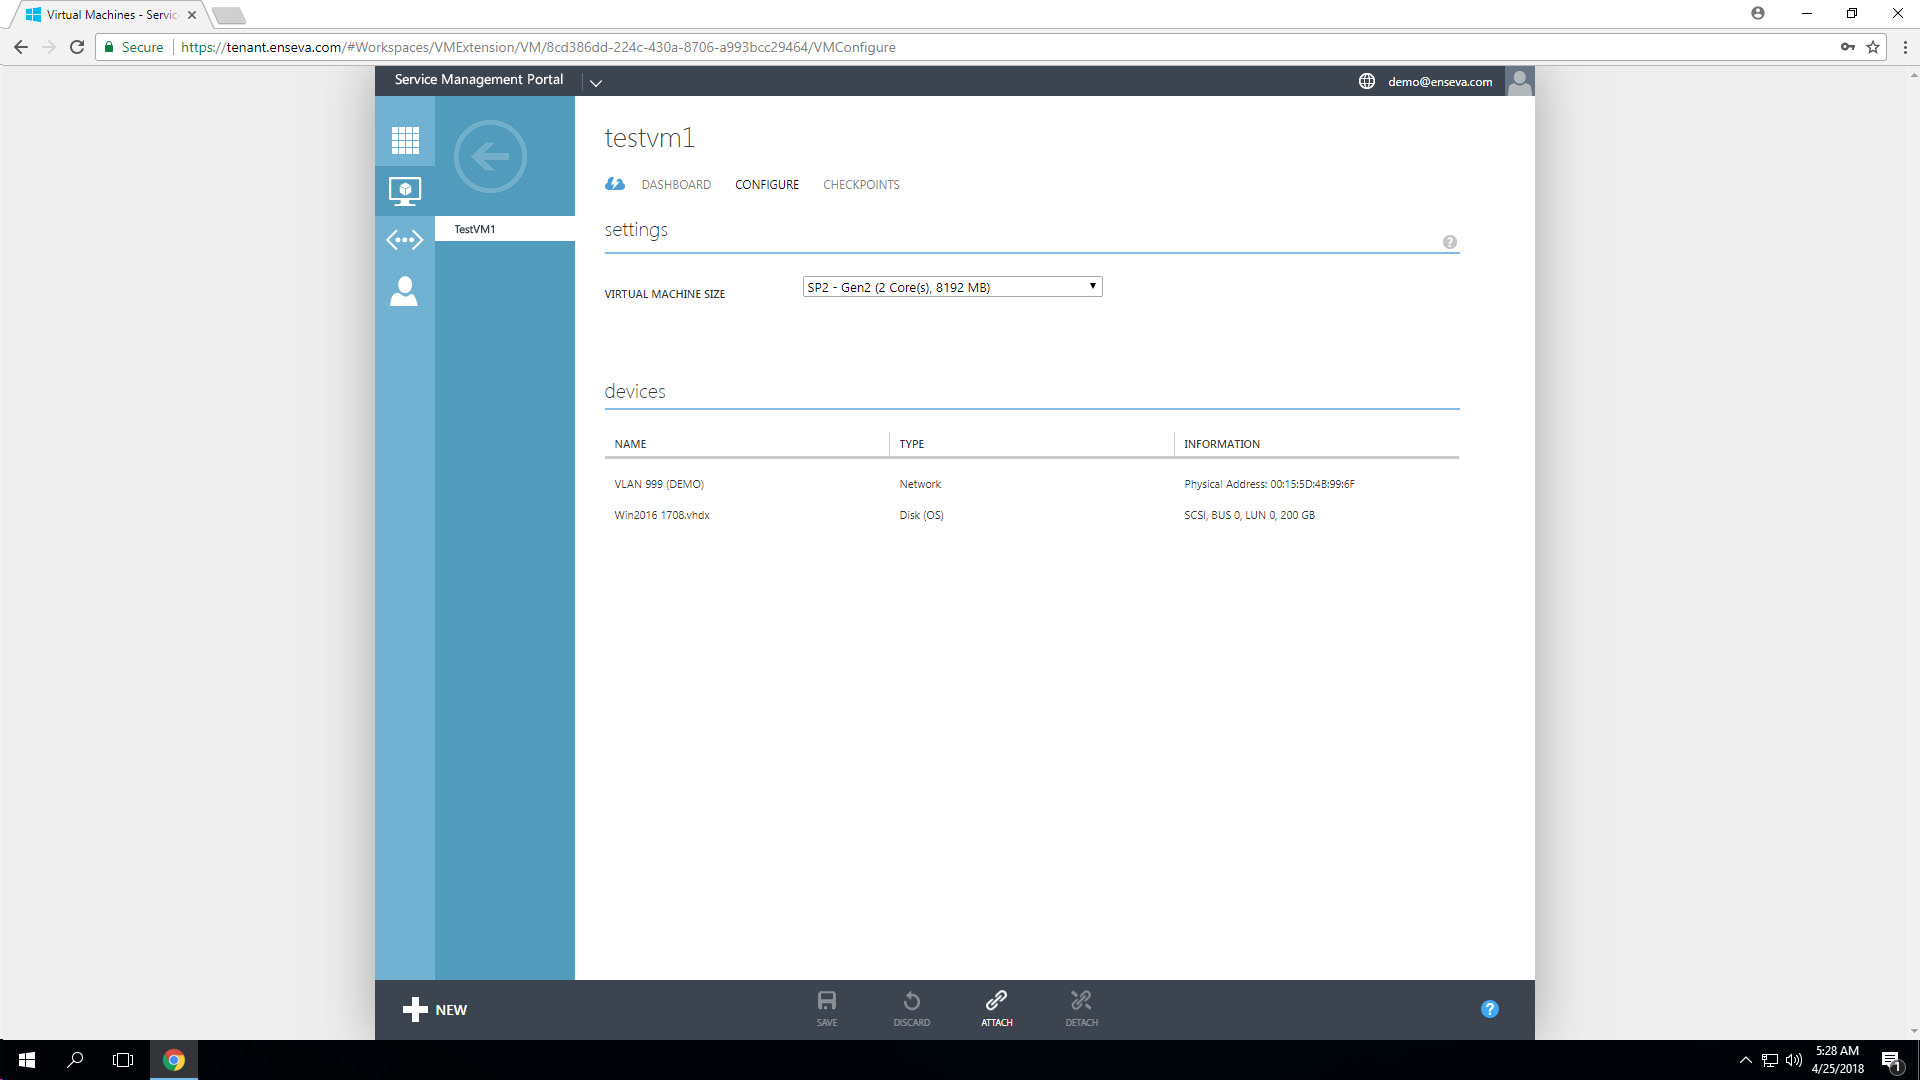
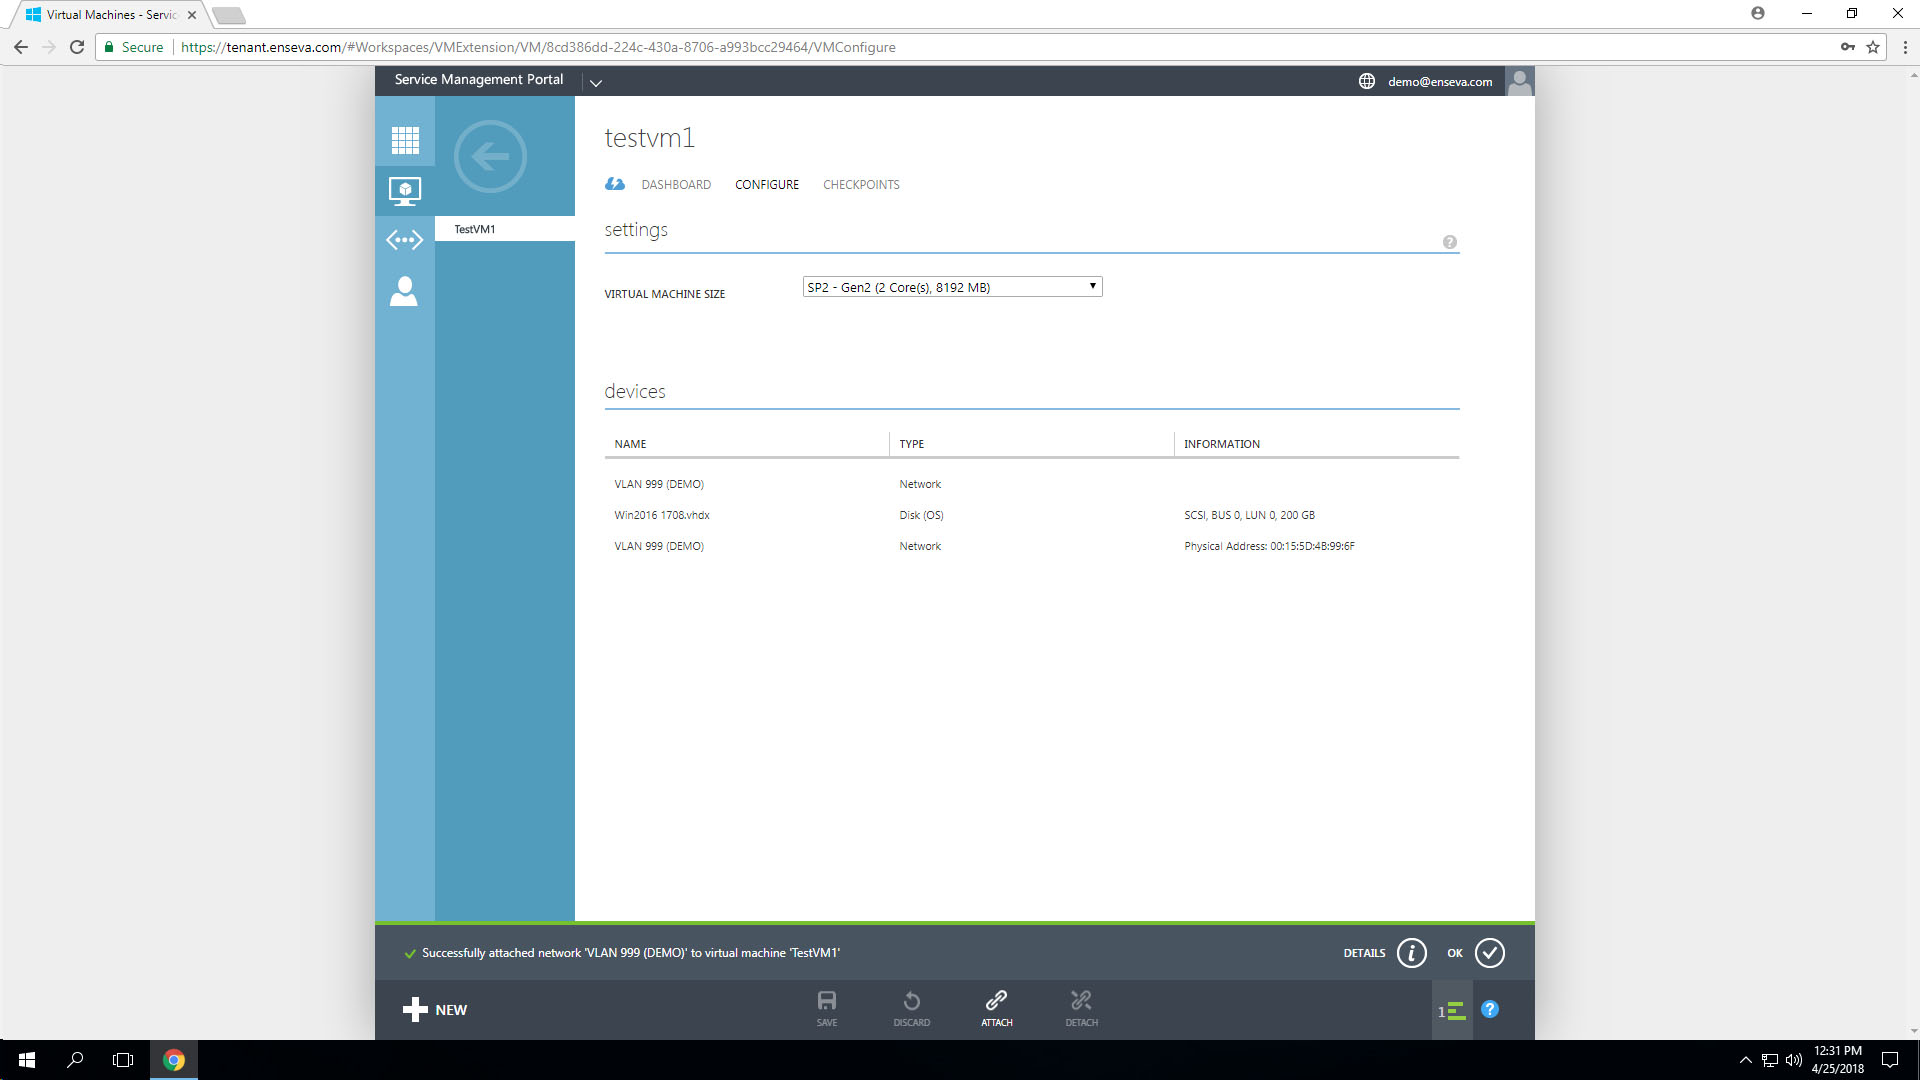
Adding a Network Adapter to an Instance
Each virtual machine instance may have one or more virtual network adapters attached to them. Typically a virtual machine instance will have a single adapter assigned, however multiple adapters may be leveraged in instances where layer-2 connectivity is required for multiple networks. This capability allows for the possibility for a virtual machine instance to facilitate communications between multiple networks (in the form of a router/security device) or to circumvent routing devices to improve network performance.
Adding a Network Adapter to an Instance
-
To add a network adapter to a virtual machine instance, the instance must be first placed in an offline state. Visit related tutorials for details on how to place a virtual machine instance in a stopped state.
With the virtual machine instance already in a stopped state, select the item in the All Items or Virtual Machine menu. This will present an instance welcome message for the instance that was selected. - Select the Configure button at the top of the screen to bring up configuration options for the instance. This menu includes the ability to adjust hardware profiles, add/remove network interface and add/remove/resize block storage devices.

- In the bottom menu, select the Attach button, followed by selecting Network. This will launch the attach device wizard that will be utilized to add a virtual network adapter. The Virtual Machine Name will be pre-populated with the instance you are working with. If you have multiple networks in which virtual machines may be attached, you may select the one you wish to utilize. When completed, click the check box to apply the new virtual network adapter.

- After a few moments, you should receive a success message. Your disk addition has been completed.


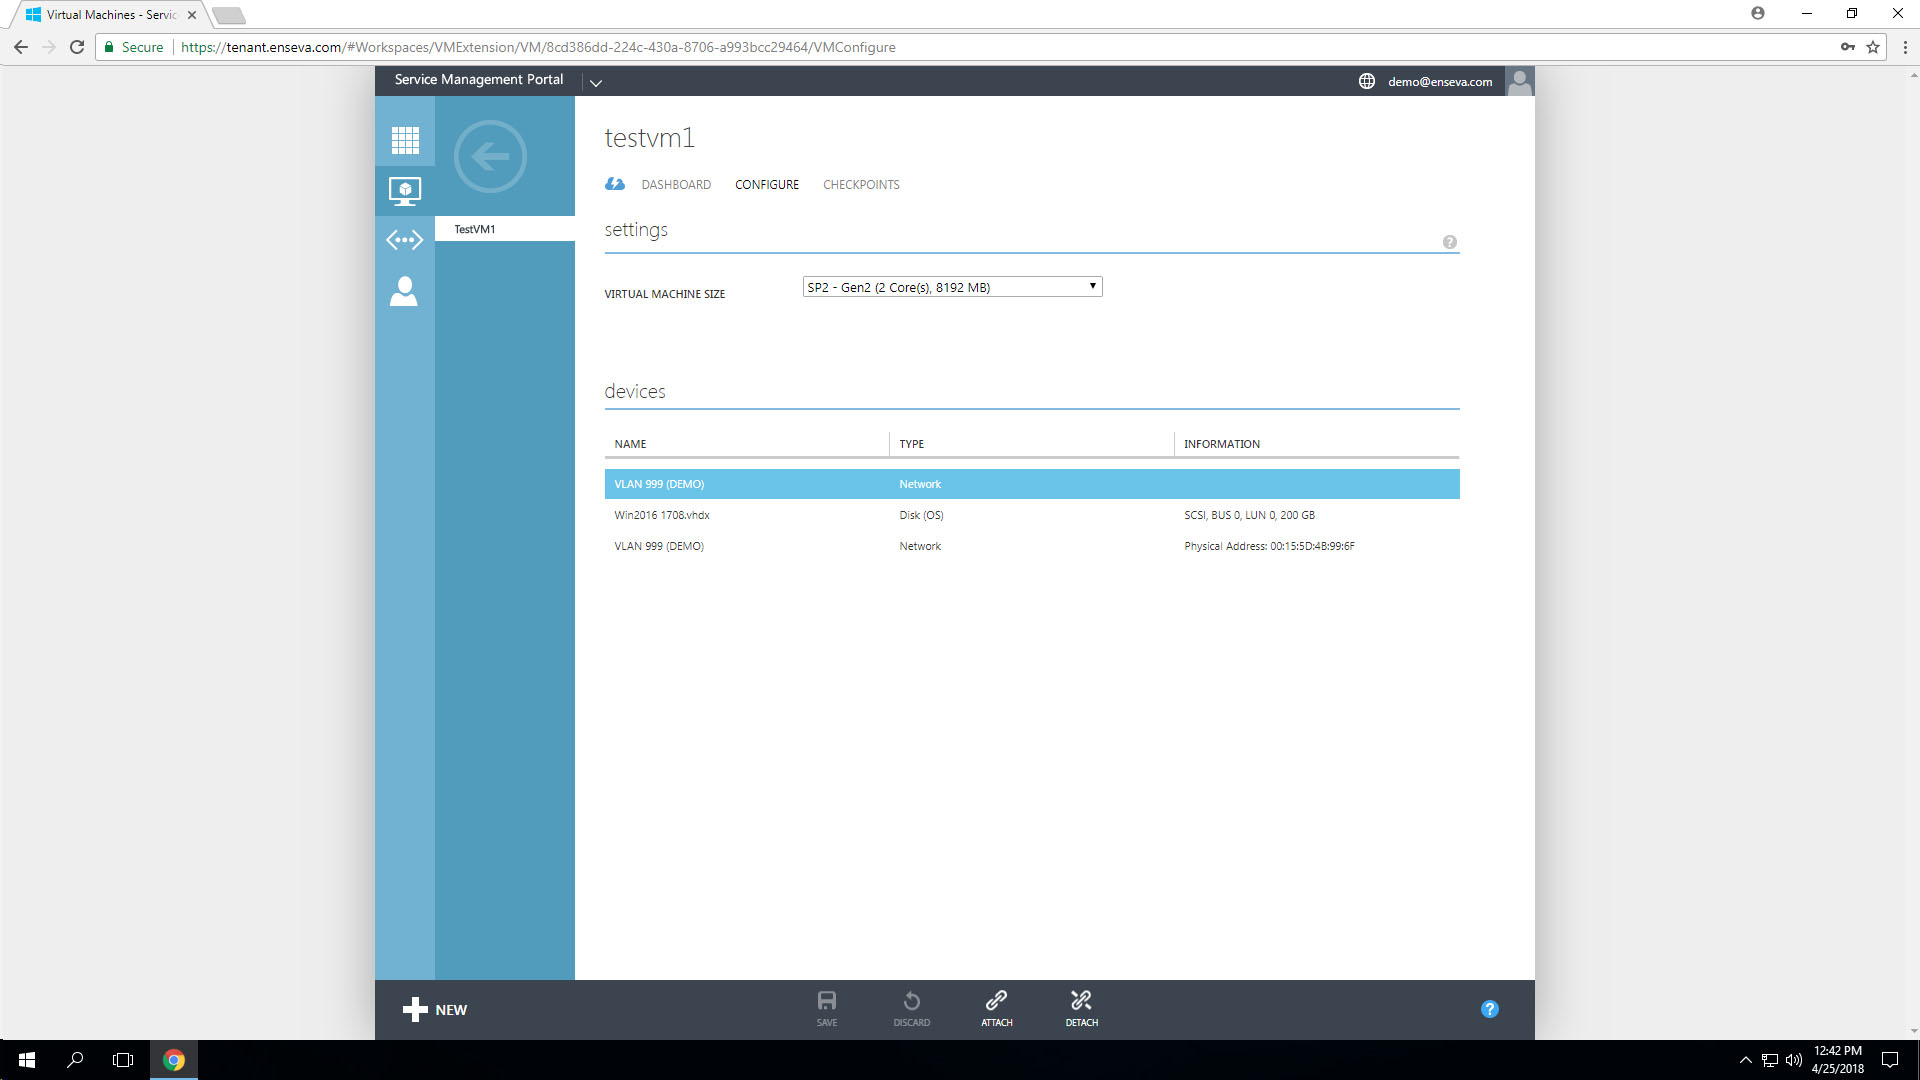
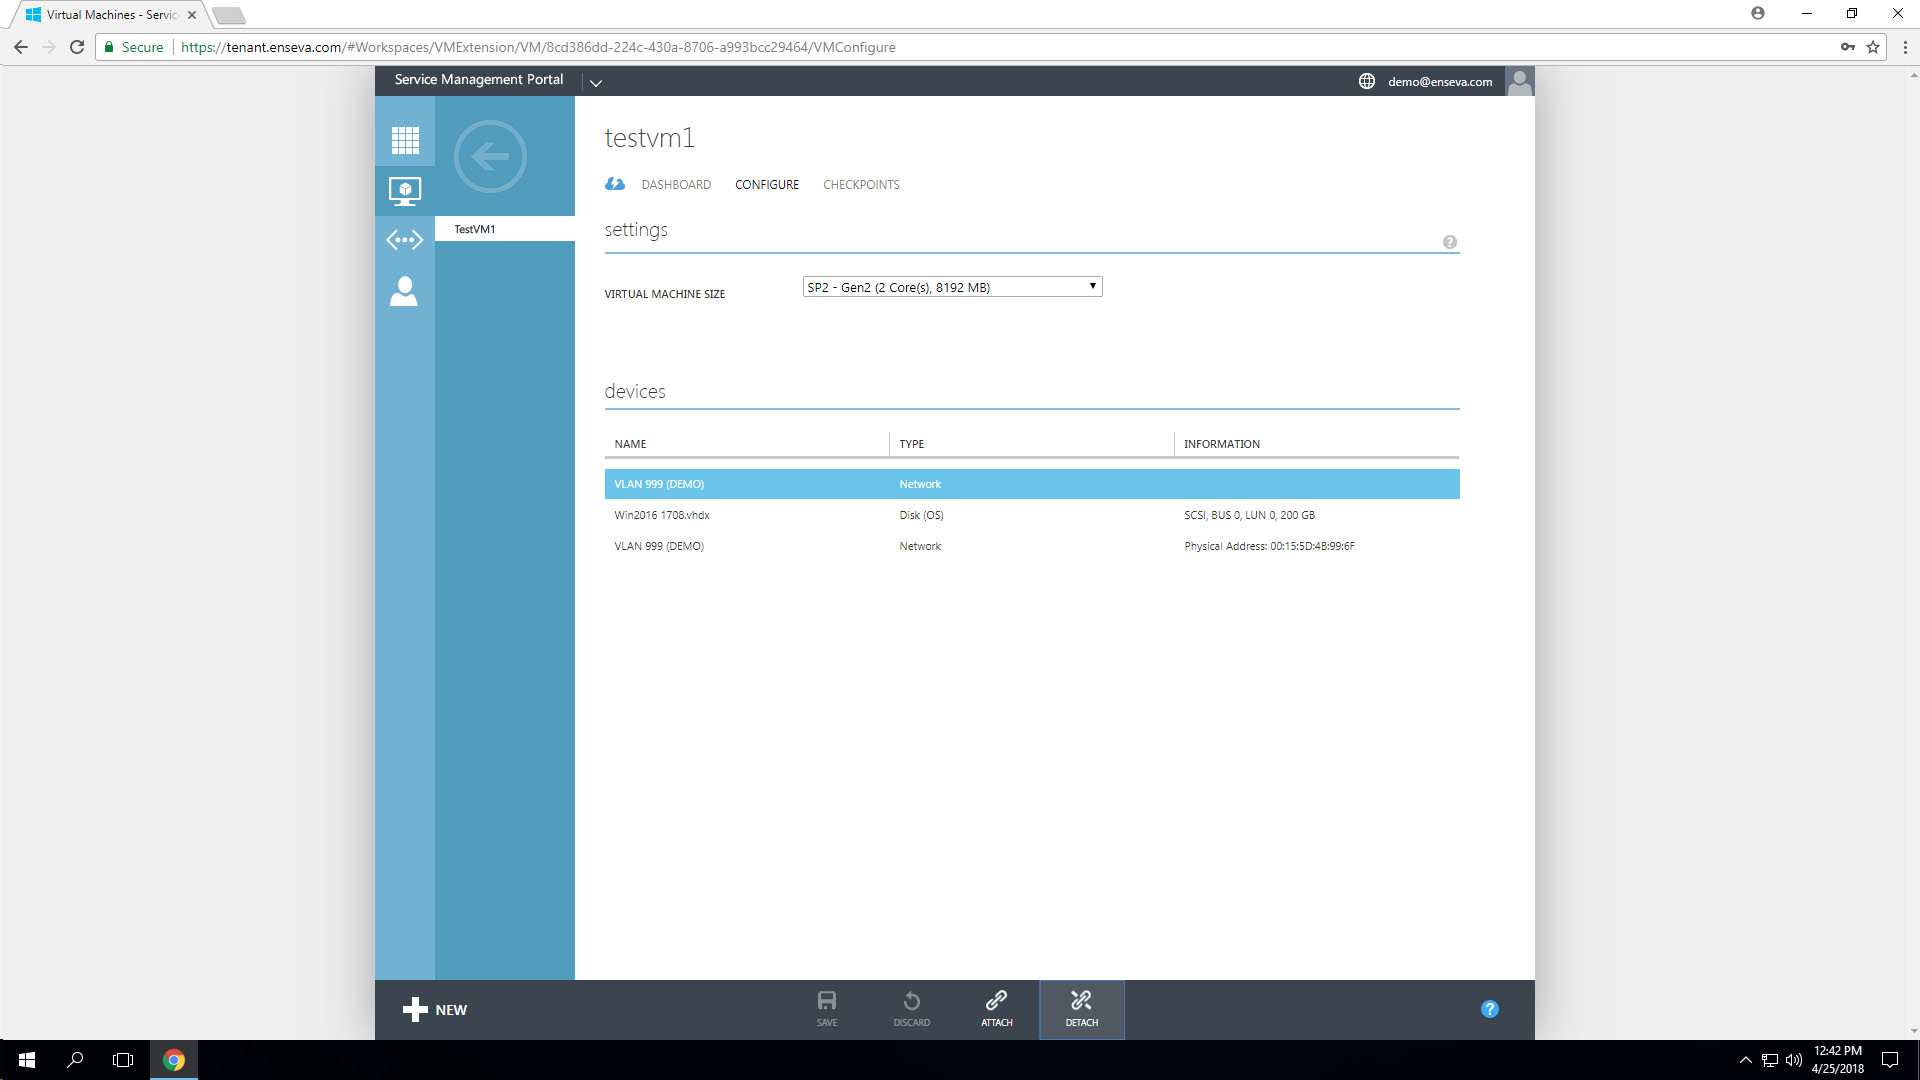
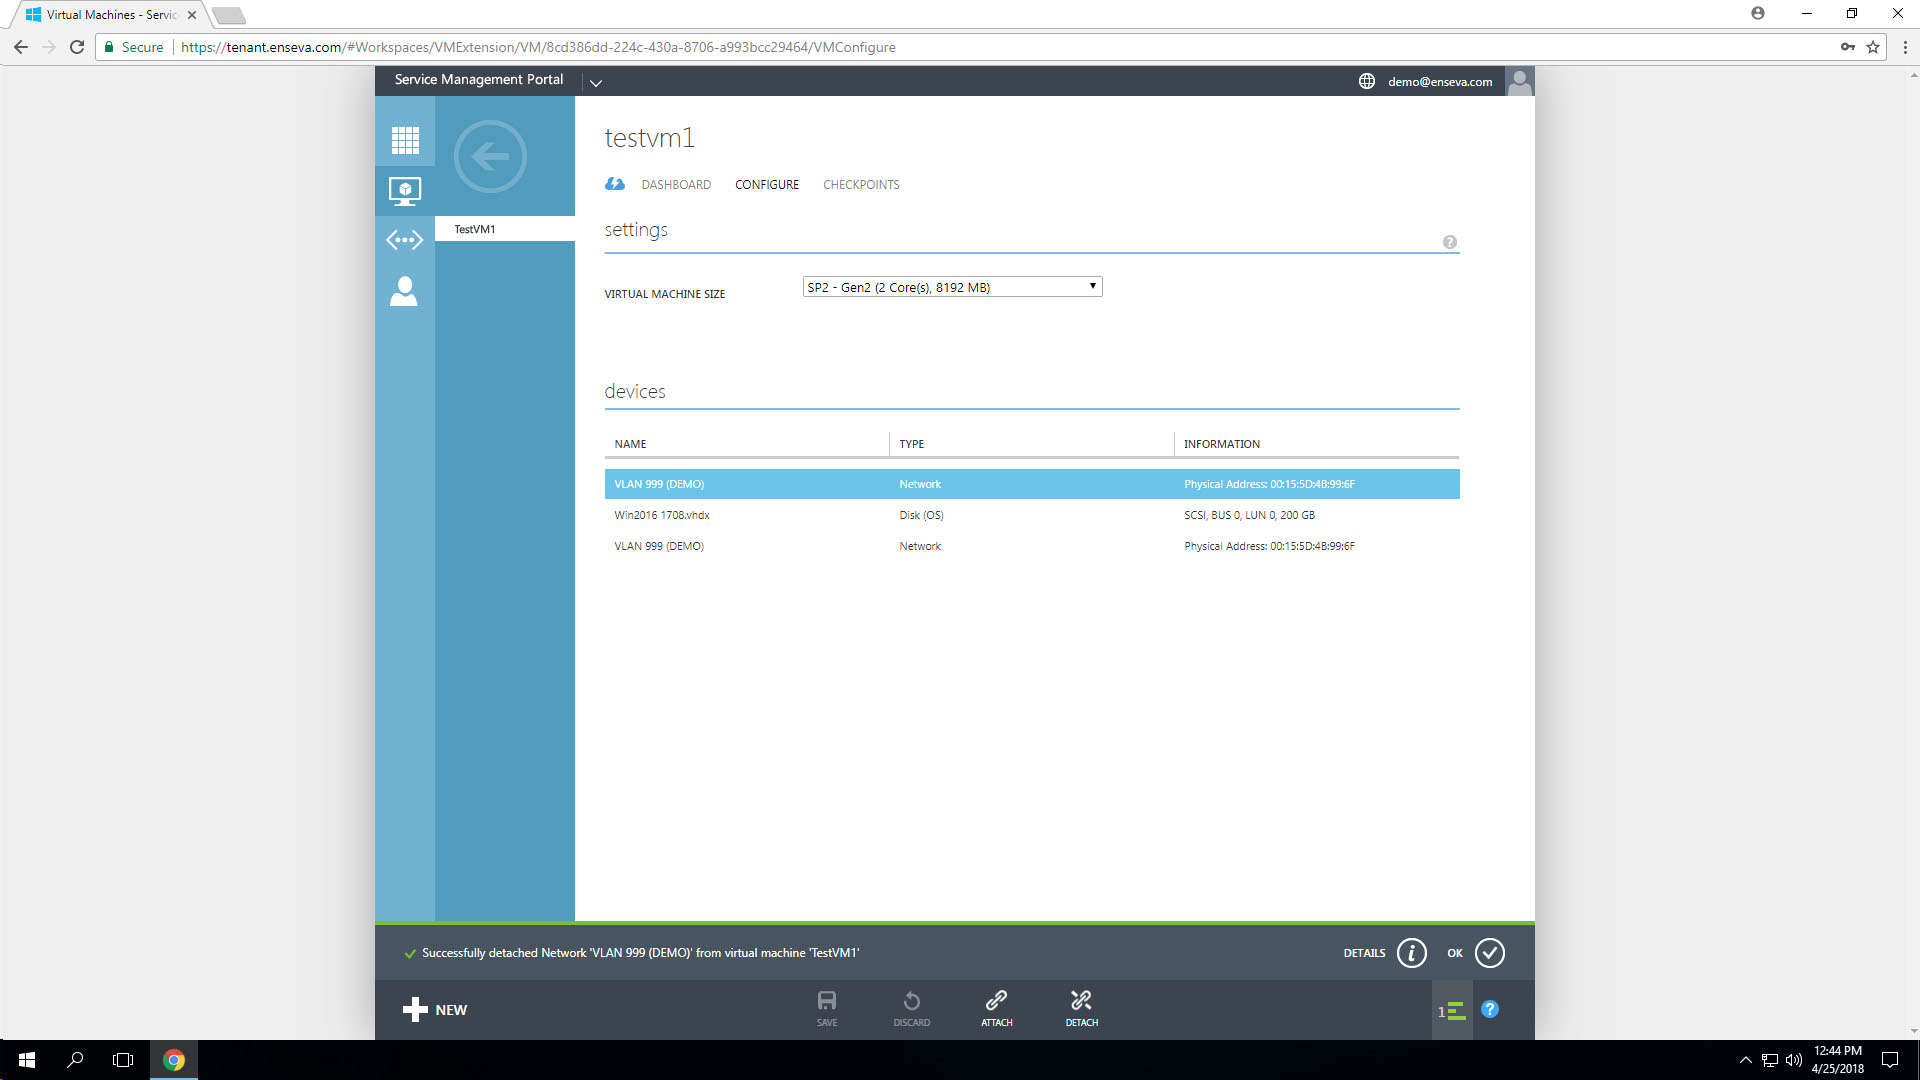
Removing a Network Adapter from an Instance
Each virtual machine instance may have one or more virtual network adapters attached to them. Typically a virtual machine instance will have a single adapter assigned, however multiple adapters may be leveraged in stances where layer-2 connectivity is required for multiple networks. This capability allows for the possibility for a virtual machine instance to facilitate communications between multiple networks (in the form of a router/security device) or to circumvent routing devices to improve network performance.
Removing a Network Adapter from an Instance
-
To Remove a virtual network adapter from a virtual machine instance, the instance must be first placed in an offline state. Visit related tutorials for details on how to place a virtual machine instance in a stopped state.
With the virtual machine instance already in a stopped state, select the item in the All Items or Virtual Machine menu. This will present an instance welcome message for the instance that was selected. - Select the Configure button at the top of the screen to bring up configuration options for the instance. This menu includes the ability to adjust hardware profiles, add/remove network interface and add/remove/resize block storage devices.

- Select the network adapter you would like removed and then leverage the bottom menu to select the Detach button This will launch a confirmation dialog prompting you to confirm you would like to remove the network adapter. Click Yes to complete the action.


- After a few moments, you should receive a success message. Your network adapter has successfully been removed from the virtual machine.


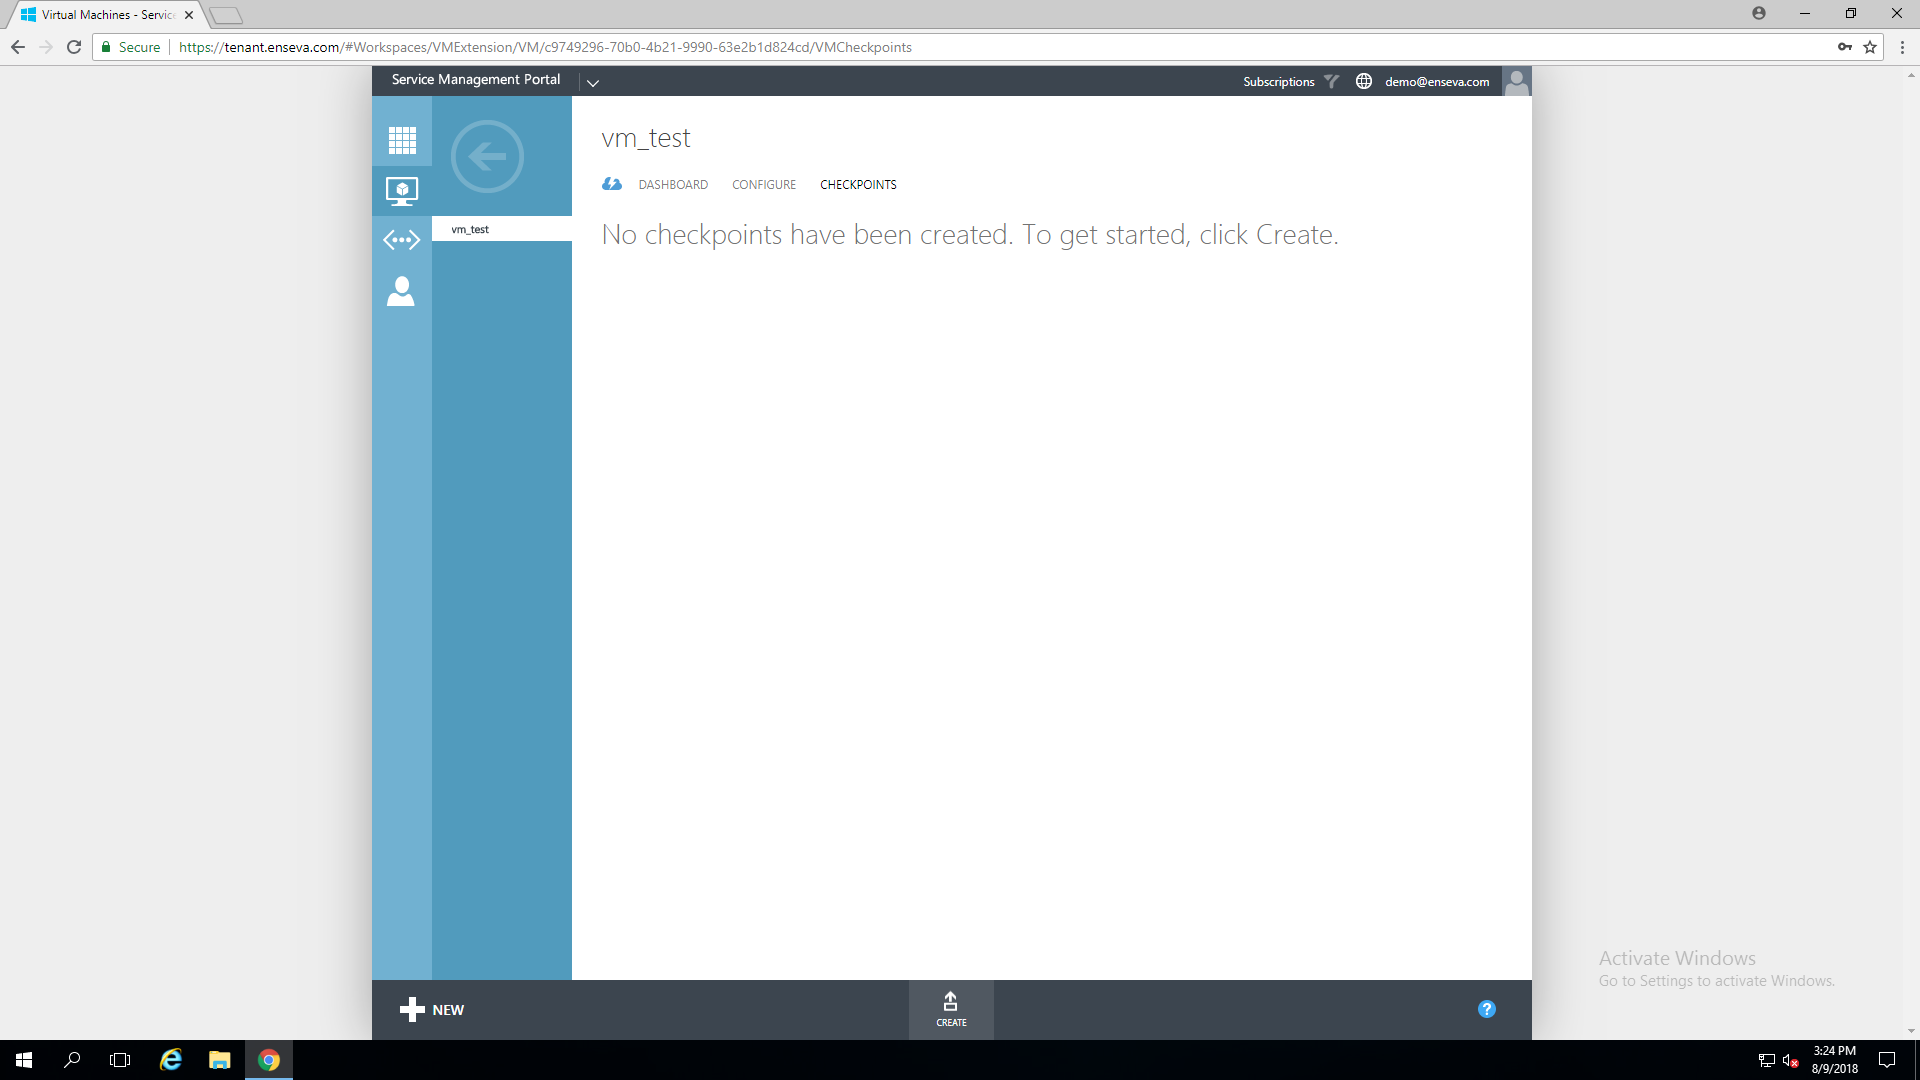
Creating an Instance Check-Point
This guide will cover Creating an Instance Check-point within Enseva Azure.
Creating an Instance Check-Point
- Navigate to the Tenant Portal
Navigate to https://tenant.enseva.com and enter your login credentials, then sign into your account.
For the purposes of this tutorial, we already have a virtual machine created with the friendly name of 'vm_test'
- Select Virtual Machine
Click on the virtual machine's name in which you want to create a checkpoint, this will bring you to the vm's dashboard.
- Select Checkpoints
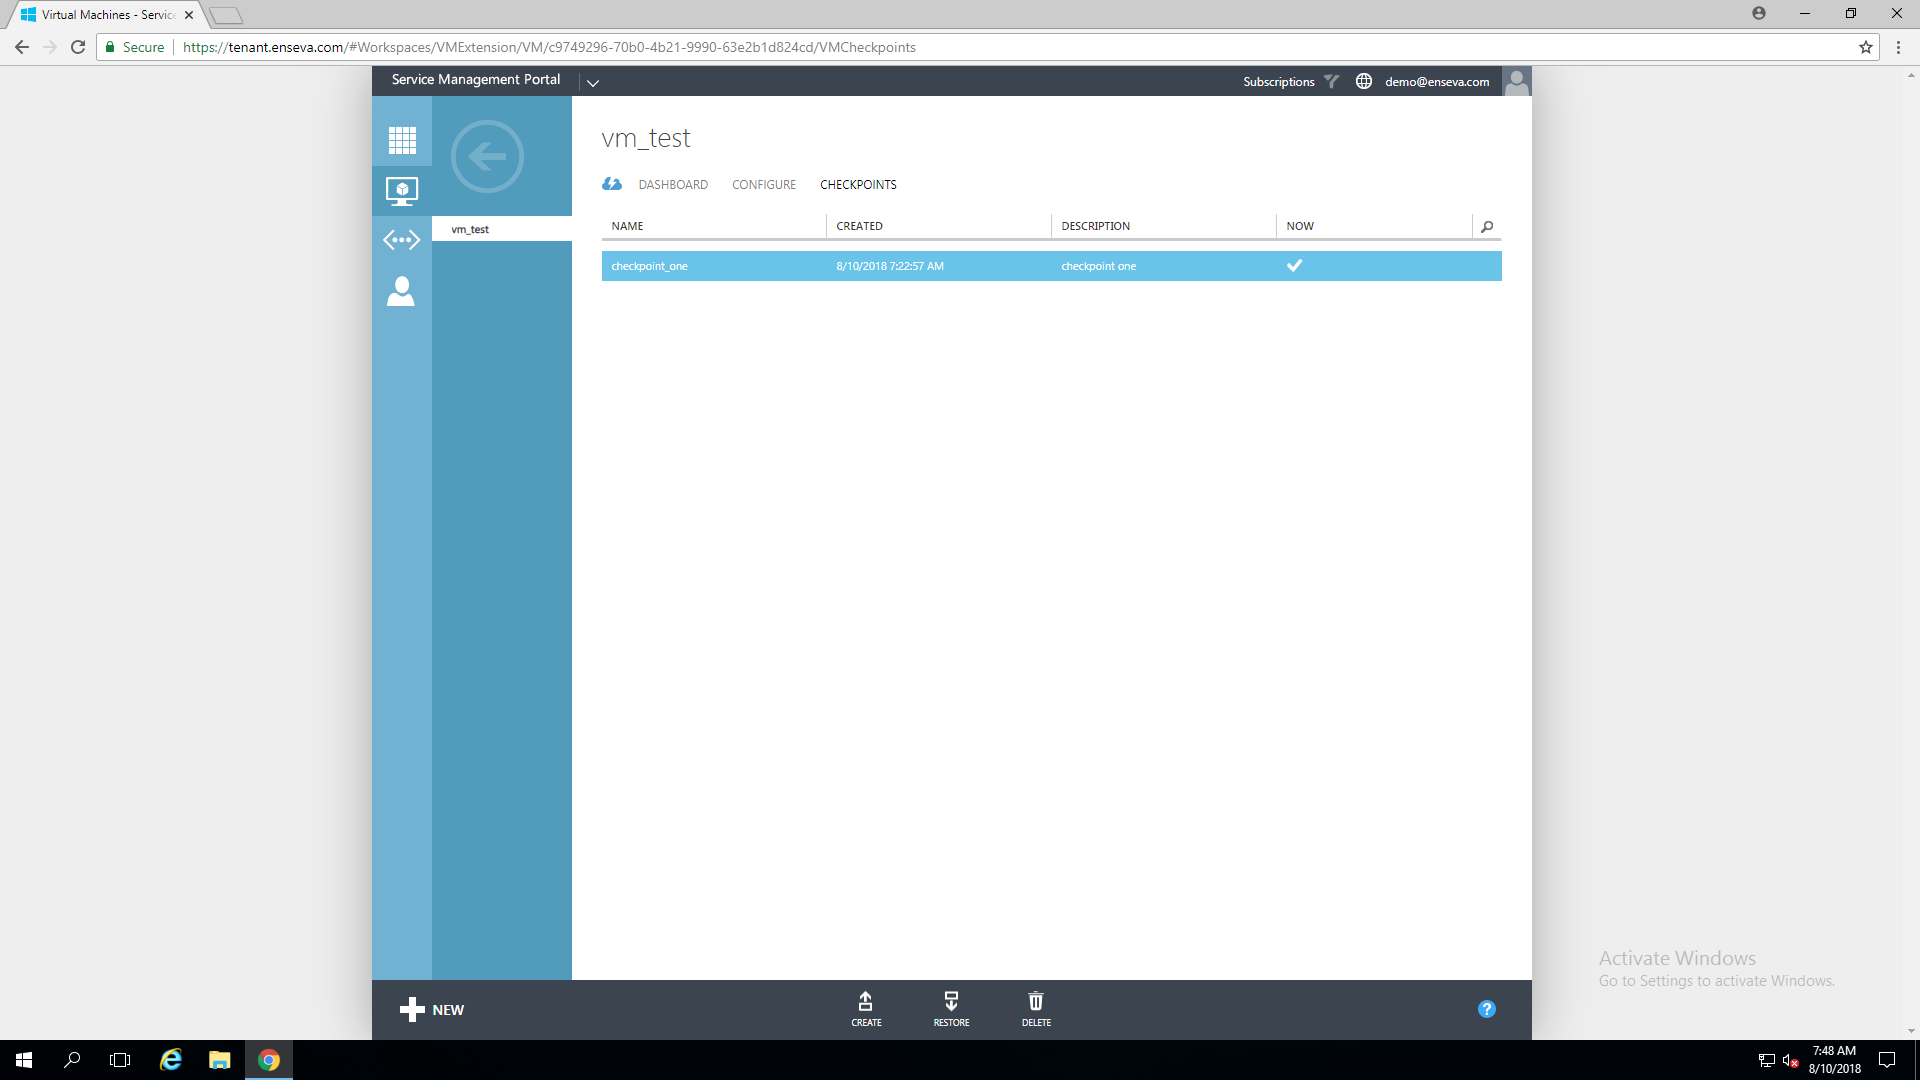
From the dashboard, select checkpoints near the top of the page.
- Create a Checkpoint
Near the bottom of the page click on the 'create' button.
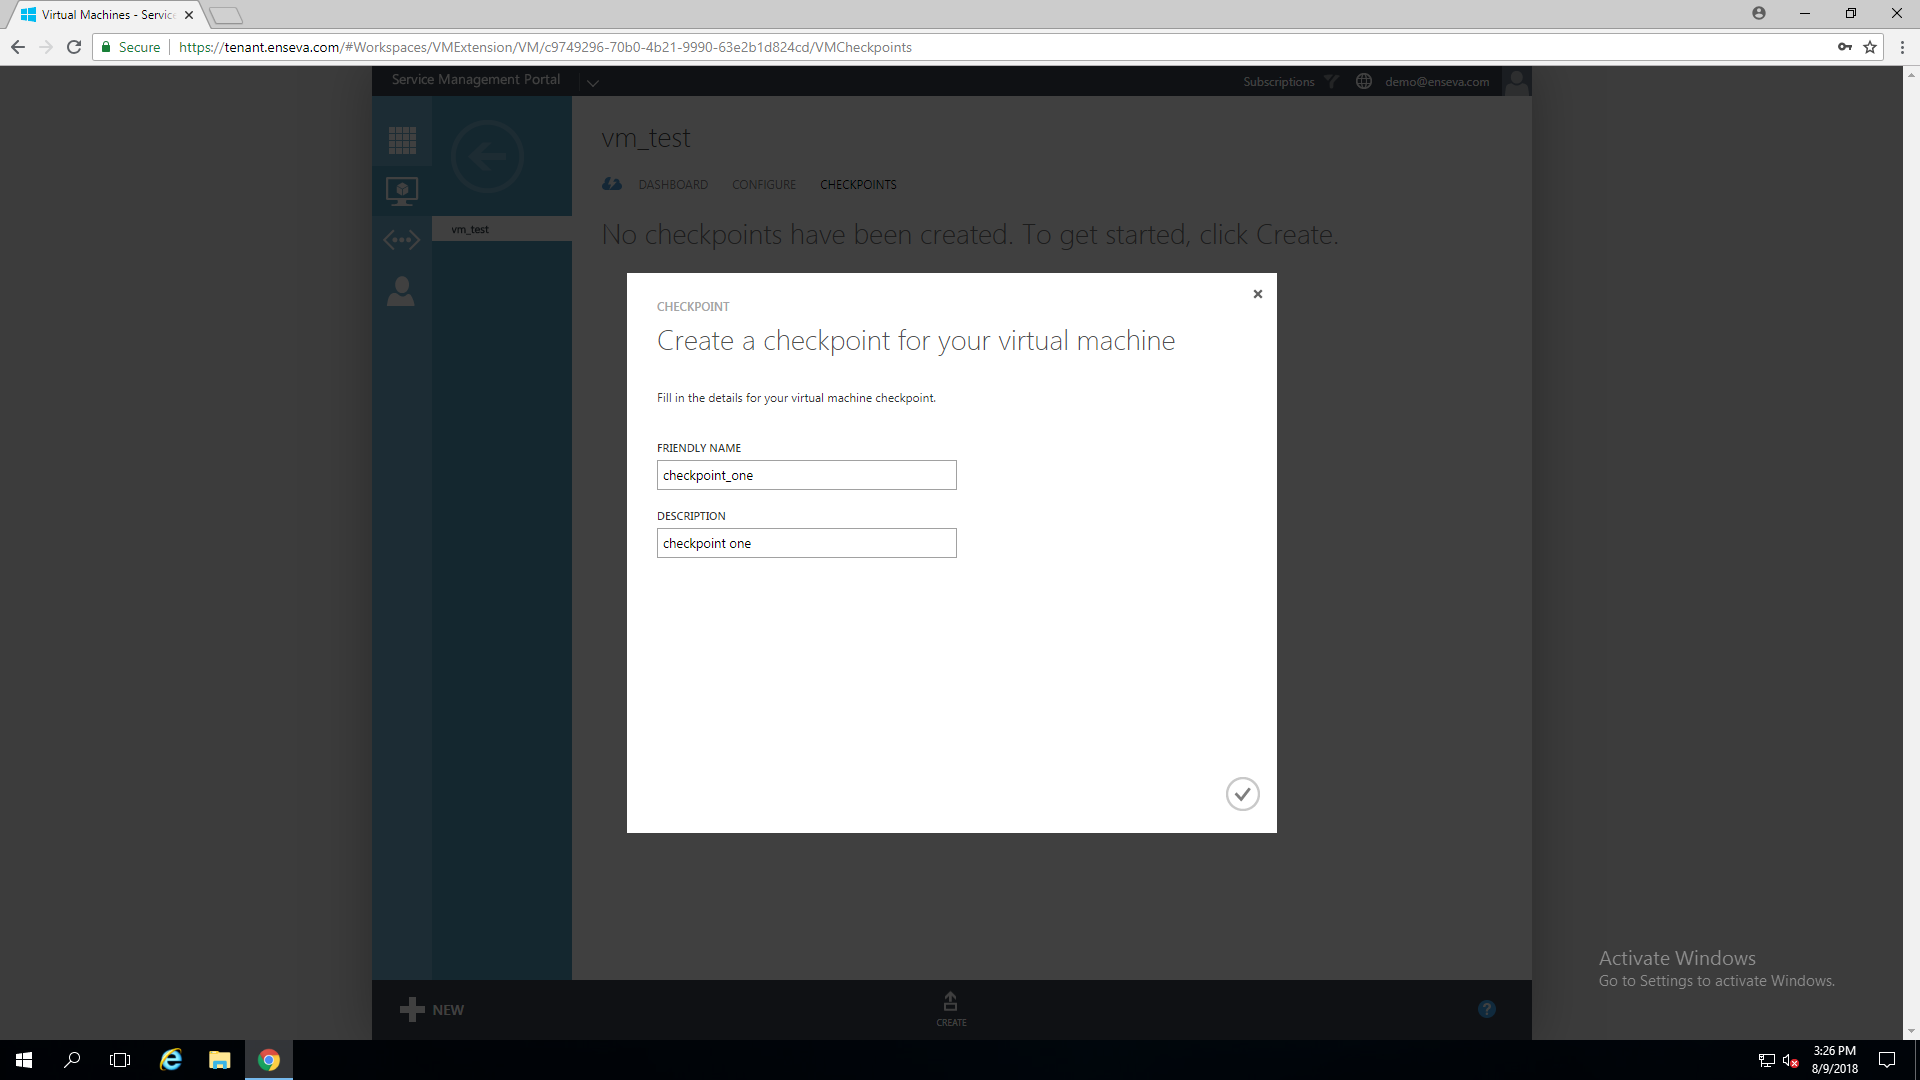
- Specify Checkpoint Details
A window will appear that allows you to specify a friendly name for your checkpoint and a description.

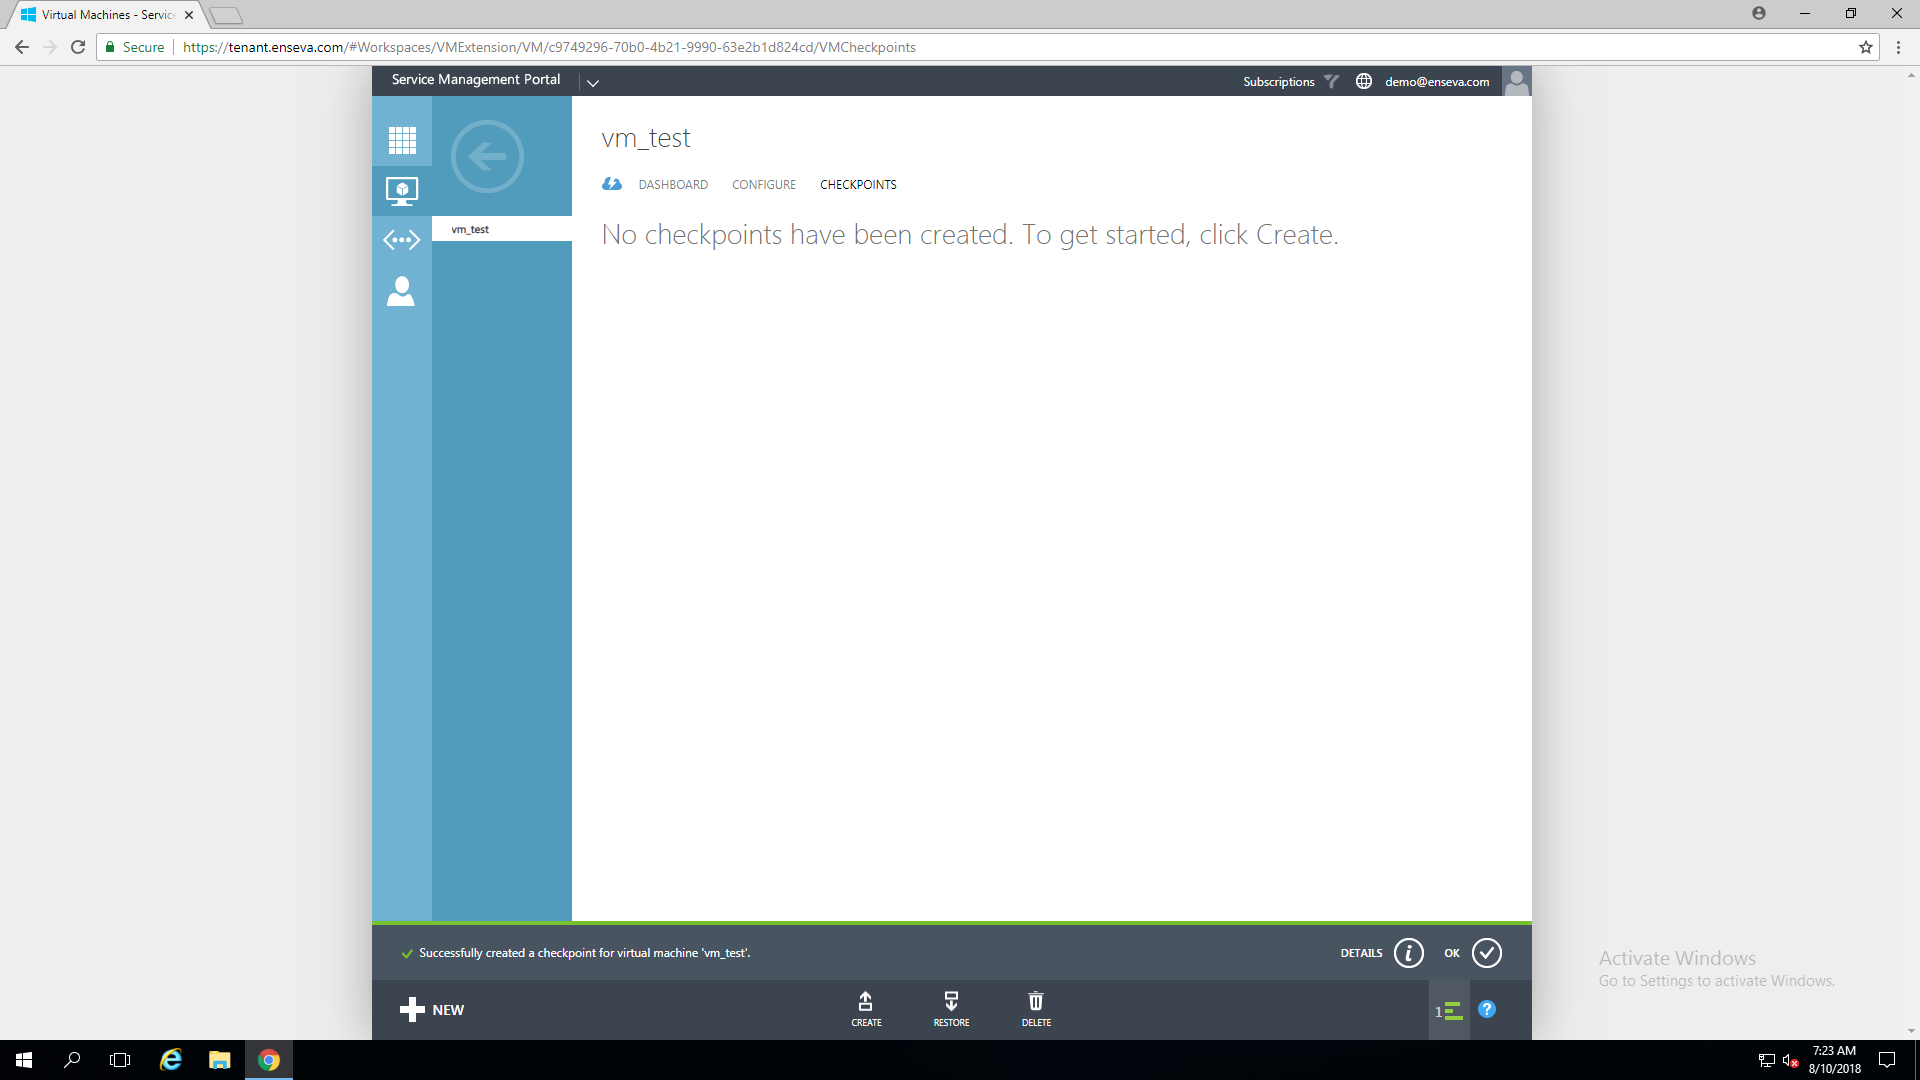
- Confirm Selection
A pop-up bar will appear towards the bottom of the screen asking you to confirm your decision, select 'Yes'
- Verify Creation
A pop-up bar towards the bottom of the screen will indicate that a checkpoint is being created, wait for this operation to complete.
When the operation has finished you will notice the message within the bottom pop-up bar change to Successfully created a checkpoint for virtual machine 'your_vm_name'

- Review Checkpoint
If you don't see your checkpoint appear, try refreshing your page to confirm it has been created.


Restoring an Instance to a Checkpoint
This guide will cover Restoring an Instance of a Virtual Machine to a Checkpoint
Restoring an Instance to a Checkpoint
- Navigate to the Tenant Portal
Navigate to https://tenant.enseva.com and enter your login credentials, then sign into your account.
For the purposes of this tutorial, we already have a virtual machine created with the friendly name of 'vm_test' - Select Virtual Machine
Click on the virtual machine's name in which you want to create a checkpoint, this will bring you to the vm's dashboard. - Select Checkpoints
From the dashboard, select checkpoints near the top of the page.
For the purposes of this tutorial, we already have a checkpoint created with the friendly name of 'checkpoint_one'
- Select Restore
Select the checkpoint that you would like to restore to, then click the 'Restore' button towards the bottom of the page.
- Confirm Restore
A pop-up bar will appear towards the bottom of the screen asking you to confirm your decision, select 'Yes'
- Verify Restore Process
A pop-up bar towards the bottom of the screen will indicate that the checkpoint is being restored, wait for the operation to complete.
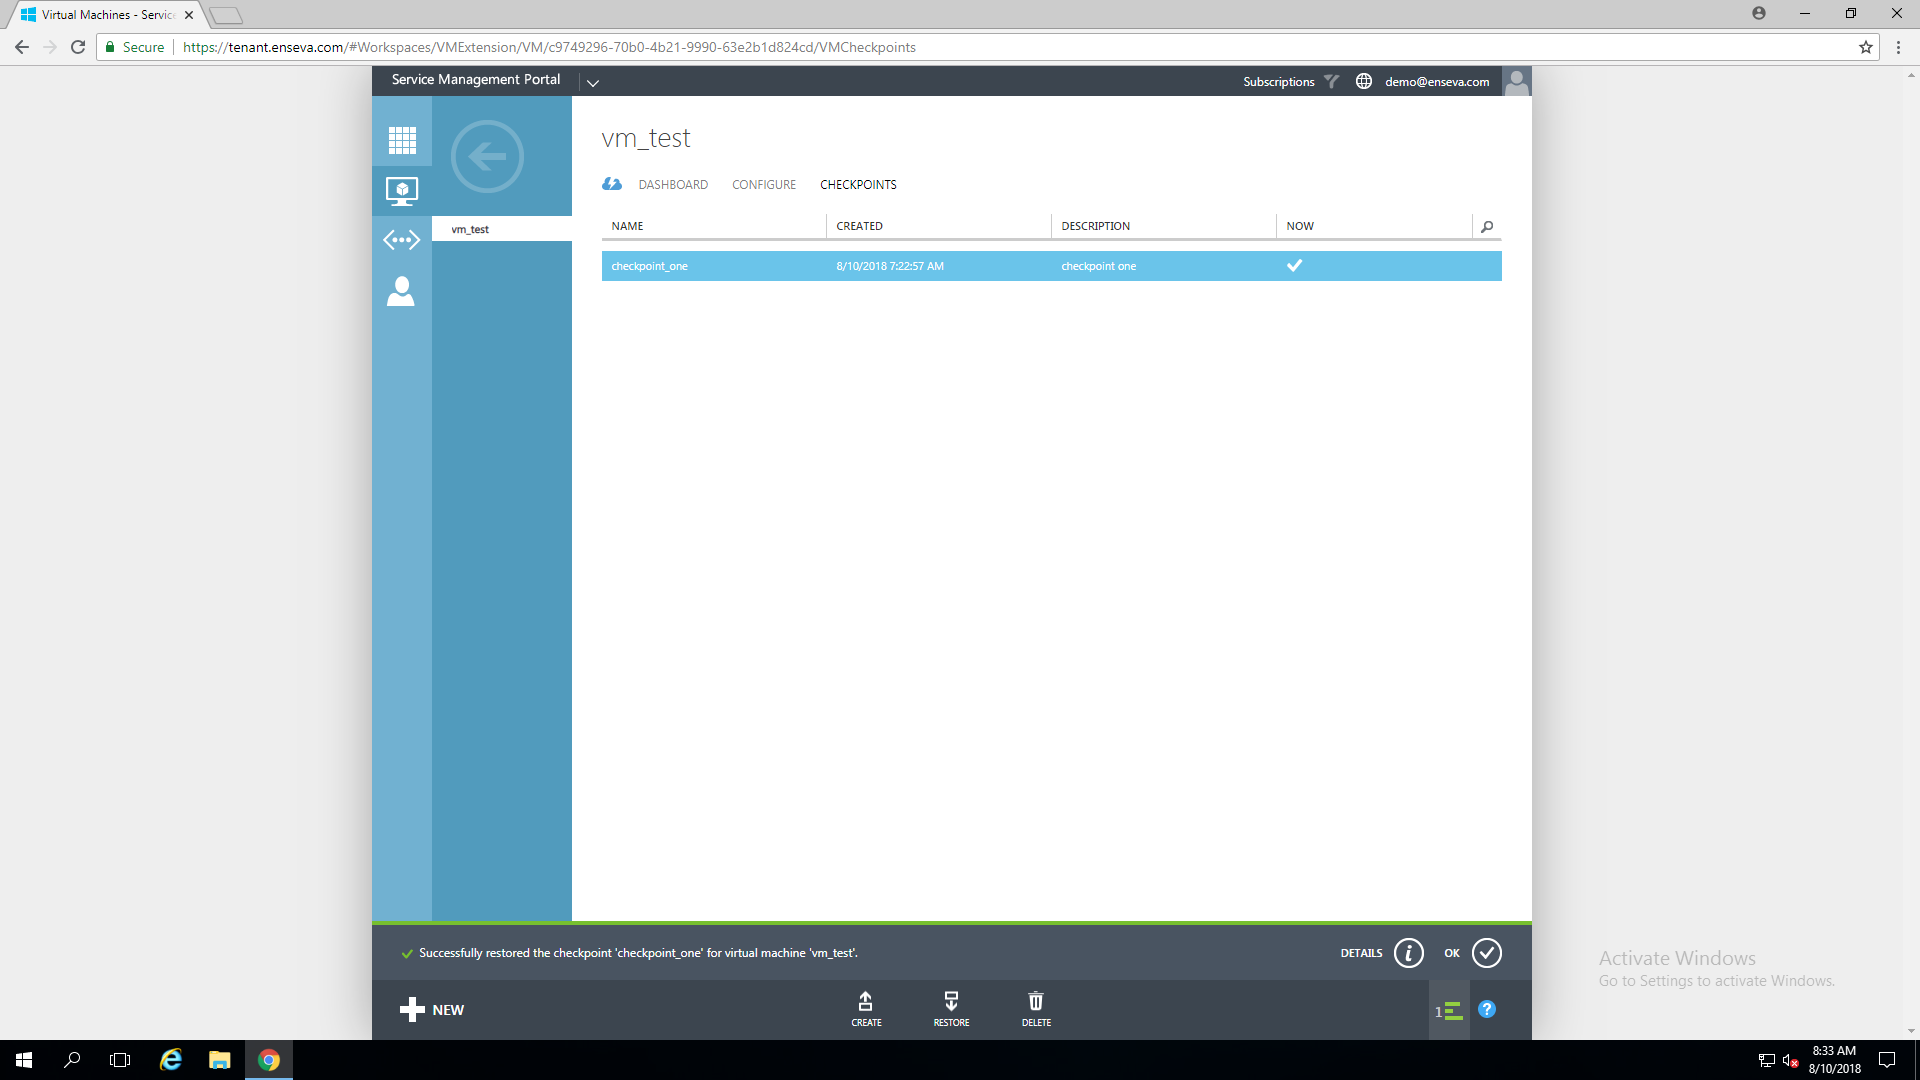
Once the restore has finished you will see a message indicating 'Successfully restored the checkpoint 'checkpoint' for the virtual machine 'virtual_machine'


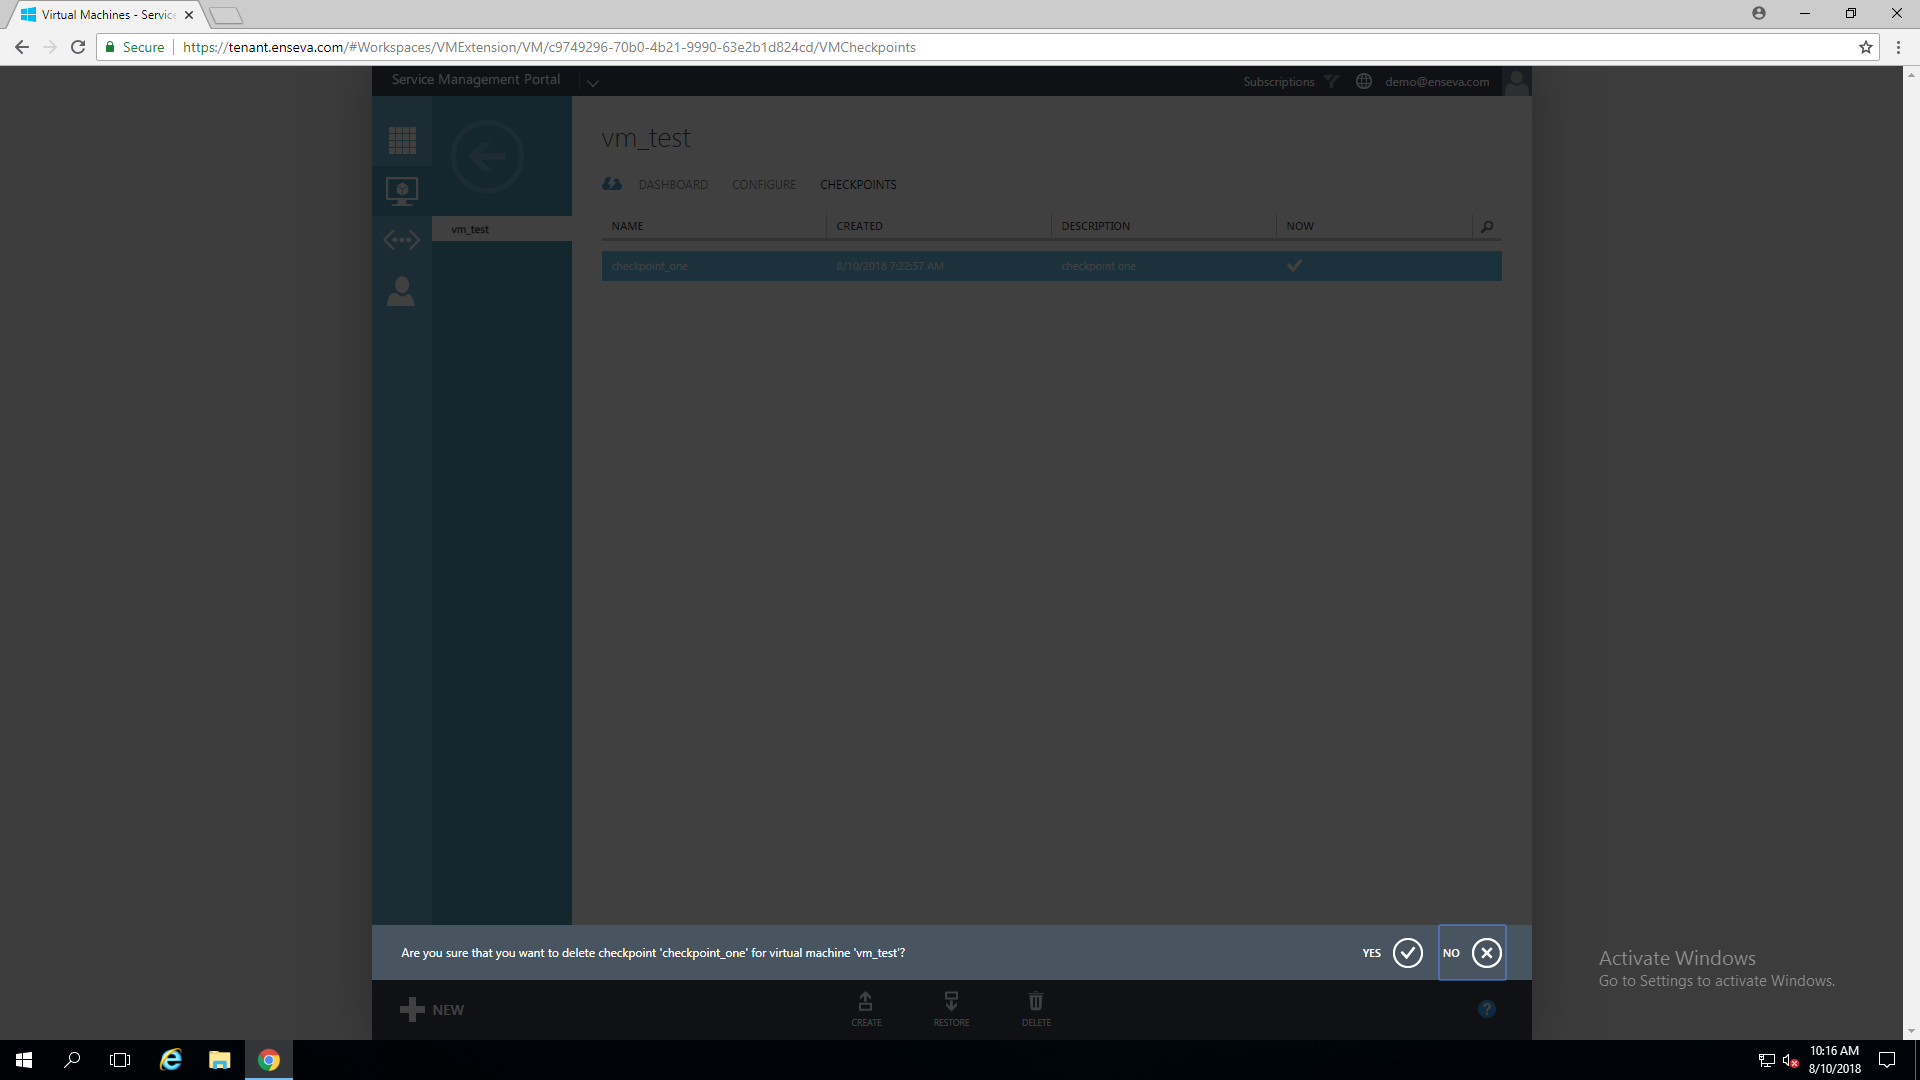
Deleting an Instance Checkpoint
This guide will cover Deleting an Instance Checkpoint
Deleting an Instance Checkpoint
- Navigate to the Tenant Portal
Navigate to https://tenant.enseva.com and enter your login credentials, then sign into your account.
For the purposes of this tutorial we already have a virtual machine with a friendly name of 'vm_test' that has a checkpoint created for it named 'checkpoint_one' - Select Virtual Machine
Click on the virtual machine's name in which you would like to delete a checkpoint, this will bring you to the vm's dashboard. - Select Checkpoints
From the dashboard, select checkpoints near the top of the page, then select the checkpoint in which you would like to delete.
- Delete a Checkpoint
Near the bottom of the page, click the 'Delete' button.
- Confirm Selection
A pop-up bar will appear towards the bottom of the screen asking you to confirm your decision, select 'Yes'
- Verify Removal
A pop-up bar towards the bottom of the screen will indicate that a checkpoint is being deleted, wait for this operation to complete.
When the operation has finished you will notice the message within the bottom pop-up bar change to Successfully deleted checkpoint 'checkpoint_name' for virtual machine 'Virtual_machine'