Enseva Support Portal
Managing Preferences
Changing Your Password
We recommend updating your password regularly to keep your account secure.
In this tutorial we will review how to update your password from your Enseva account.
Changing Your Password
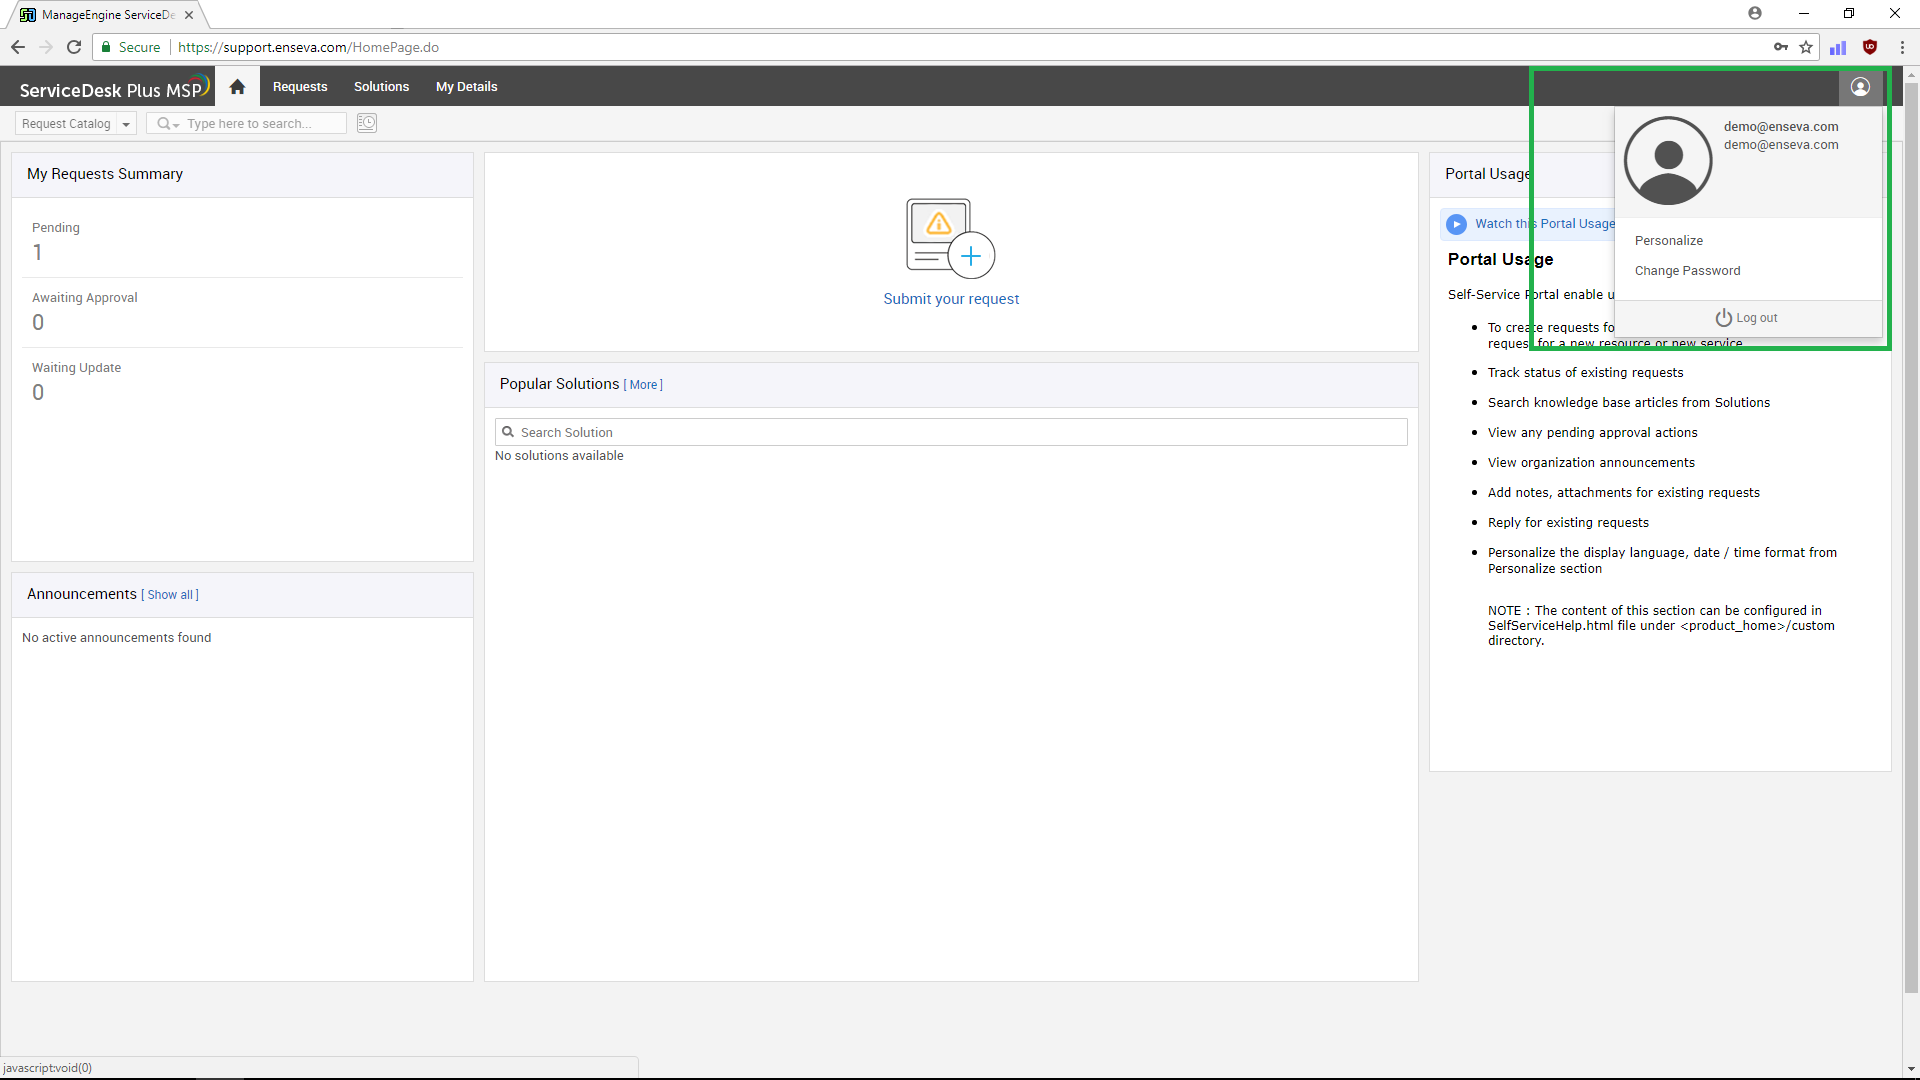
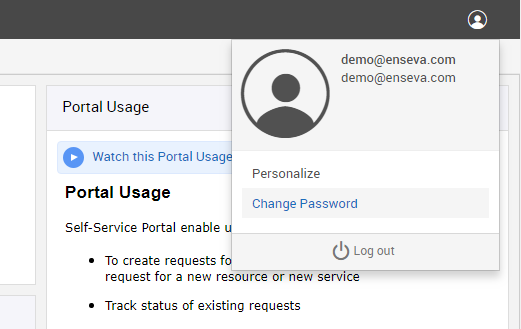
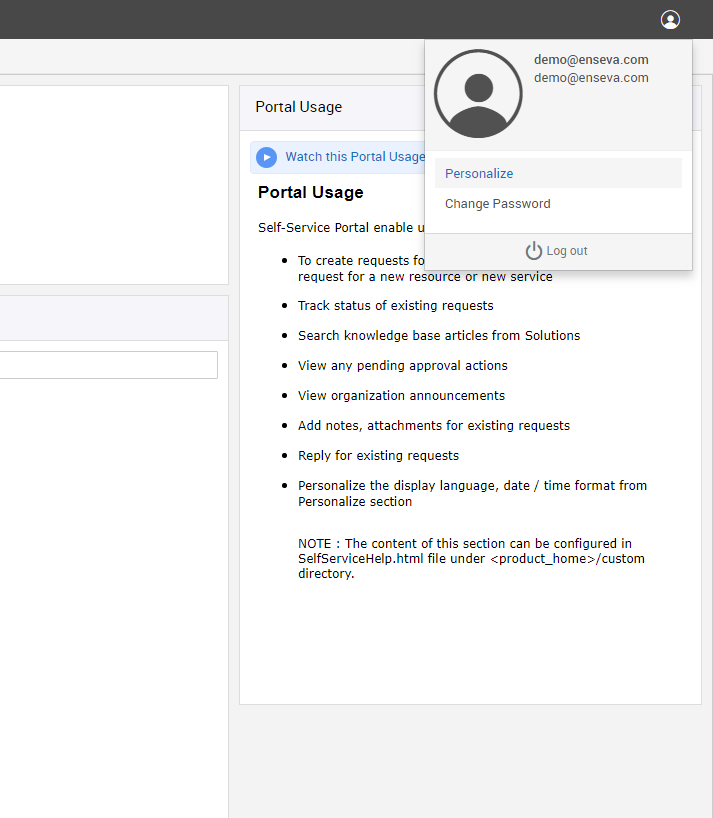
- To change your password while logged in, click on your User Menu in the upper-right corner of your account home page.

- Click on Change Password.

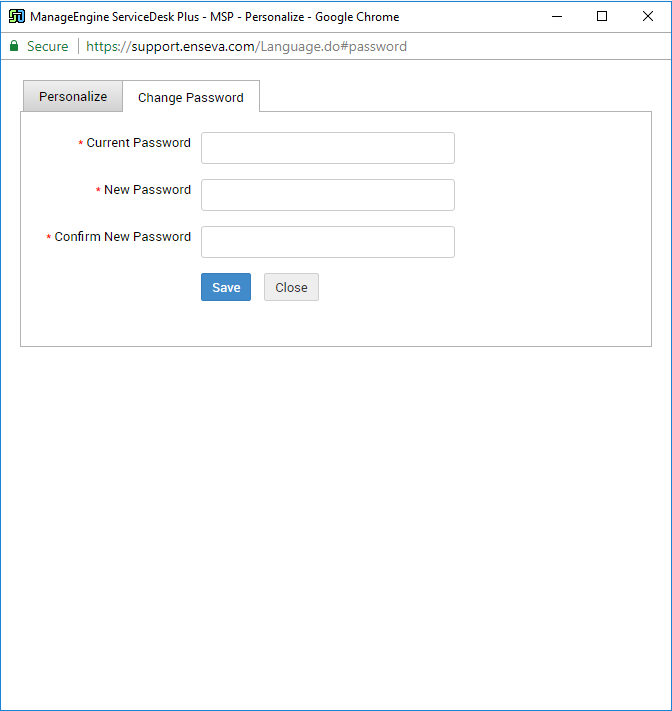
- You'll see a pop-up window as shown below.

- After you click Save you'll see a success screen confirming you've updated your password.


Resetting a Forgotten Password
We all forget our passwords sometimes, but it's easy to reset if you do. Follow the tutorial below to reset your forgotten password.
Changing Your Password (Forgot Password)
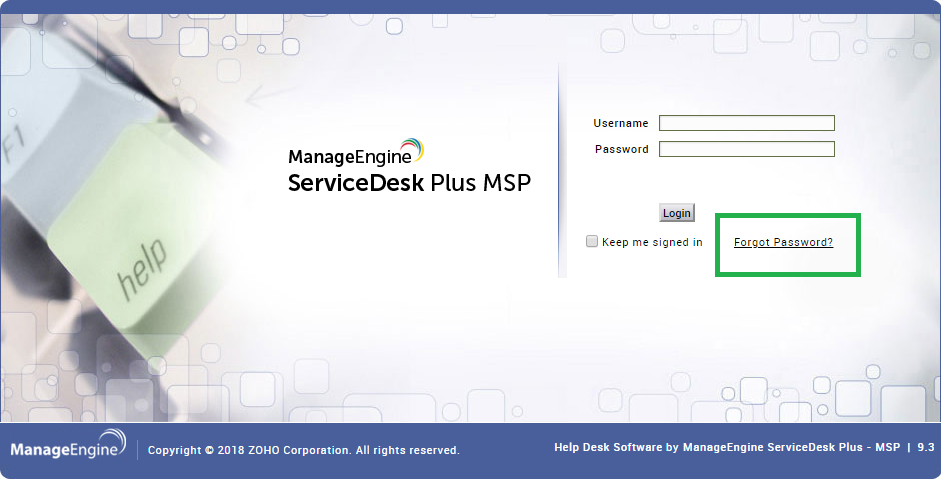
- If you've forgotten your password, start by visiting Enseva Support and click the Forgot Password link.

- On the Forgot Password screen, enter your Login/User Name and choose Not in Domain in the For Domain field. Then click Send Email.

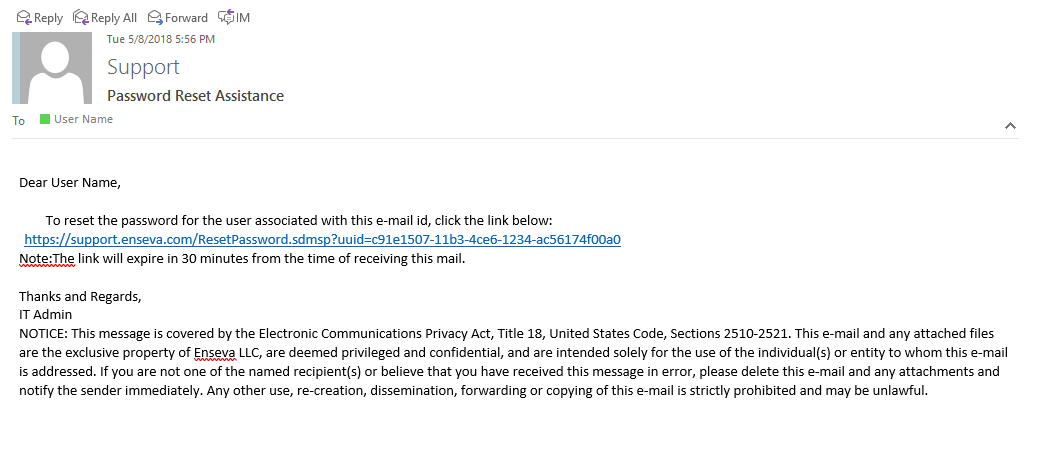
- You'll receive a confirmation that an email will be sent to the address on file and that you will need to open this email to continue the password reset process.

- Open this email and click the link provided.

- You will be taken to a page where you can now set a new password. Enter the new password, then repeat it in the next field to confirm. Click Submit.

- You'll receive confirmation that you've reset your password. You should now be able to return to the Enseva Support page at https://support.enseva.com and login with your new password.


Setting Time Zone and Date/Time Formats
To make your account easier to manage it is important to be able to properly recognize date and time where it is displayed across the account.
For example, when making a service request, the time stamp shown for the due date and creation date can be formatted to your preference and based on your region.
We will discuss how to modify these settings in this tutorial.
Setting Time Zone and Date/Time Formats
- Start by clicking on the User Menu in the upper-right corner of your account home page.
- Click on Personalize.

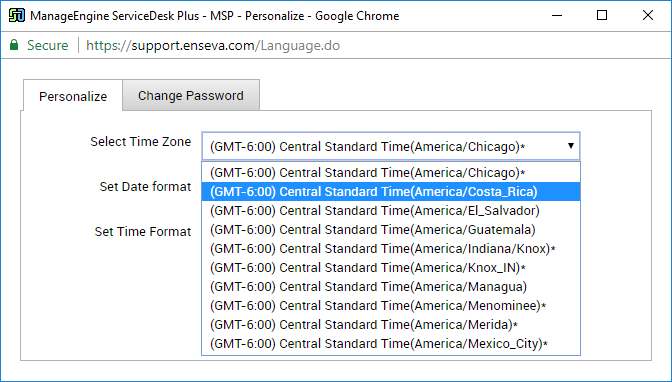
- On the pop-up window you will see where you can adjust the following settings

- Time Zone
Set the value for your region
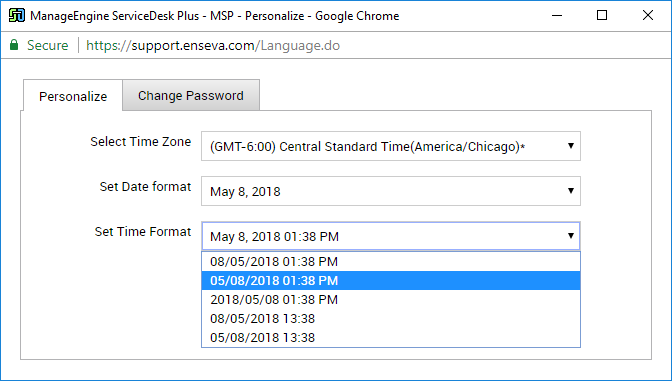
- Date Format
This will adjust the appearance of dates across your account (exa. 5 May, 2018 vs. May 5th, 2018)
- Time Format
This will adjust the appearance of date and time across your account. In most cases, this will take precedence over the Date Format setting


Managing Requesters
Adding a Support Requester
We all need tech support on occasion, and Enseva is here to help. A Requester is a person you allow to open technical support requests on behalf of your organization or company. You can add a new Requester using this tutorial.
Adding a Support Requester to Your Account
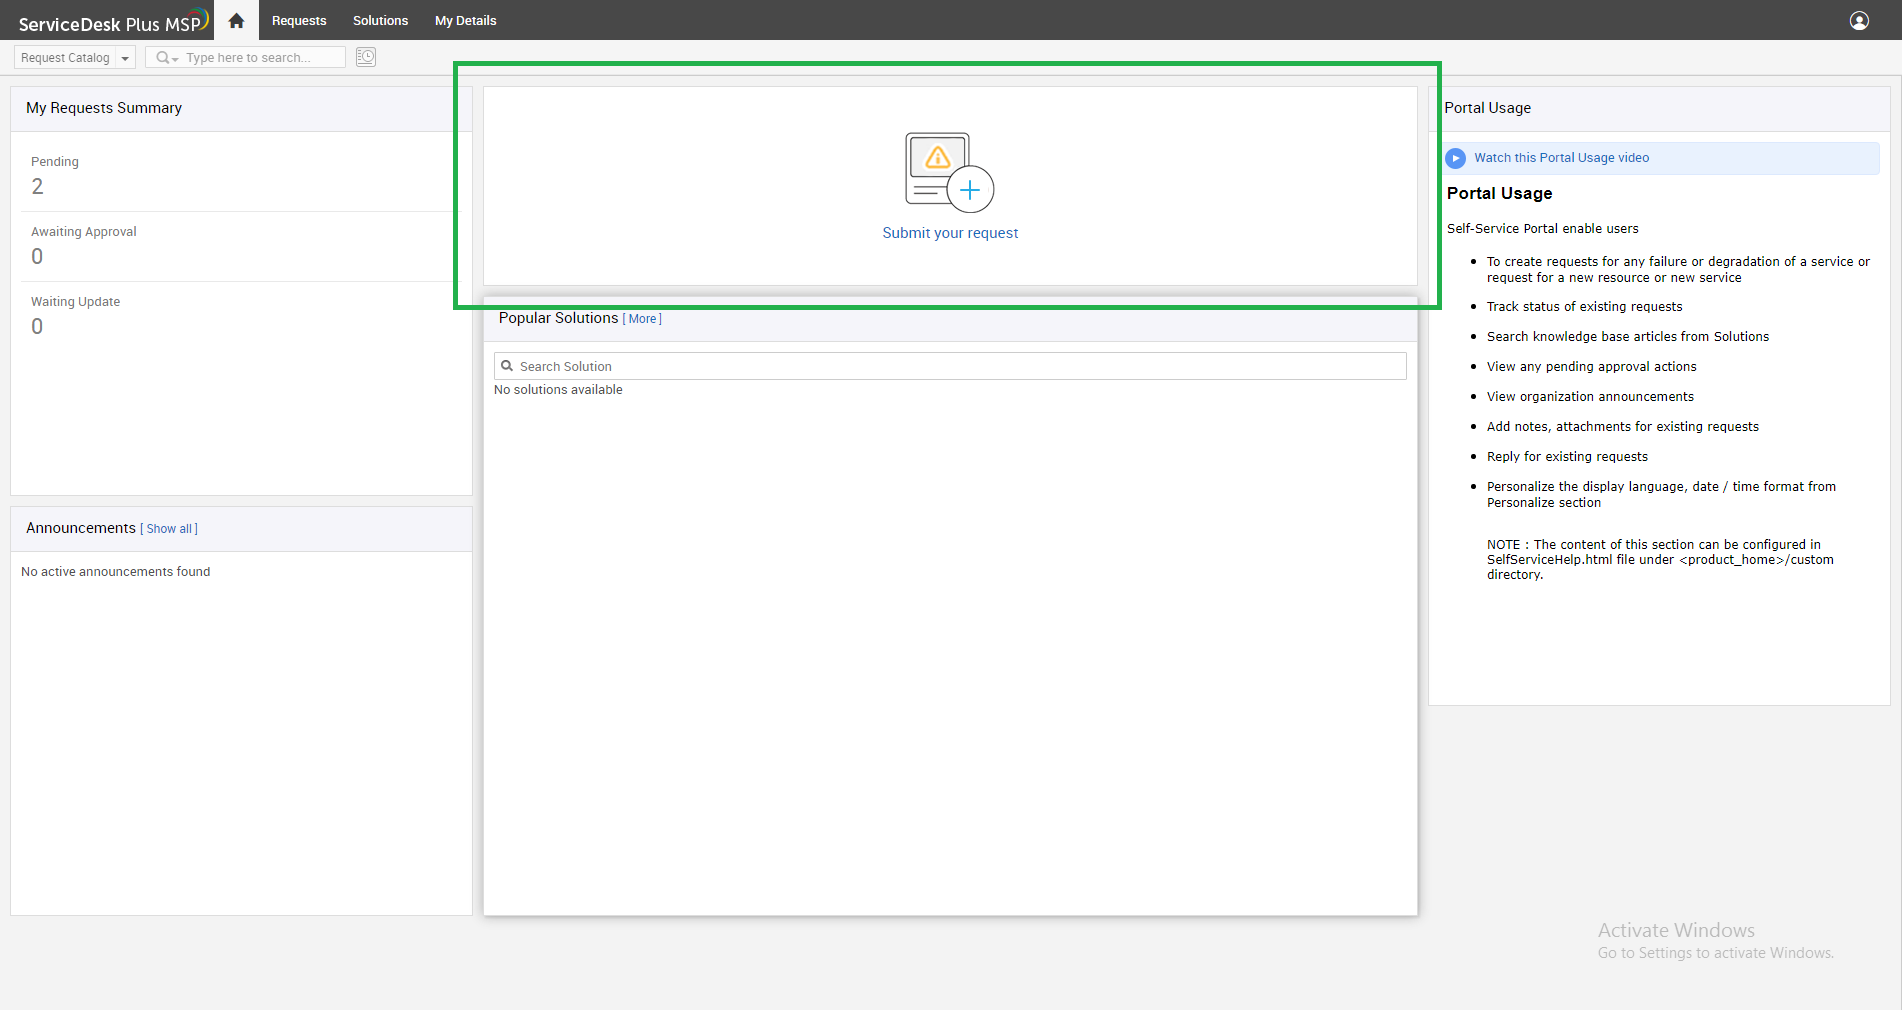
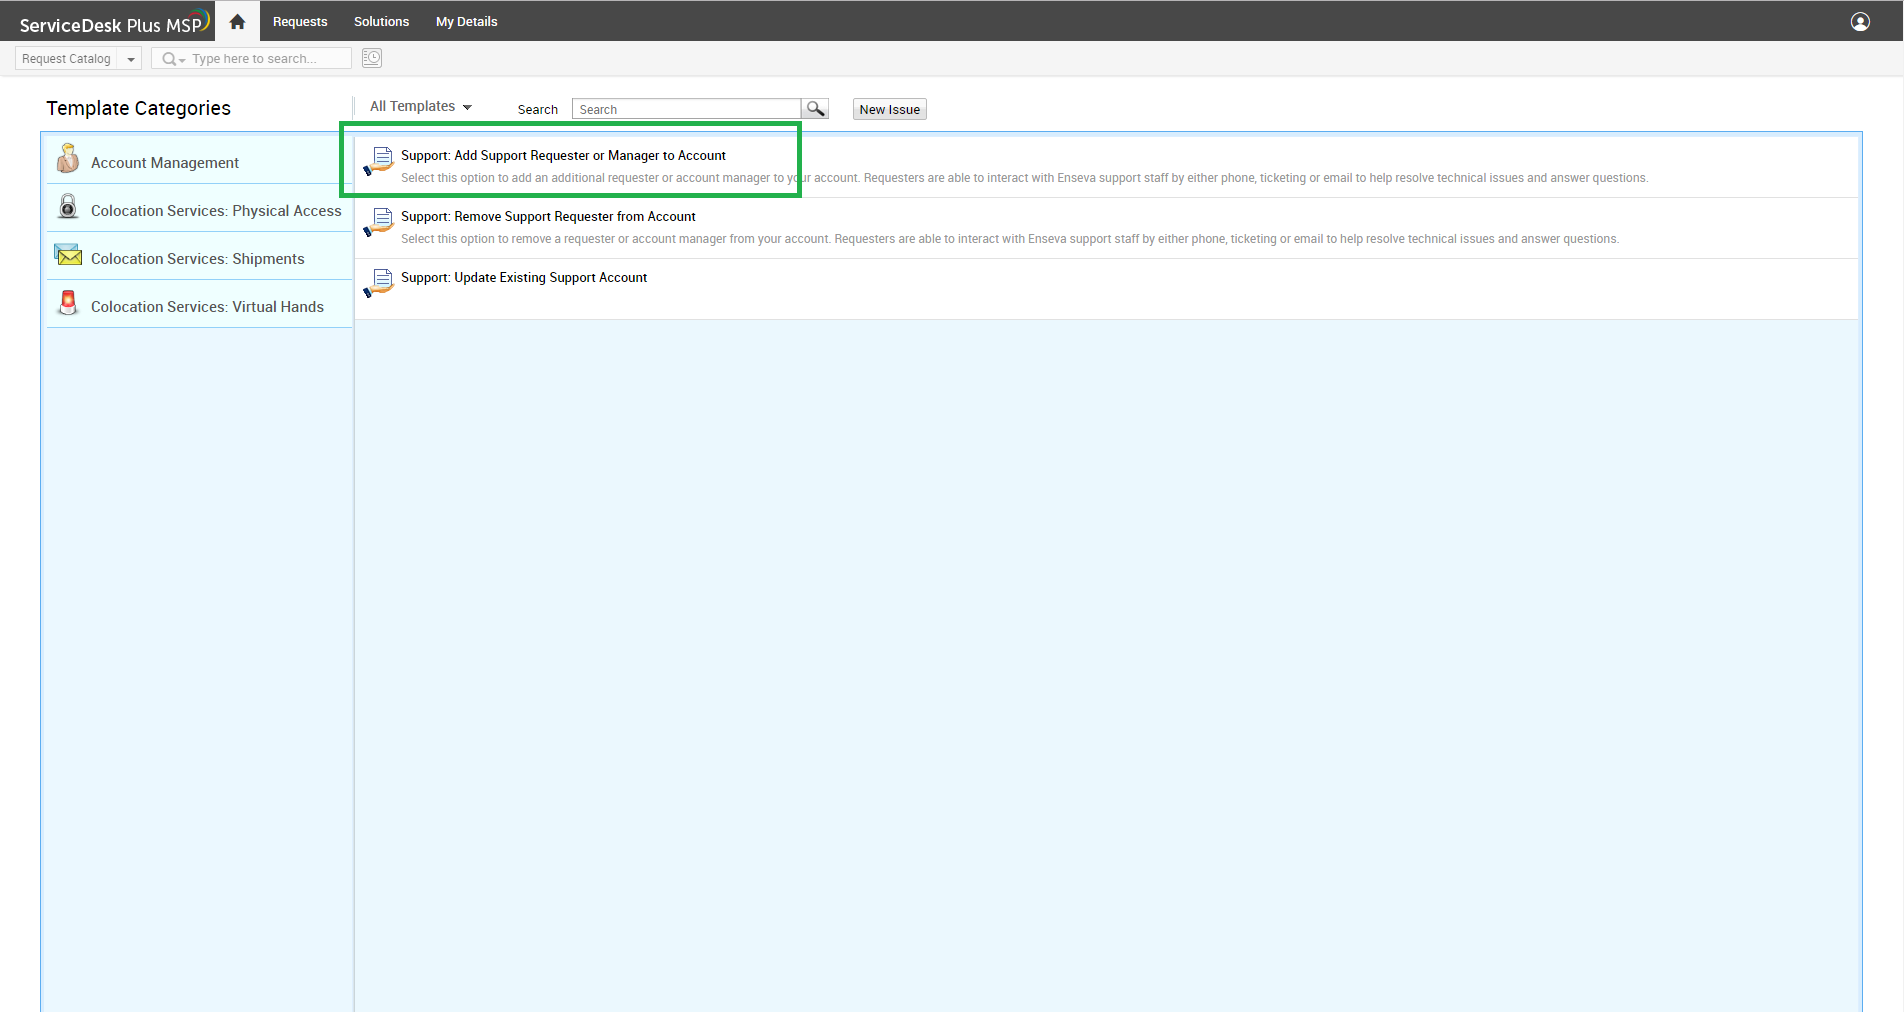
- From your account home page, click on Submit your request .

- Now, click on Support: Add Support Requester or Manager to Account .

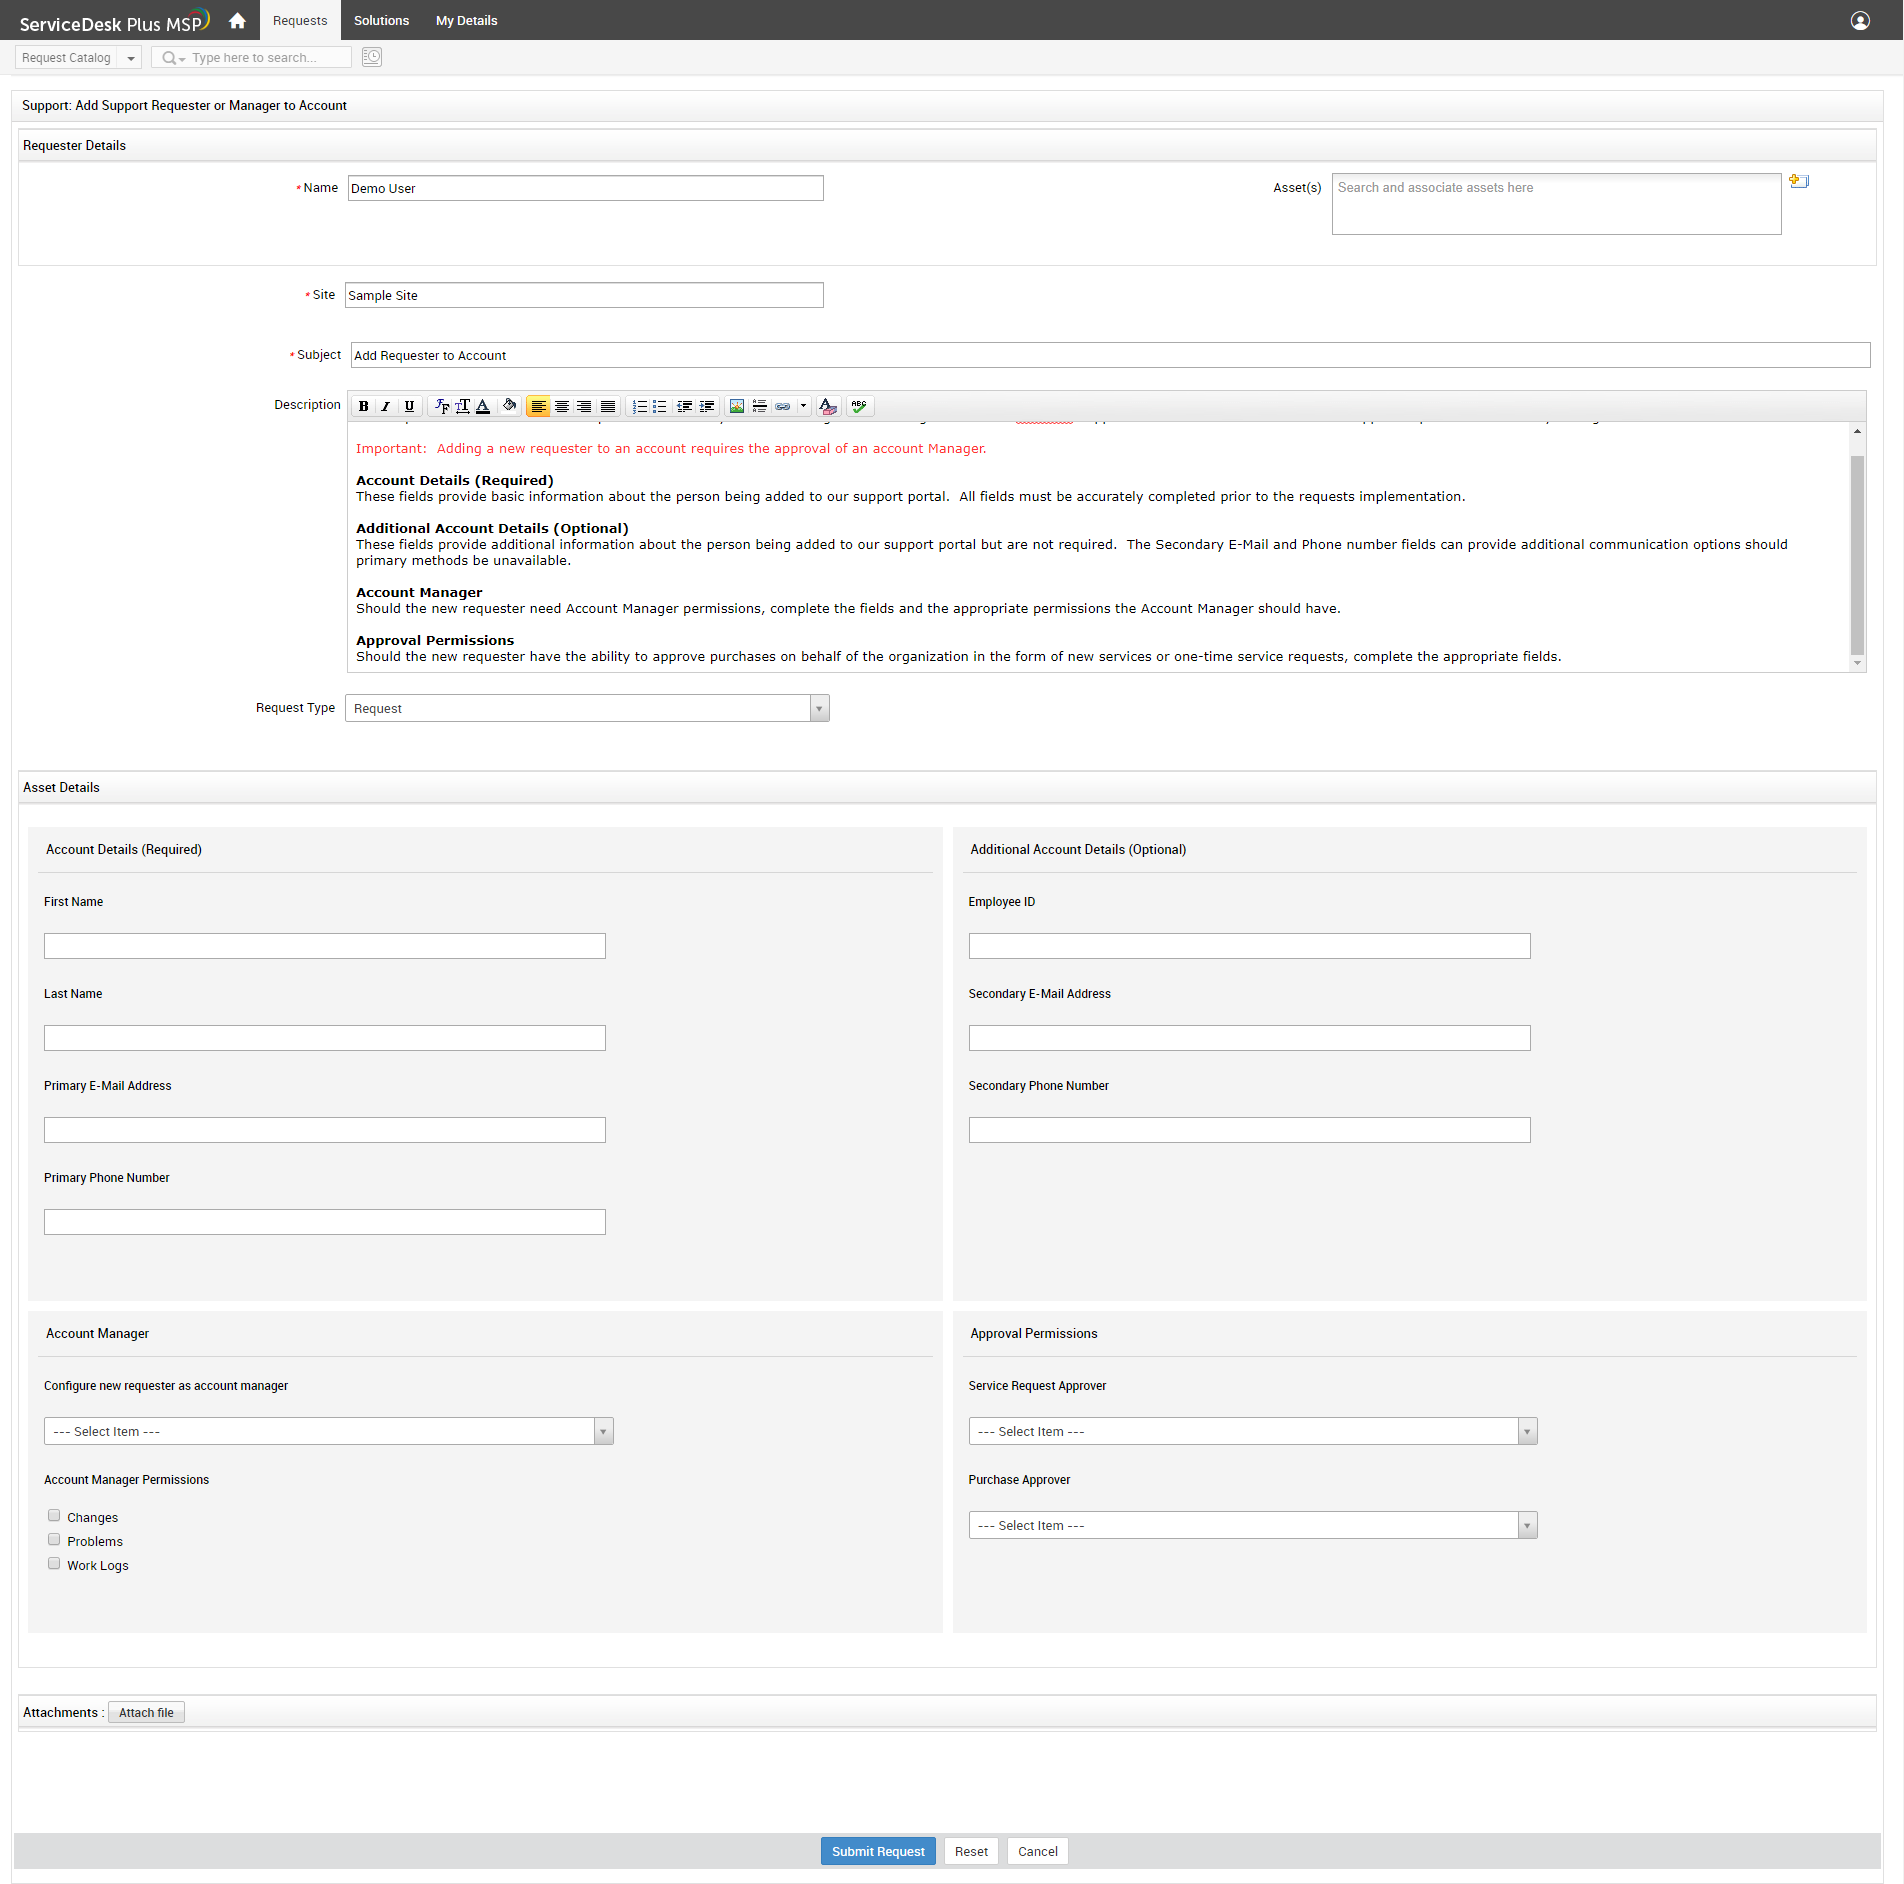
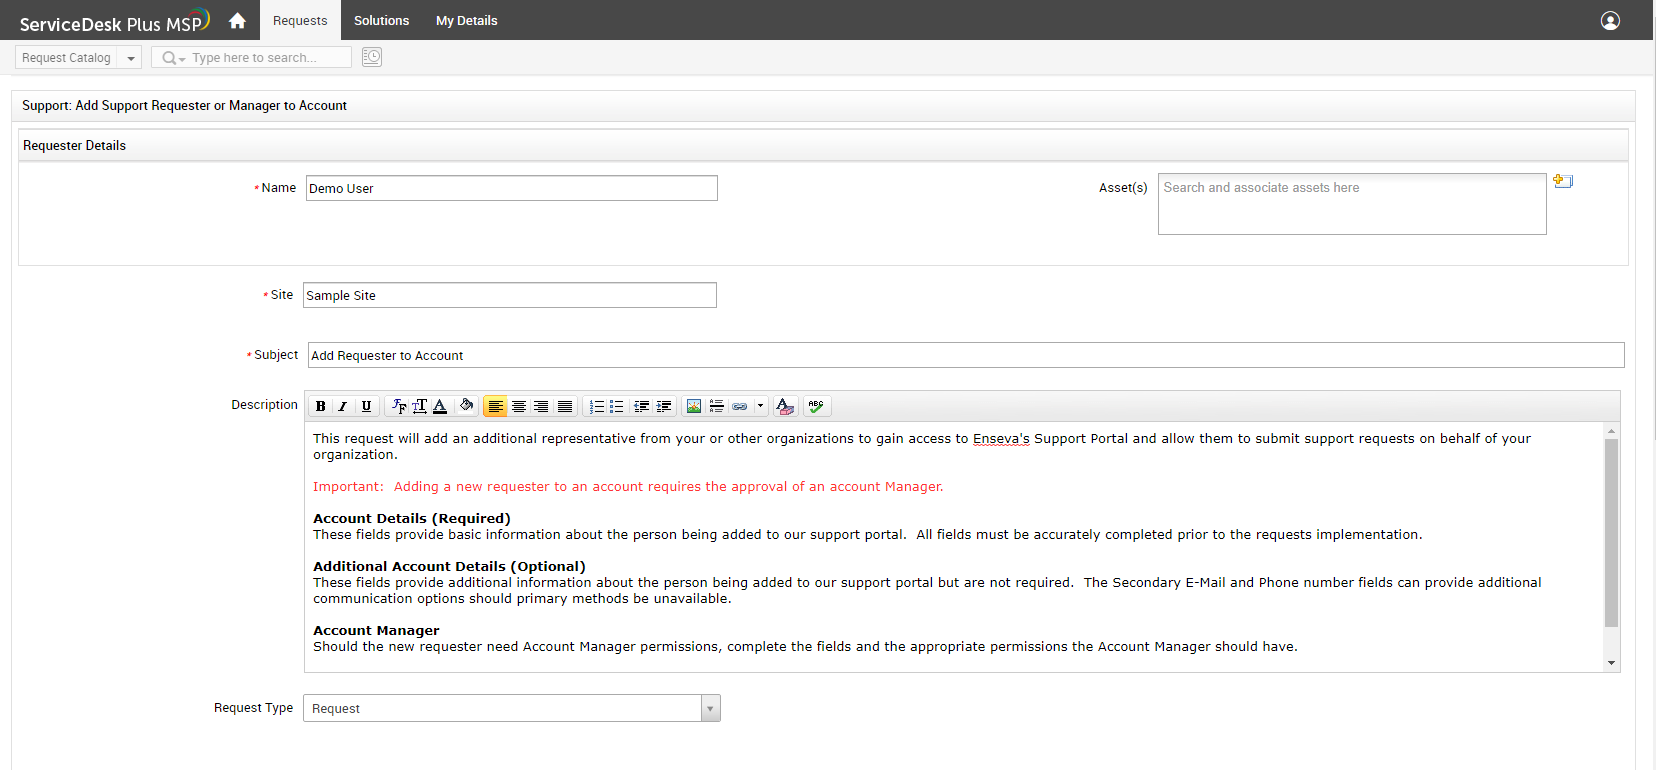
- You will be taken to the ticket screen you see below. We will review each section in the steps below.

- At the top of the request form you will see basic instructions on how to use this form.
Note: You do not need to edit information in this area.
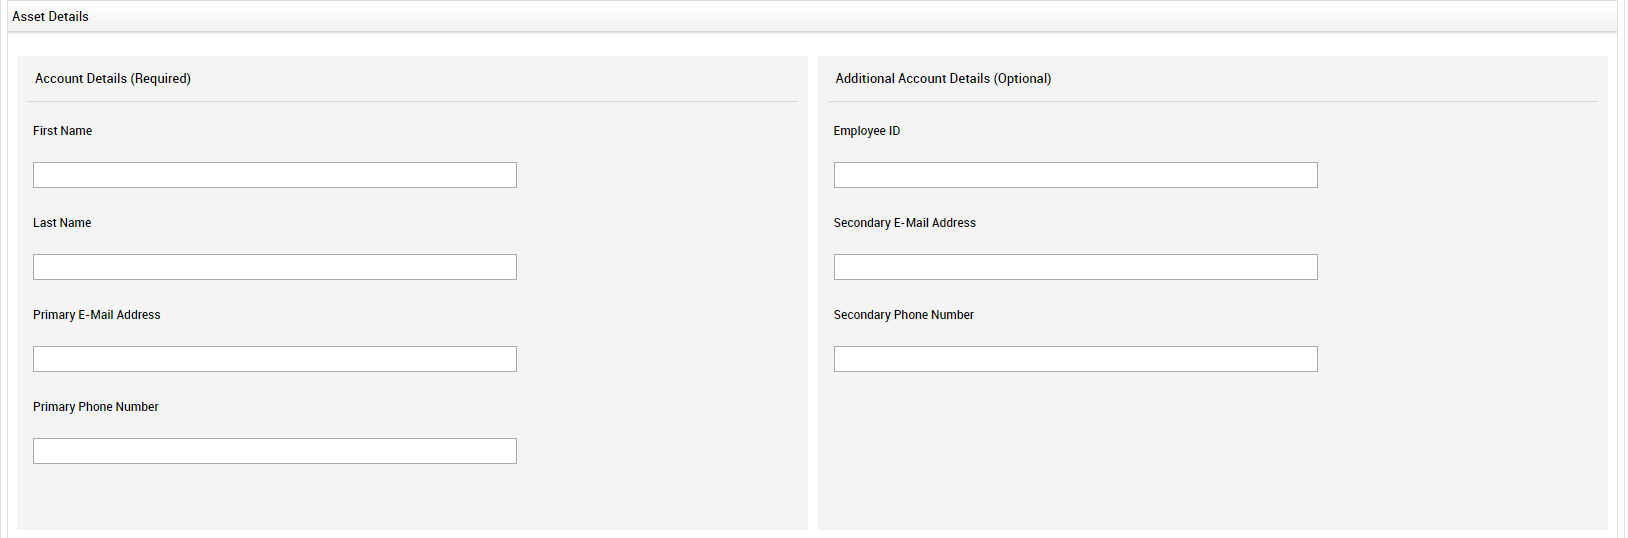
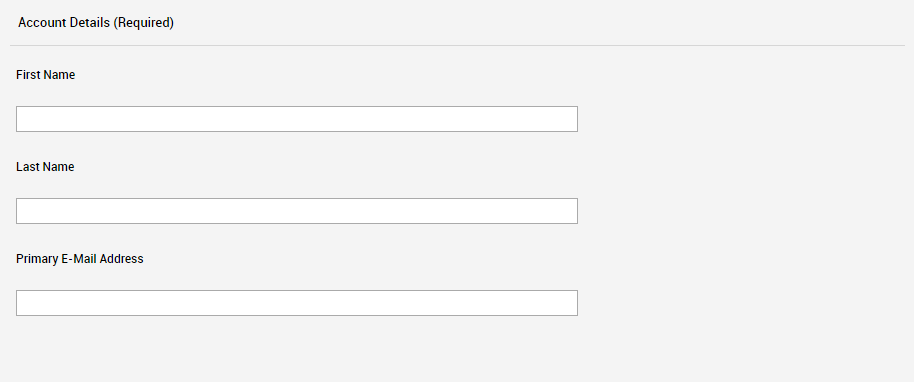
- Enter the new user Account Details and Additional Account Details
Provide the relevant information about the new Requester you would like to add.
Note the fields marked as Required and Optional.
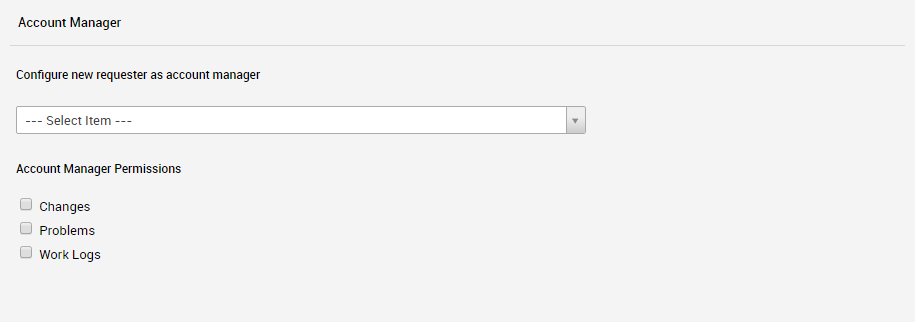
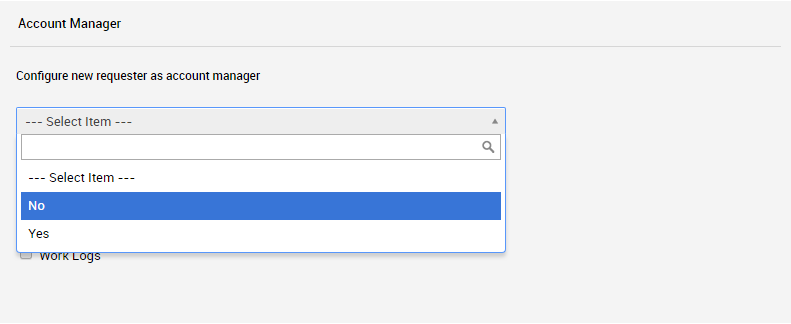
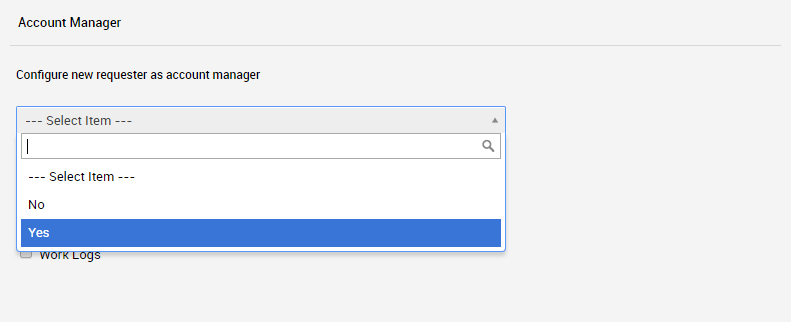
- Select your settings for "Configure new requester as account manager"
Select No on the drop-down menu.
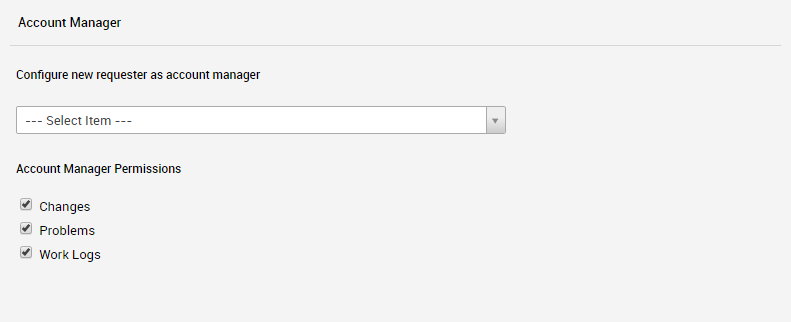
You do not need to make a selection on the Account Manager Permissions when adding Requesters.
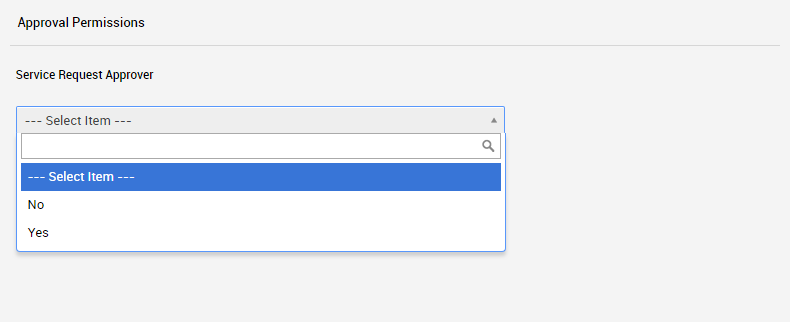
- Under Approval Permission, select the options you prefer for the new Requester.


- When you are finished, click Submit Request at the bottom.
You will receive a response within 24 hours confirming your request has been completed.


Adding an Account Manager
An Account Manager can be given access to make purchases, account changes, modify the level of access for other users and request technical assistance on behalf of your organization or company. You can add a new Account Manager and set their level of permission by following the steps below.
Adding an Account Manager to Your Account
- From your account home page, click on Submit your request
- Now click on Support: Add Support Requester or Manager to Account
- You will be taken to the ticket screen you see below. We will review each section in the steps below.
- At the top of the request form you will see basic instructions on how to use this form. You do not need to edit information in this area.
- Under Account Details and Additional Account Details, provide the relevant information about the new Account Manager you would like to add. Note the fields marked as Required and Optional.
- In the Account Manager section, under "Configure new requester as account manager" select Yes on the drop-down menu.
- Under "Account Manager Permissions" select the check boxes for the permissions you would like to set for the new Account Manager.

- Under Approval Permission, select the options you prefer for the new Account Manager.

- When you are finished, click Submit Request at the bottom. You will receive a response within 24 hours confirming your request has been completed.


Removing a Support Requester
Any time roles change in your organization, you may need to change who has access to your Enseva account. In order to do so, you can remove a Requester or Account manager using the process in this tutorial.
Removing a Support Requester from Your Account
- Start by clicking "Submit your request" from your account home page.
- Next, click on "Support: Remove Requester from Account"

- You'll see the following screen with a description of the steps to complete your request.

- Fill out the required details for the Requester you wish to remove.

- When you are finished, click Submit Request at the bottom.
You will receive a response within 24 hours confirming your request has been completed.


Updating a Support Requester
It is important security practice to maintain control over who has access to your Enseva account. In order to manage the level of access provided to those who manage your account, you can update these settings at any time using the steps below.
Updating a Support Requester or Account Manager
- From your account home page, click on Submit your request.

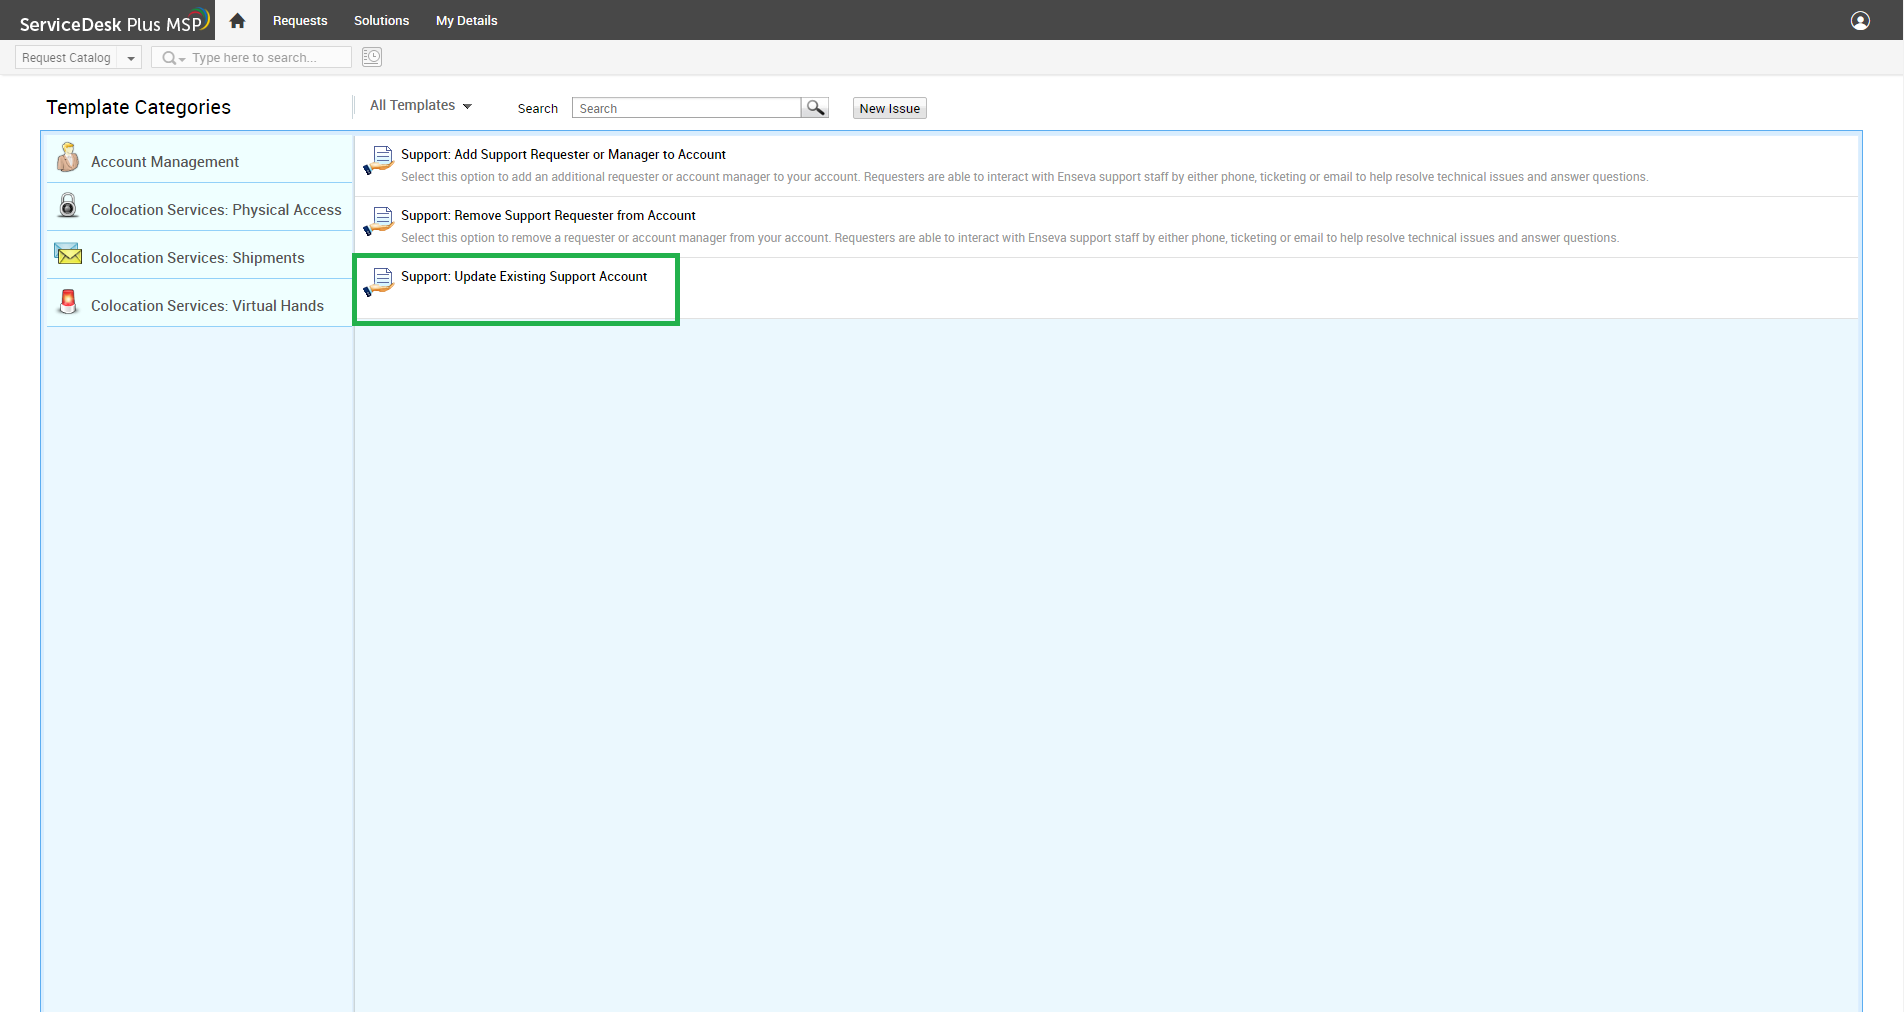
- Now, click on Support: Update Existing Support Account
- You will be taken to the ticket screen you see below. We will review each section in the steps below.

- At the top of the request form you will see basic instructions on how to use this form.
Note: You do not need to edit information in this area. - Here you can update Account Details and Additional Account Details for the user.
Provide the relevant information about the Requester or Account Manager you would like to update
Note the fields marked as Required and Optional - In the Account Manager section, under "Configure new requester as account manager" select the appropriate setting for the user being updated.
- Select No for Requester
- Select Yes for Account Manager
- Be sure to update the check boxes for Changes, Problems and Work Logs as needed if this person is an Account manager
- Under Approval Permission, select the options you prefer to update for the Requester or Account Manager.

- When you are finished, click Submit Request at the bottom.
You will receive a response within 24 hours confirming your request has been completed.