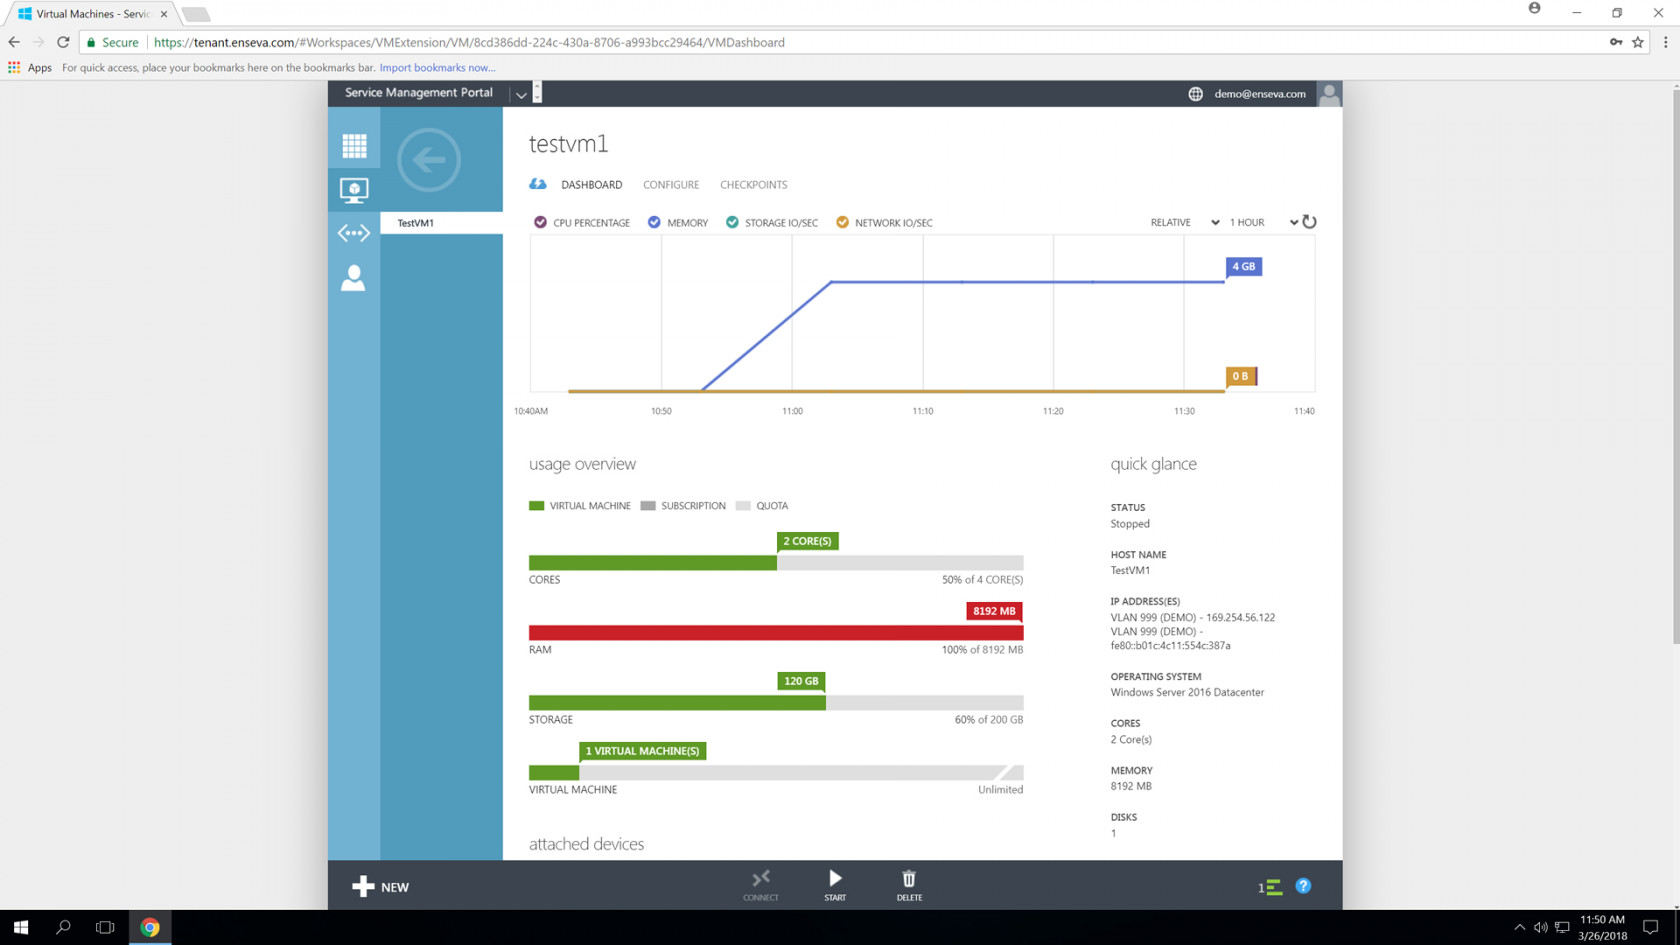
Changing an Instances Hardware Profile
Hardware profiles allow administrators to configure the number of vCPU Cores and GB of memory allocated to a virtual machine instance. All virtual machine instances have 120GB block storage devices by default and the virtual disks may be managed independently of the hardware profile that is assigned to a virtual machine instance.
For the purposes of this tutorial, it is assumed that you have already logged into the Enseva Azure portal and are the owner of one or more subscriptions.
Changing an Instance Hardware Profile
-
To change the hardware profile that is assigned to a virtual machine instance, the instance must be first placed in an offline state. Visit related tutorials for details on how to place a virtual machine instance in a stopped state.
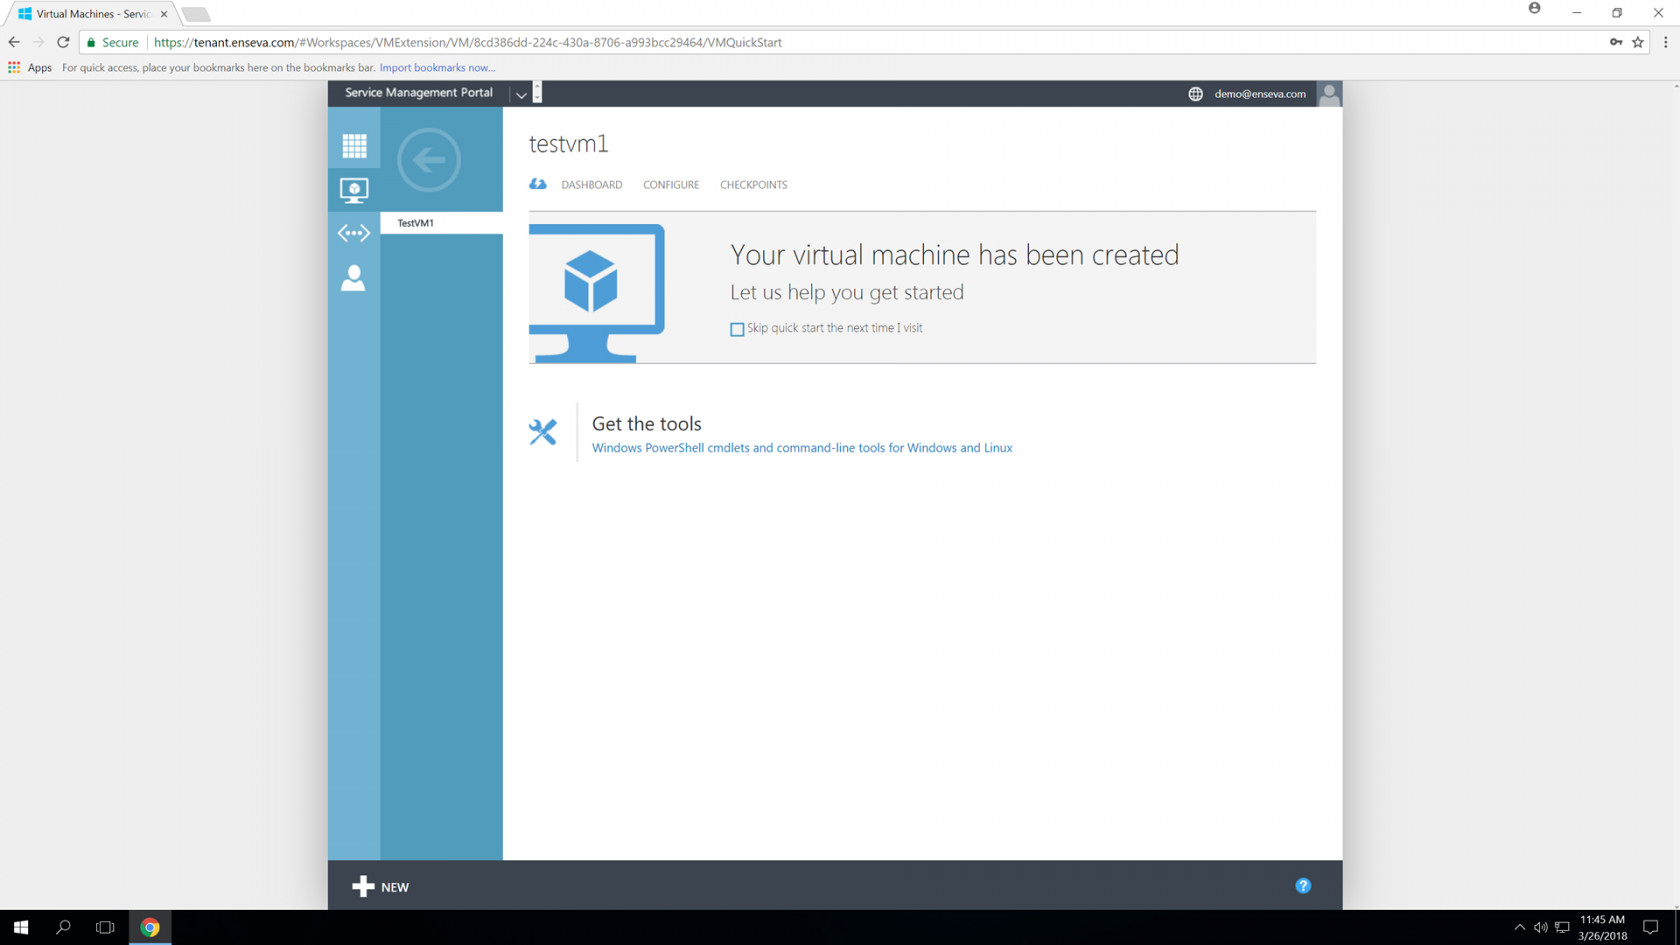
With the virtual machine instance already in a stopped state, select the item in the All Items or Virtual Machine menu. This will present an instance welcome message for the instance that was selected.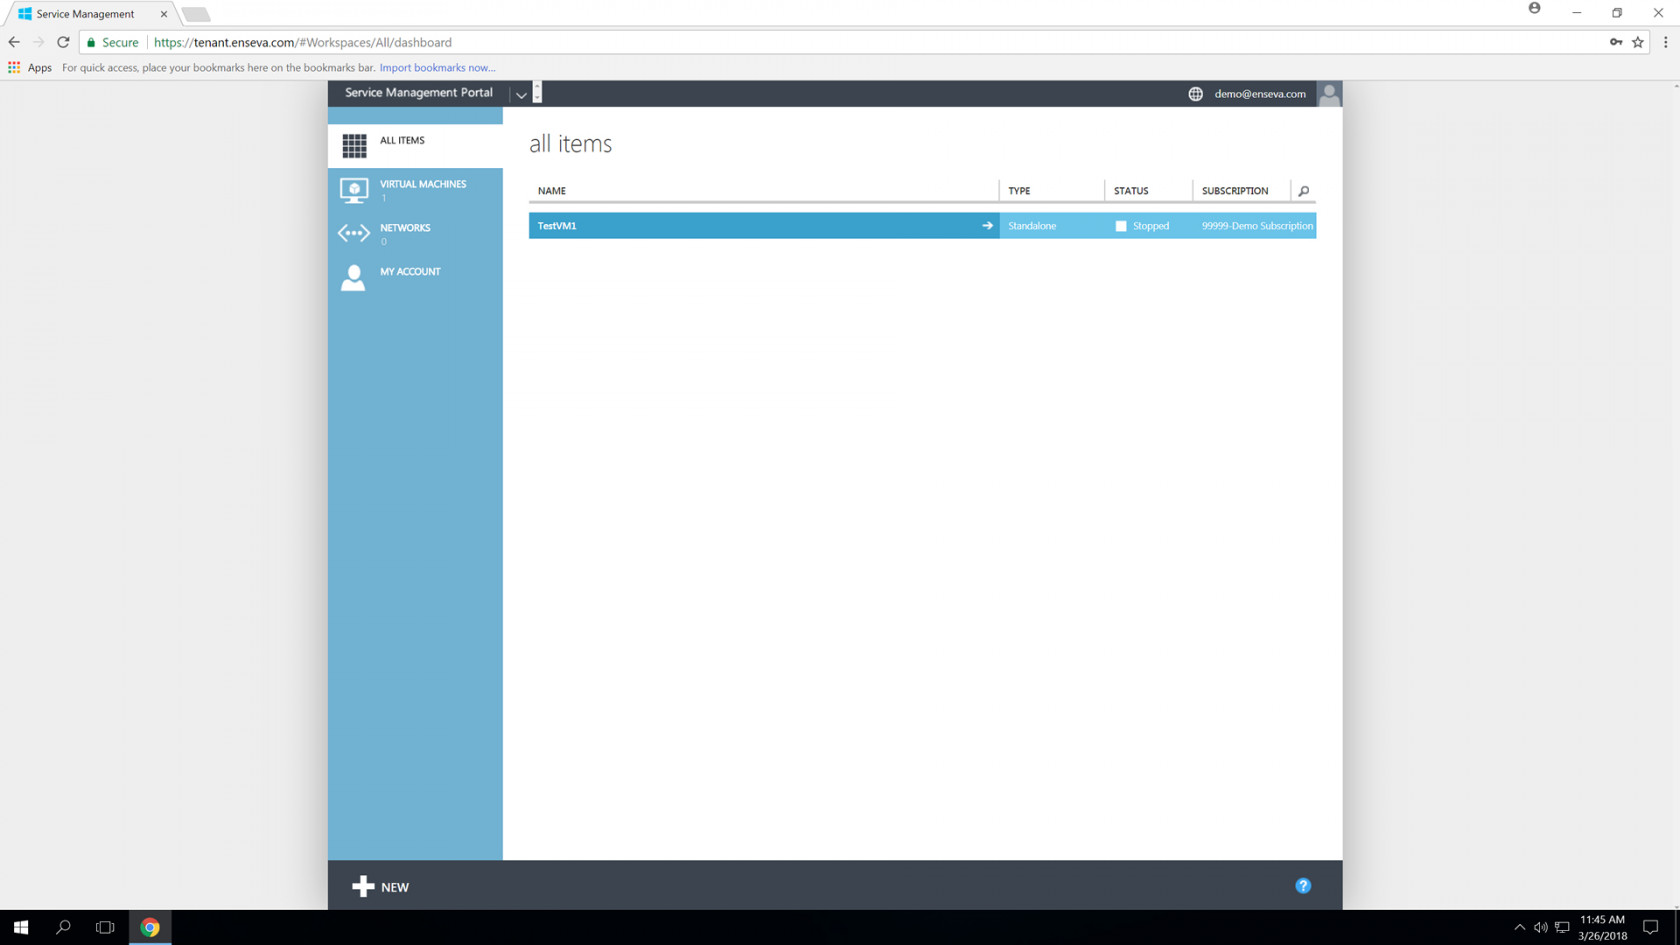
- Select the Configure button at the top of the screen to bring up configuration options for the instance. This menu includes the ability to adjust hardware profiles, add/remove network interface and add/remove/resize block storage devices.
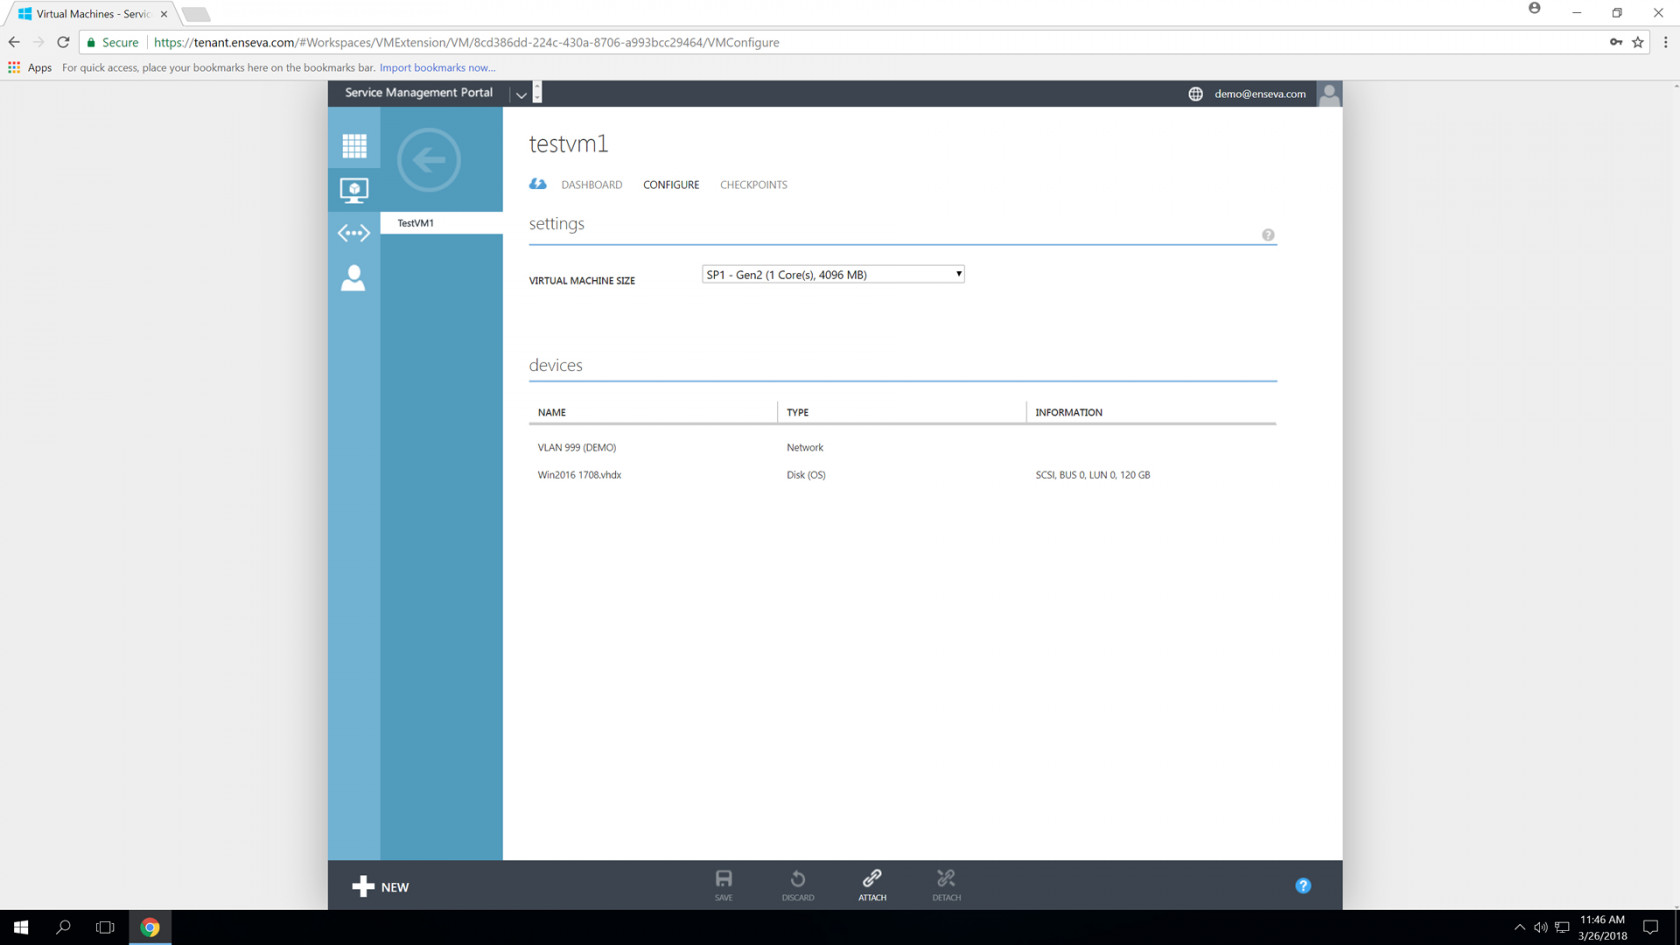
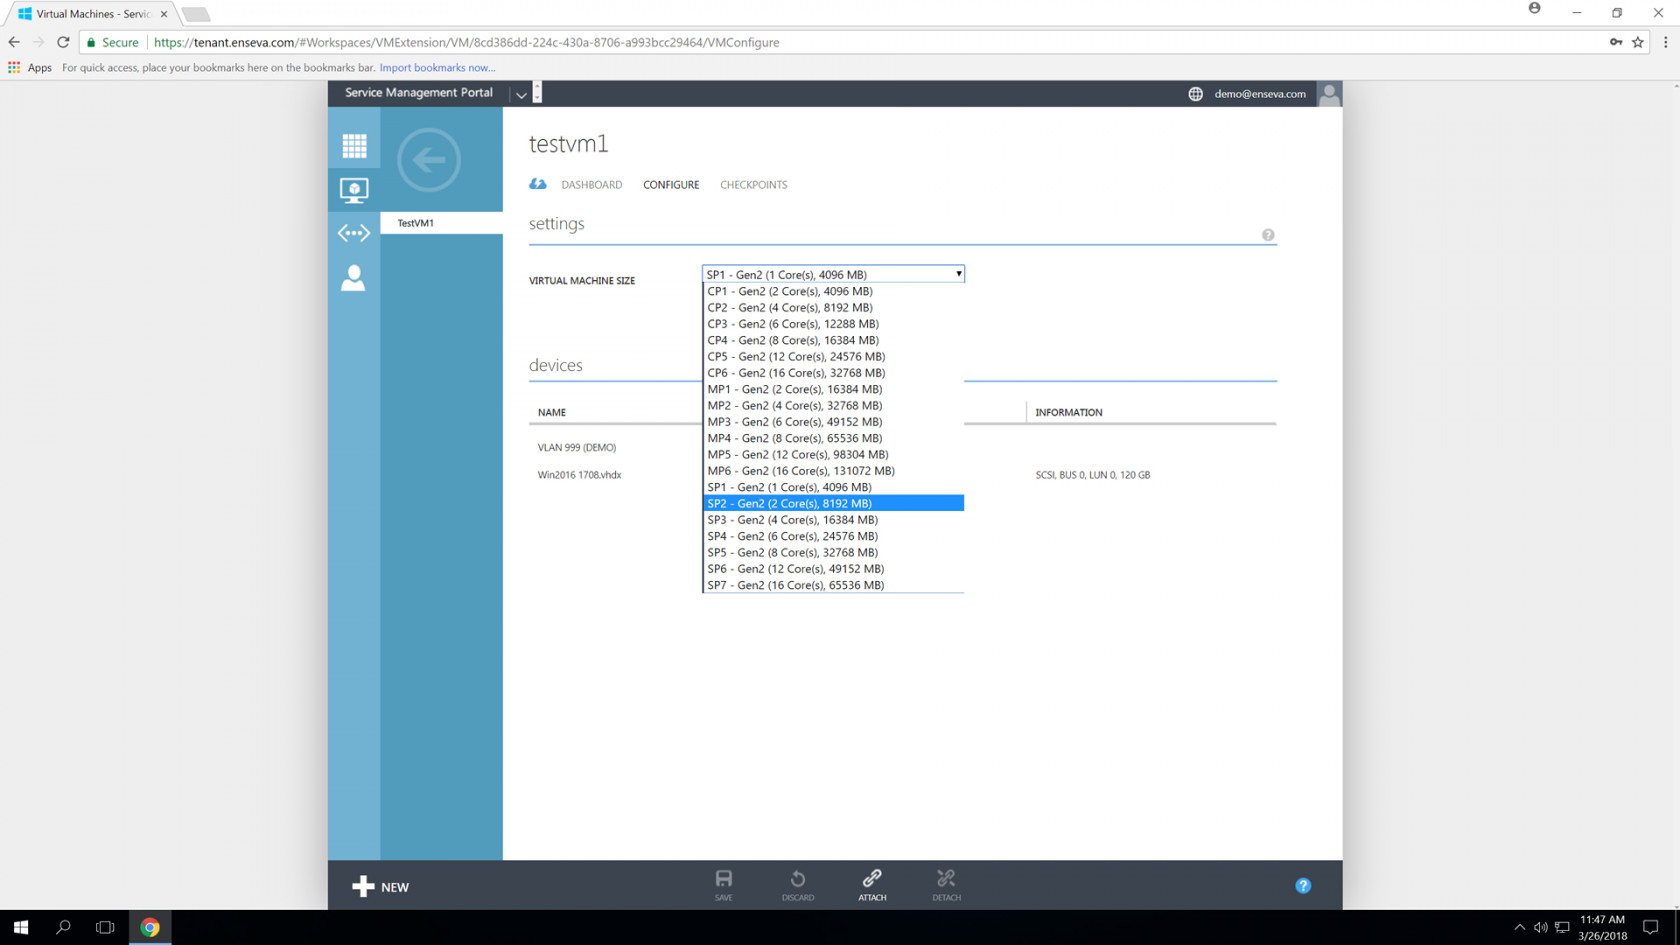
- Using the dropdown menu next to Virtual Machine Size, locate the hardware profile you would like to apply to the virtual machine instance and select it.
- Click Save at the bottom of the screen to apply the new configuration to the instance. A confirmation prompt will ask you to confirm you would like to save the configuration. Select Yes to continue or No to abort.
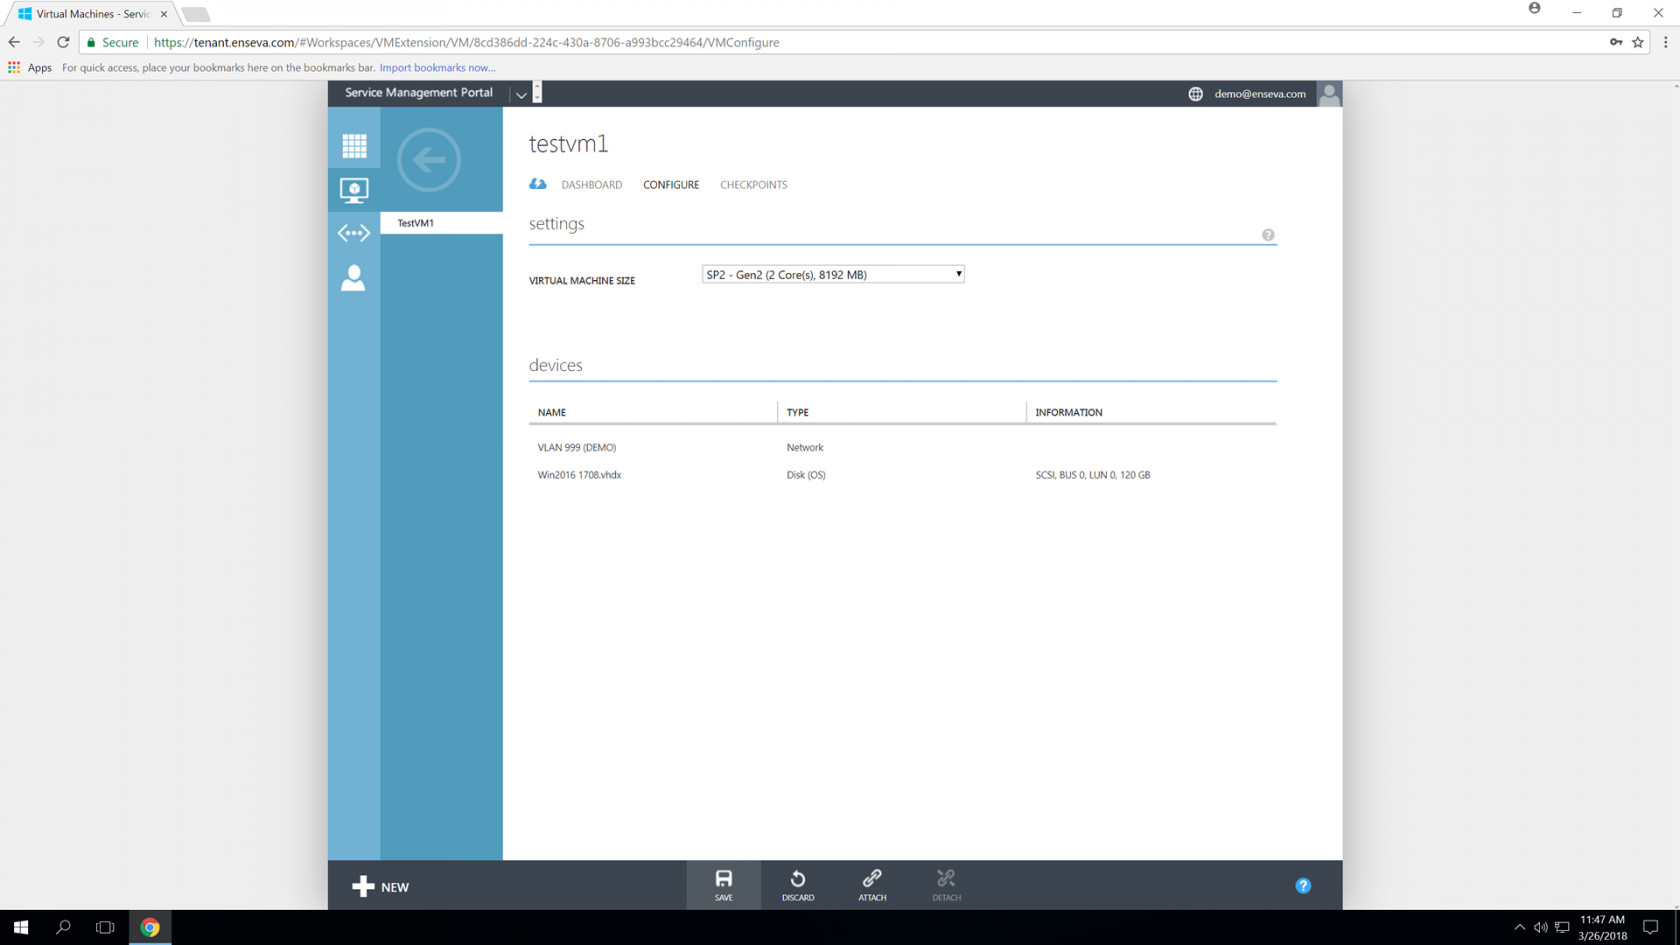
- Provided no alerts or errors have been presented, your new hardware profile has now successfully been applied. To confirm, you may select Dashboard at the top of the screen to review your virtual machine instance configuration.
