Deleting a Virtual Machine Instance
This guide will cover Deleting a Virtual Machine Instance within Enseva Azure
Deleting a Virtual Machine Instance
- Navigate to the Tenant Portal
Enseva Azure allows cloud administrators to quickly delete Windows and Linux virtual machine instances. All that is required is an Enseva Azure account and a valid subscription
The tenant portal can be accessed from a web browser by visiting this URL: https://tenant.enseva.com
Enter your user credentials and click the 'Submit' button
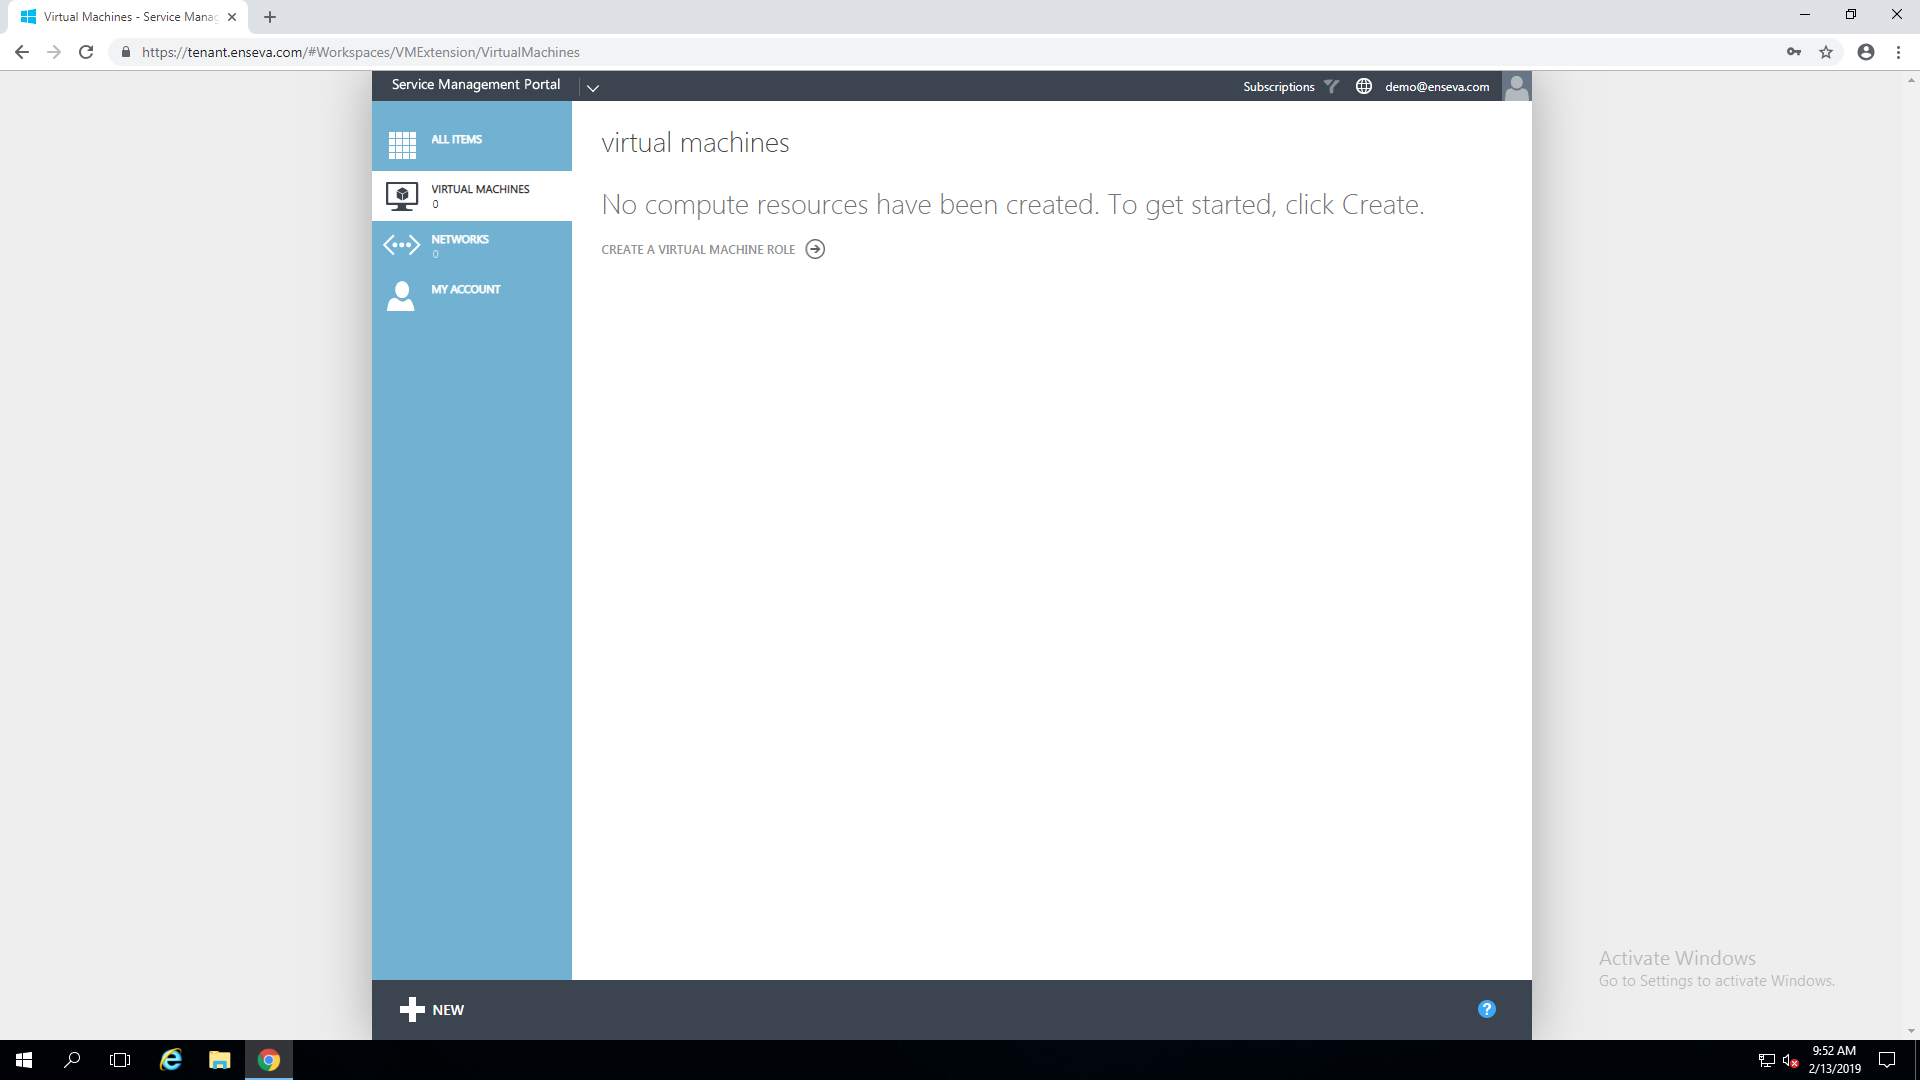
- Select a Virtual Machine
On the left hand side of the page, ensure that 'Virtual Machines' has been selected. You will see a list of virtual machines that are currently setup on your account
In this tutorial we will be deleting the 'demo-vm' virtual machine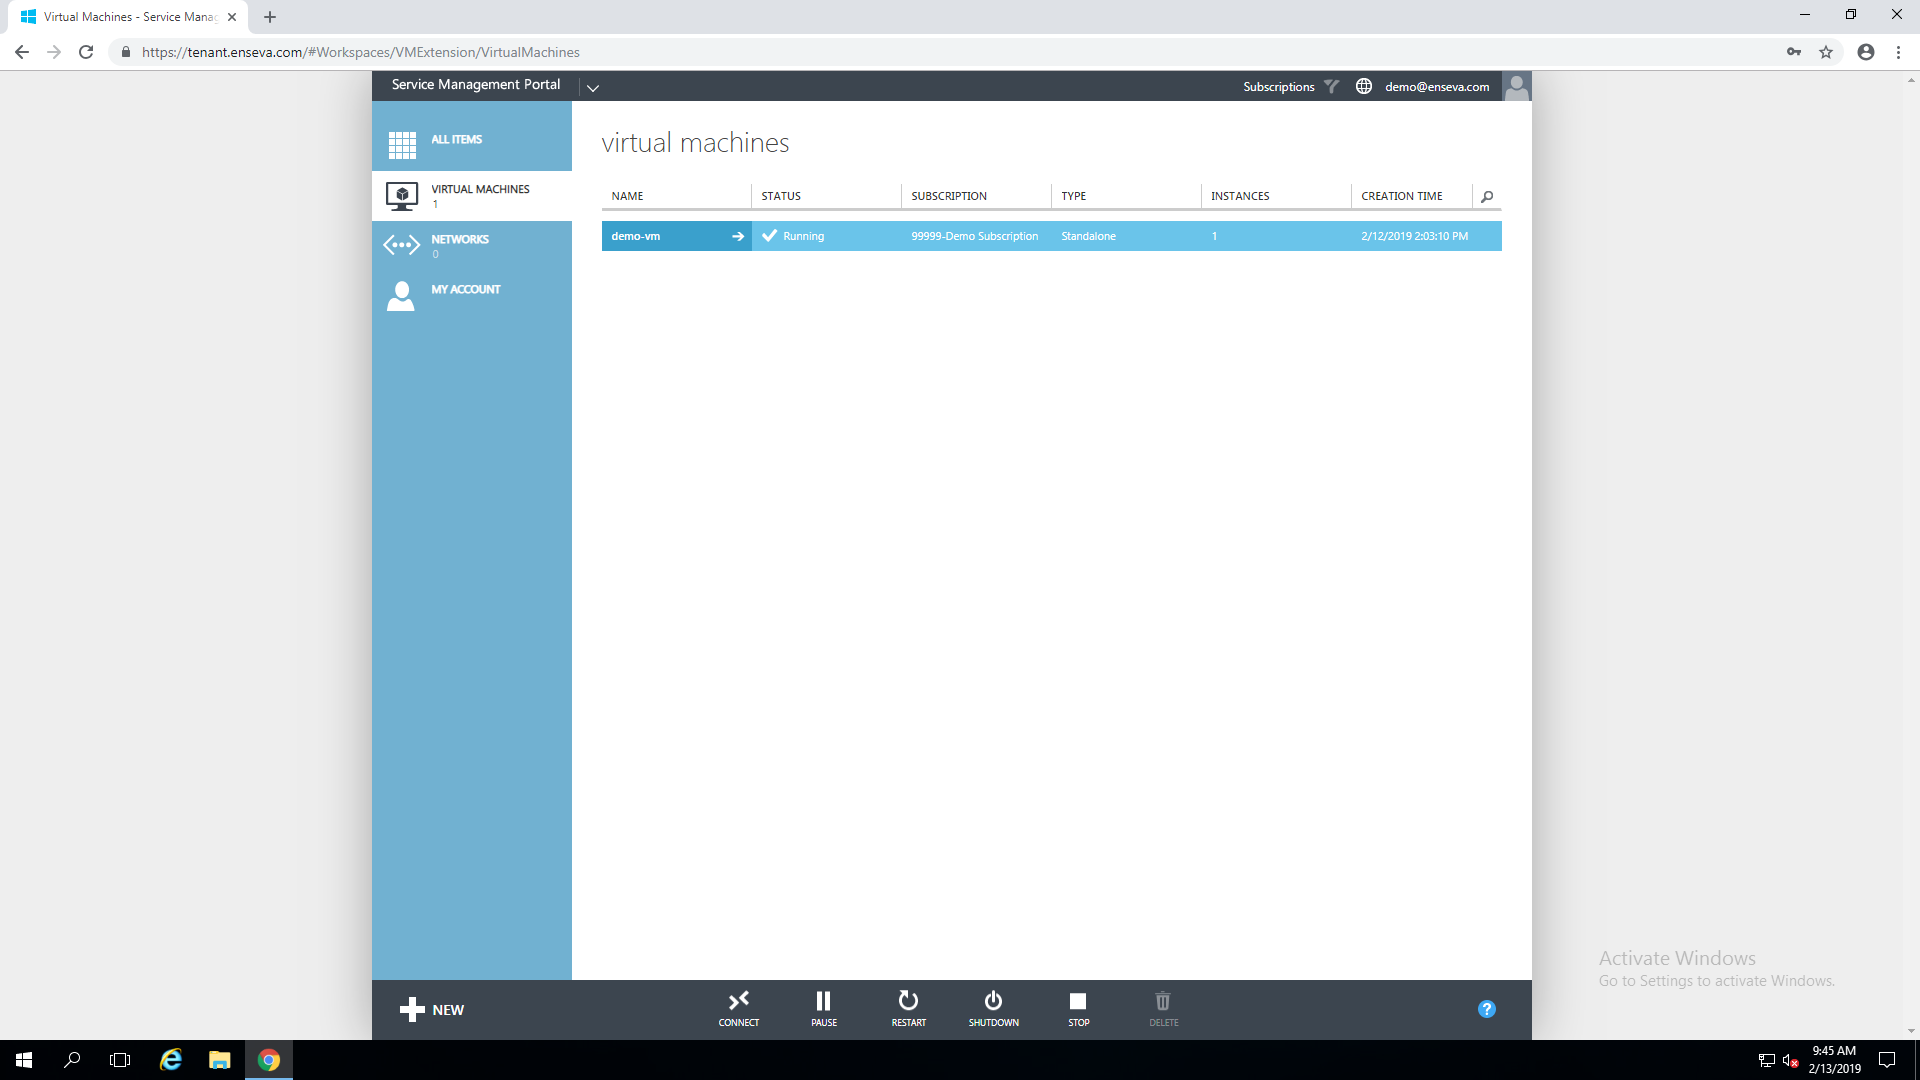
Select the virtual machine you wish to delete, then select 'Dashboard'
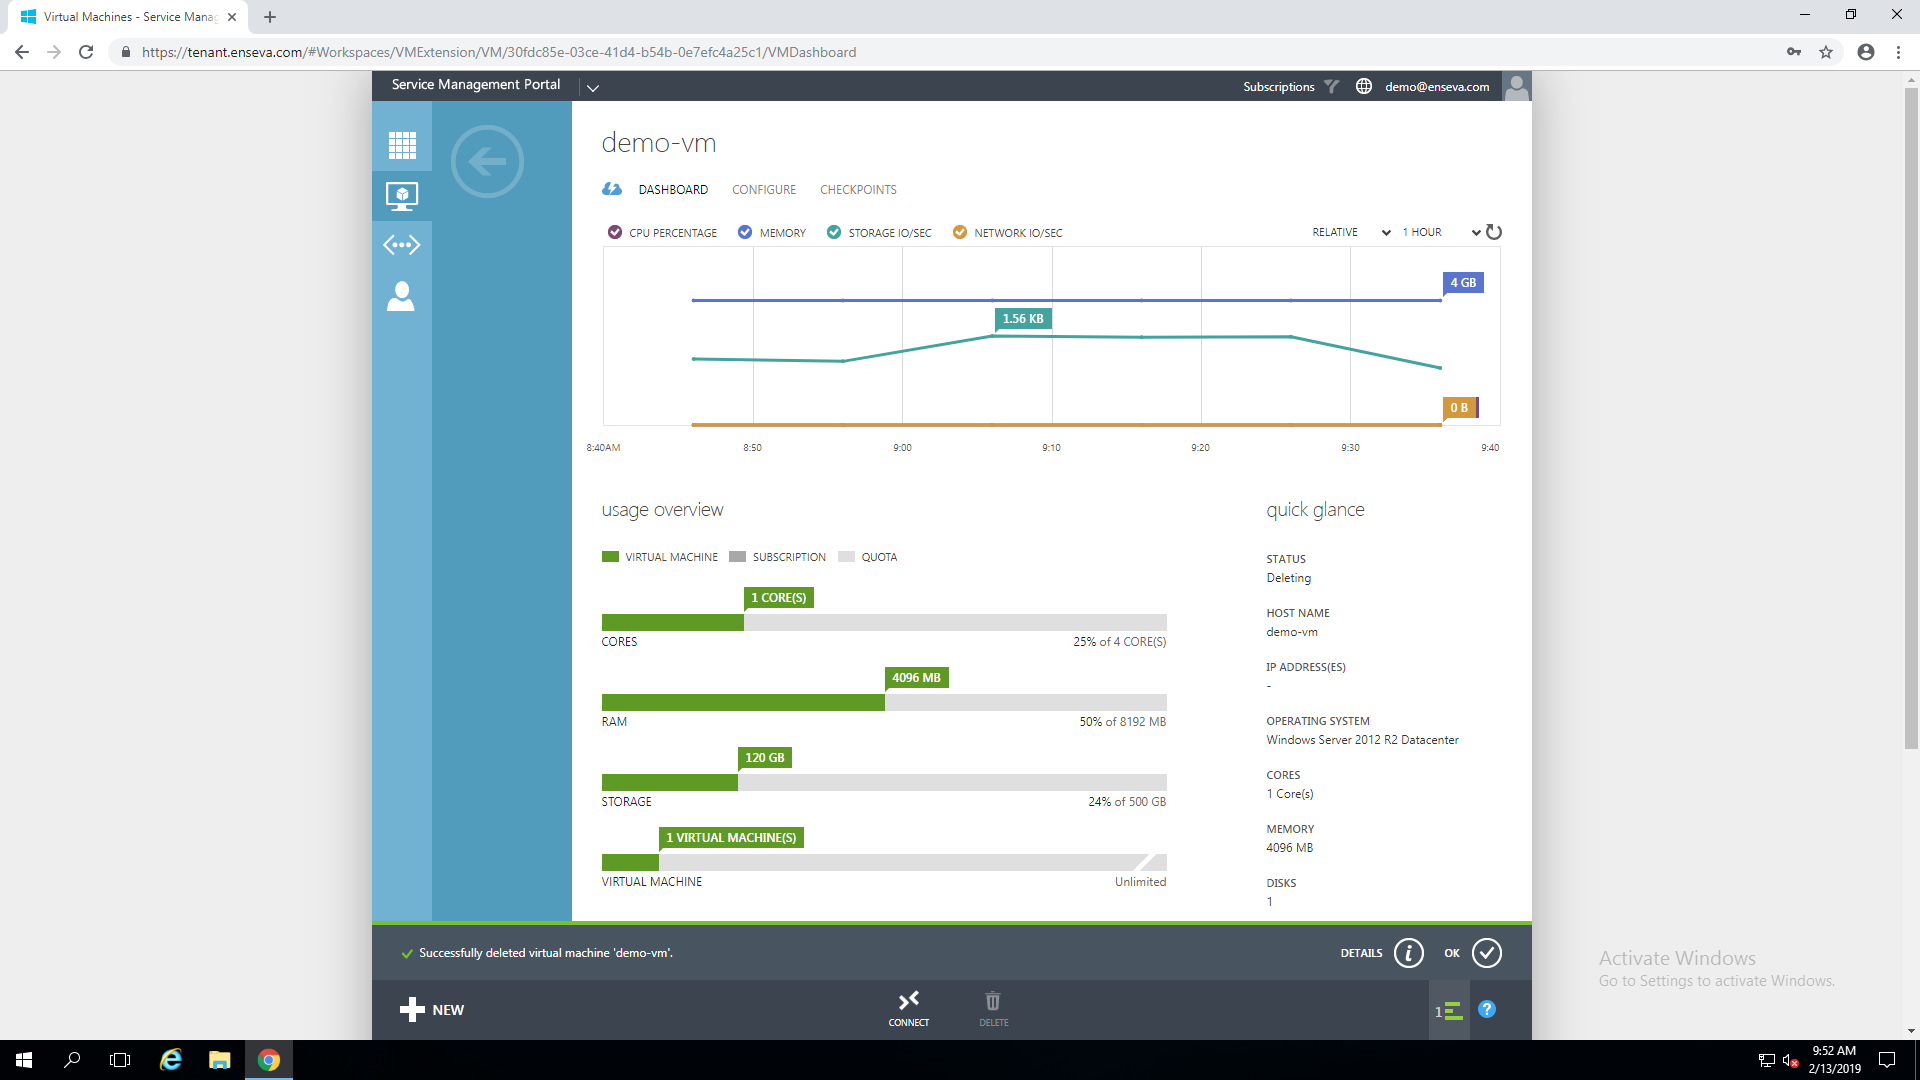
- Stop the Virtual Machine
Before a virtual machine can be deleted, it must be in a stopped state. To stop the virtual machine, click the 'Stop' button at the bottom of the page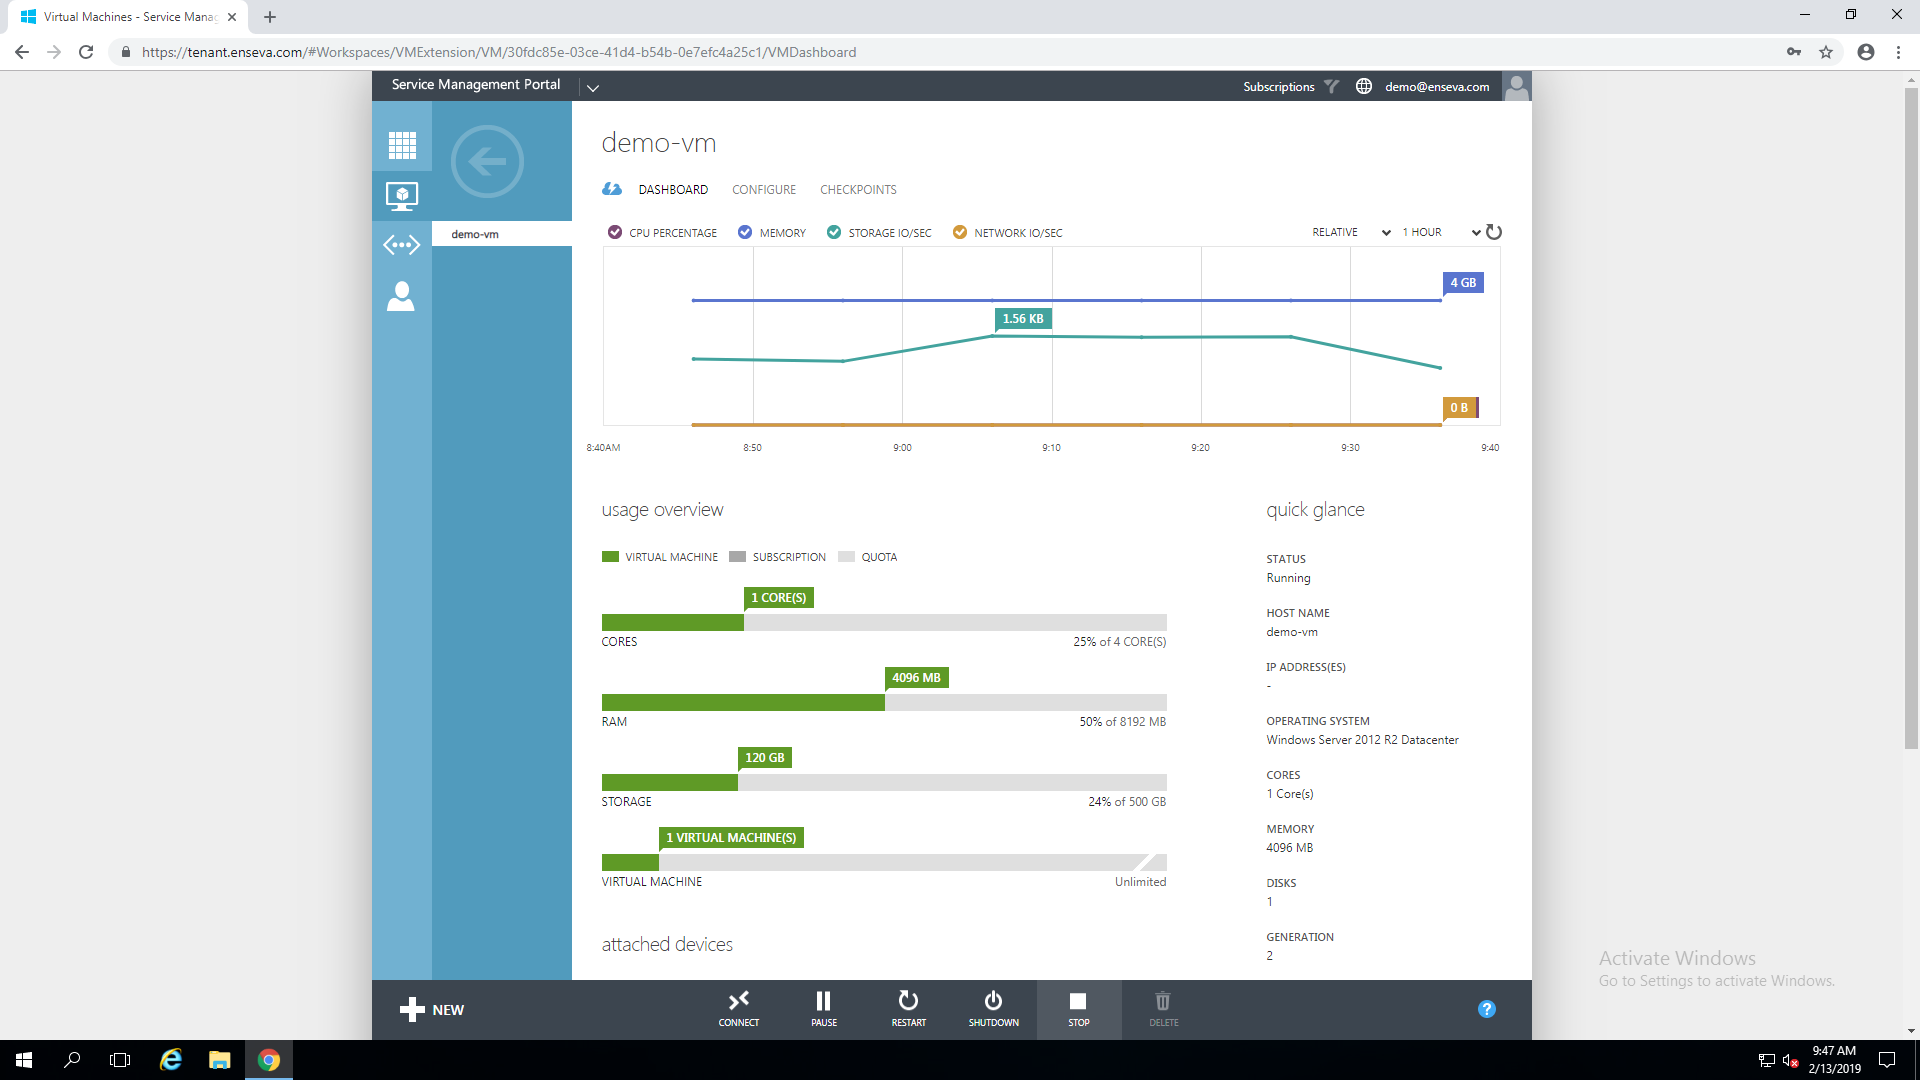

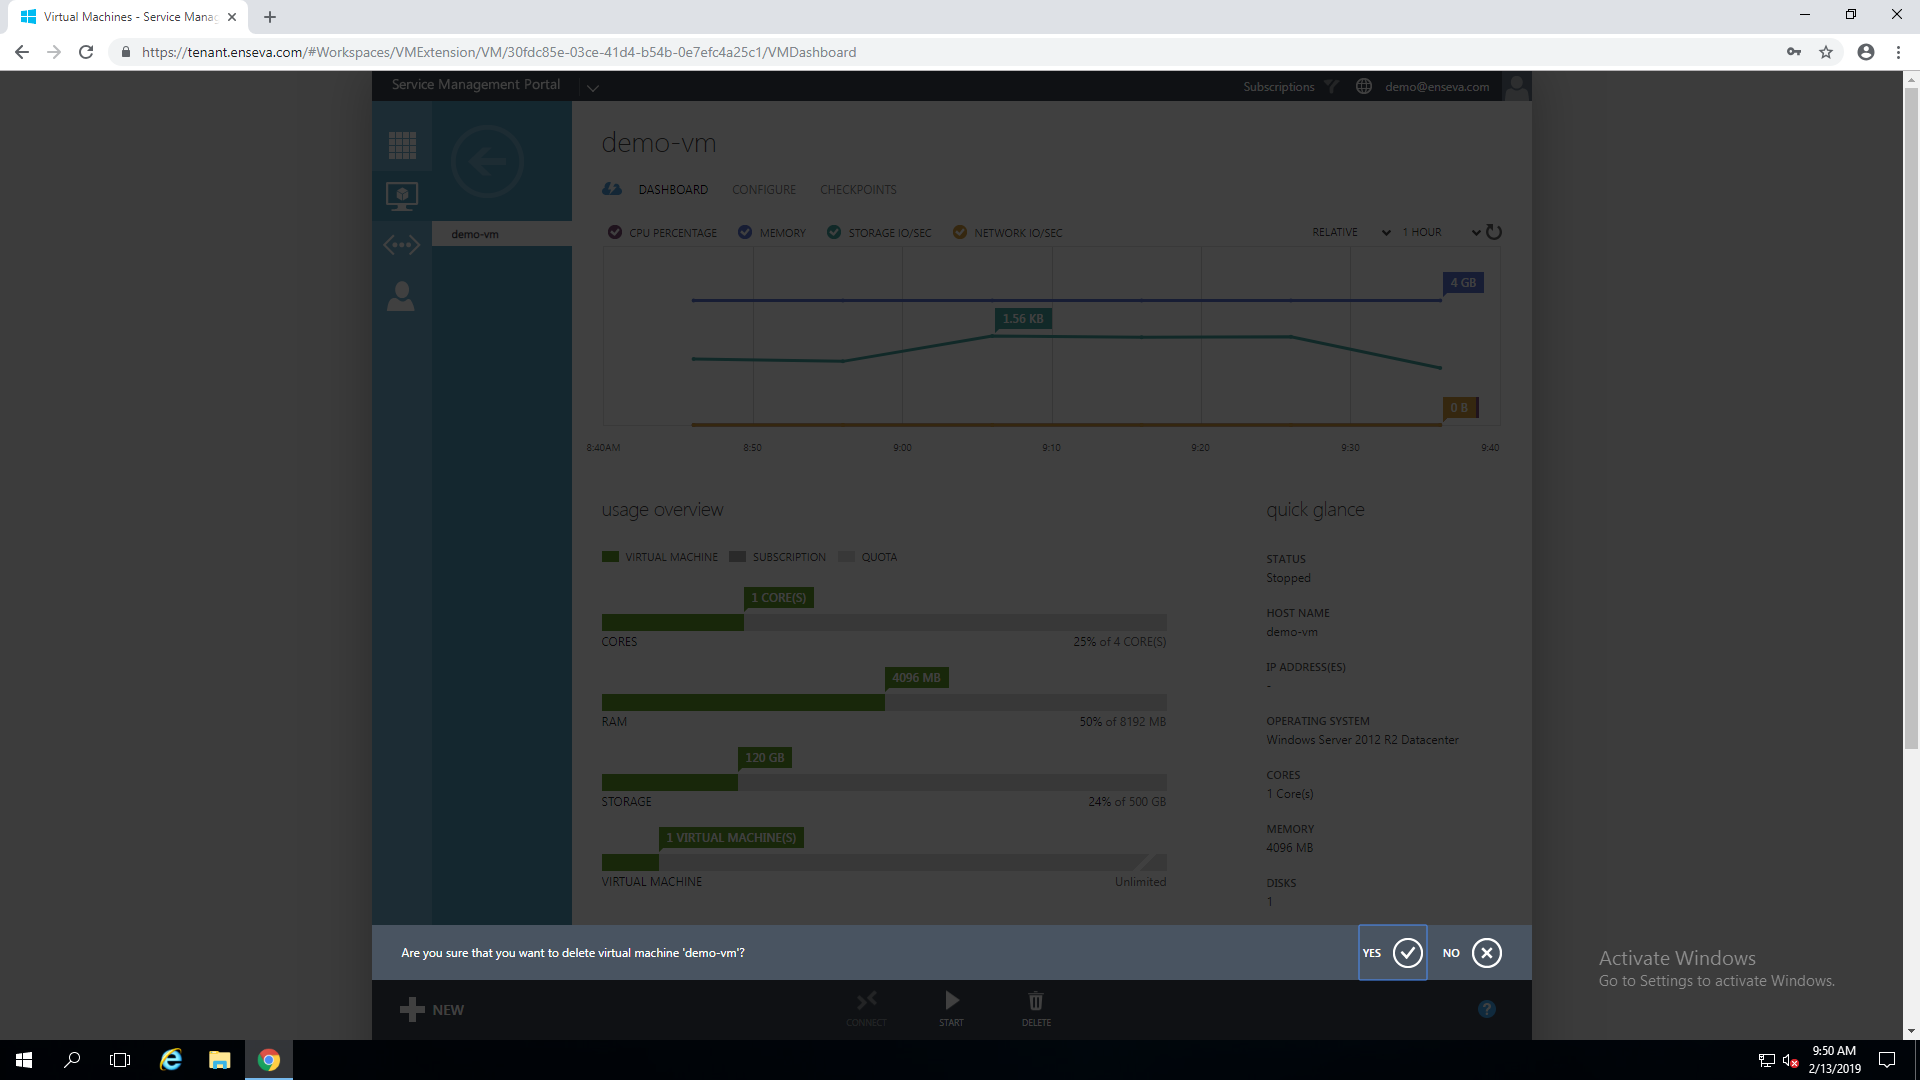
- Delete the Virtual Machine
Once the virtual machine has been stopped, it can now be deleted. To do so, click the 'Delete' button at the bottom of the page
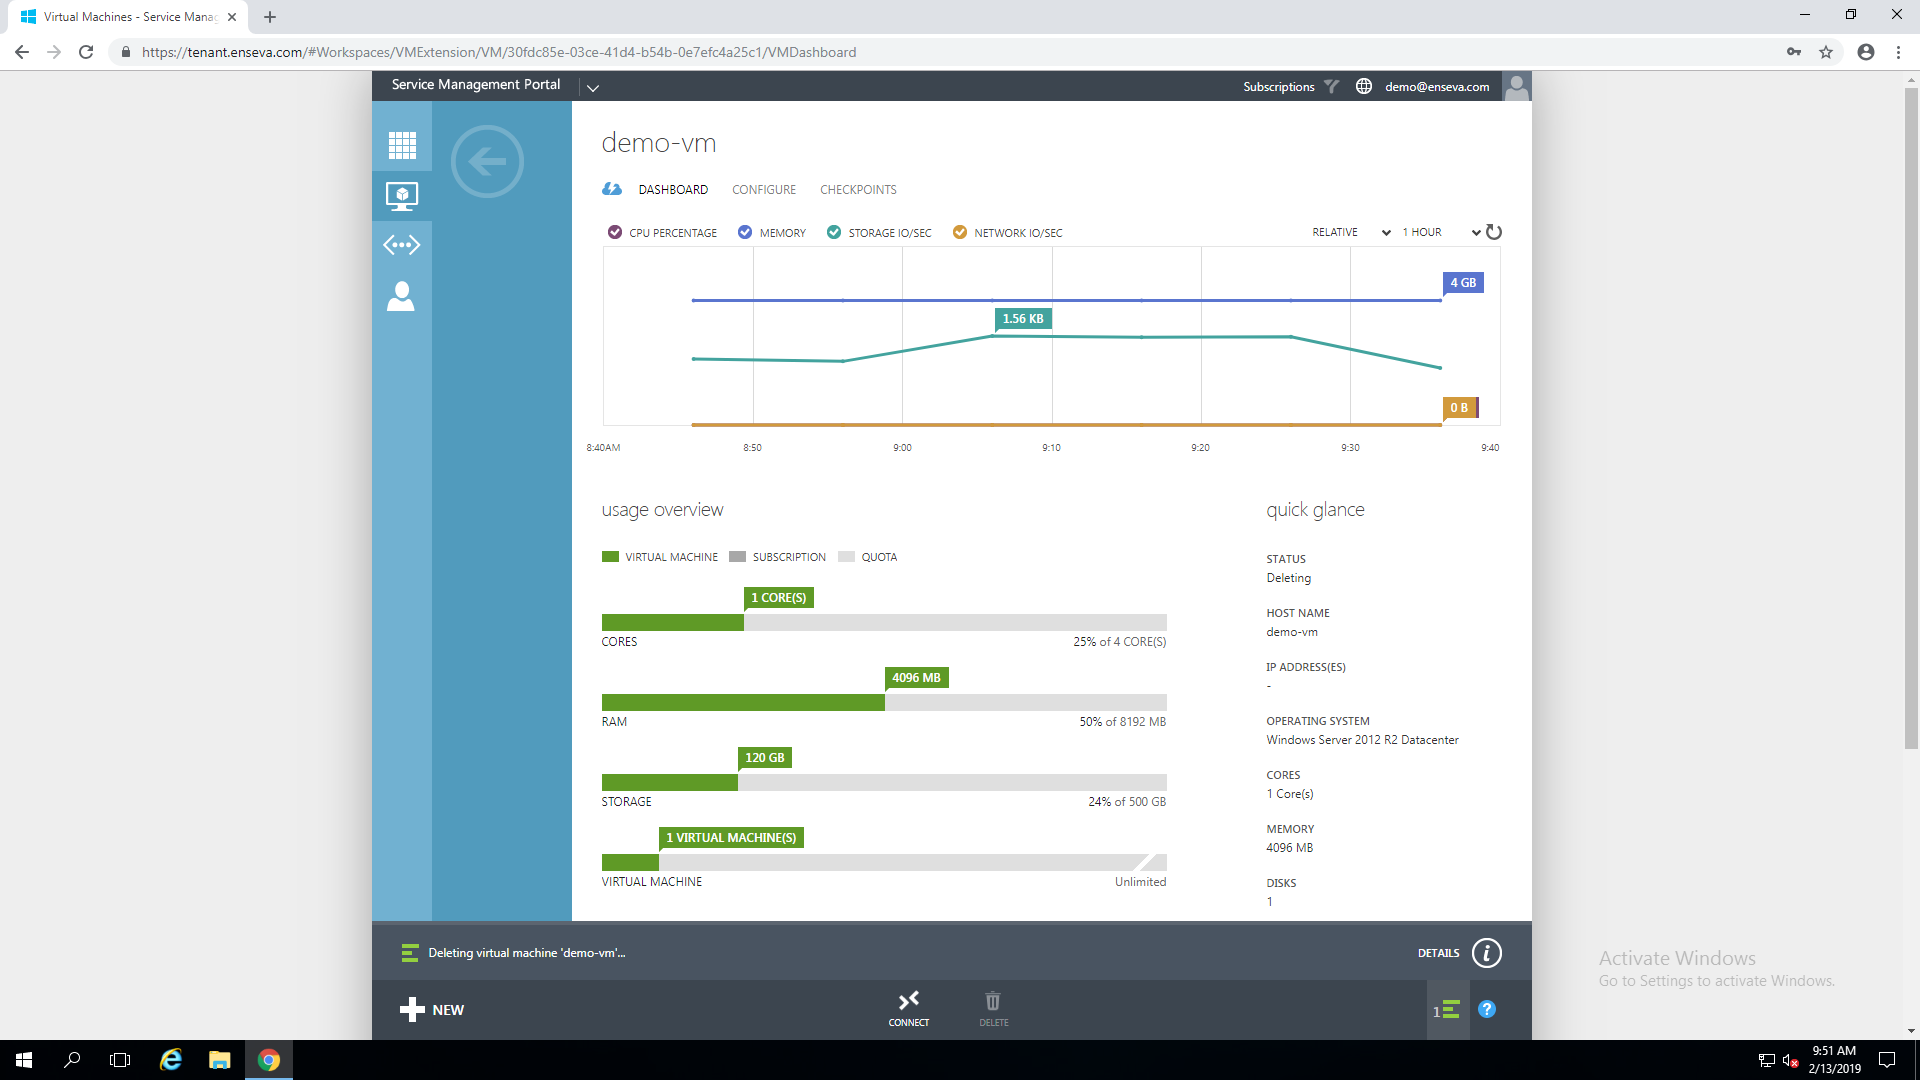

- Confirm Removal
Return to your virtual machine list to confirm removal