Deleting a Block Storage Device from an Instance
Each virtual machine instance may have multiple disks attached to them. For instance, you may want to keep the disk that is automatically provisioned with the instance for operating system purposes and attach one or more additional disks to store user applications and data. If you no longer wish to have a particular disk attached to a virtual machine instance, this procedure will assist with deleting it.
Deleting a Block Storage Device from and Instance
-
To Delete a block storage device from a virtual machine instance, the instance must be first placed in an offline state. Visit related tutorials for details on how to place a virtual machine instance in a stopped state.
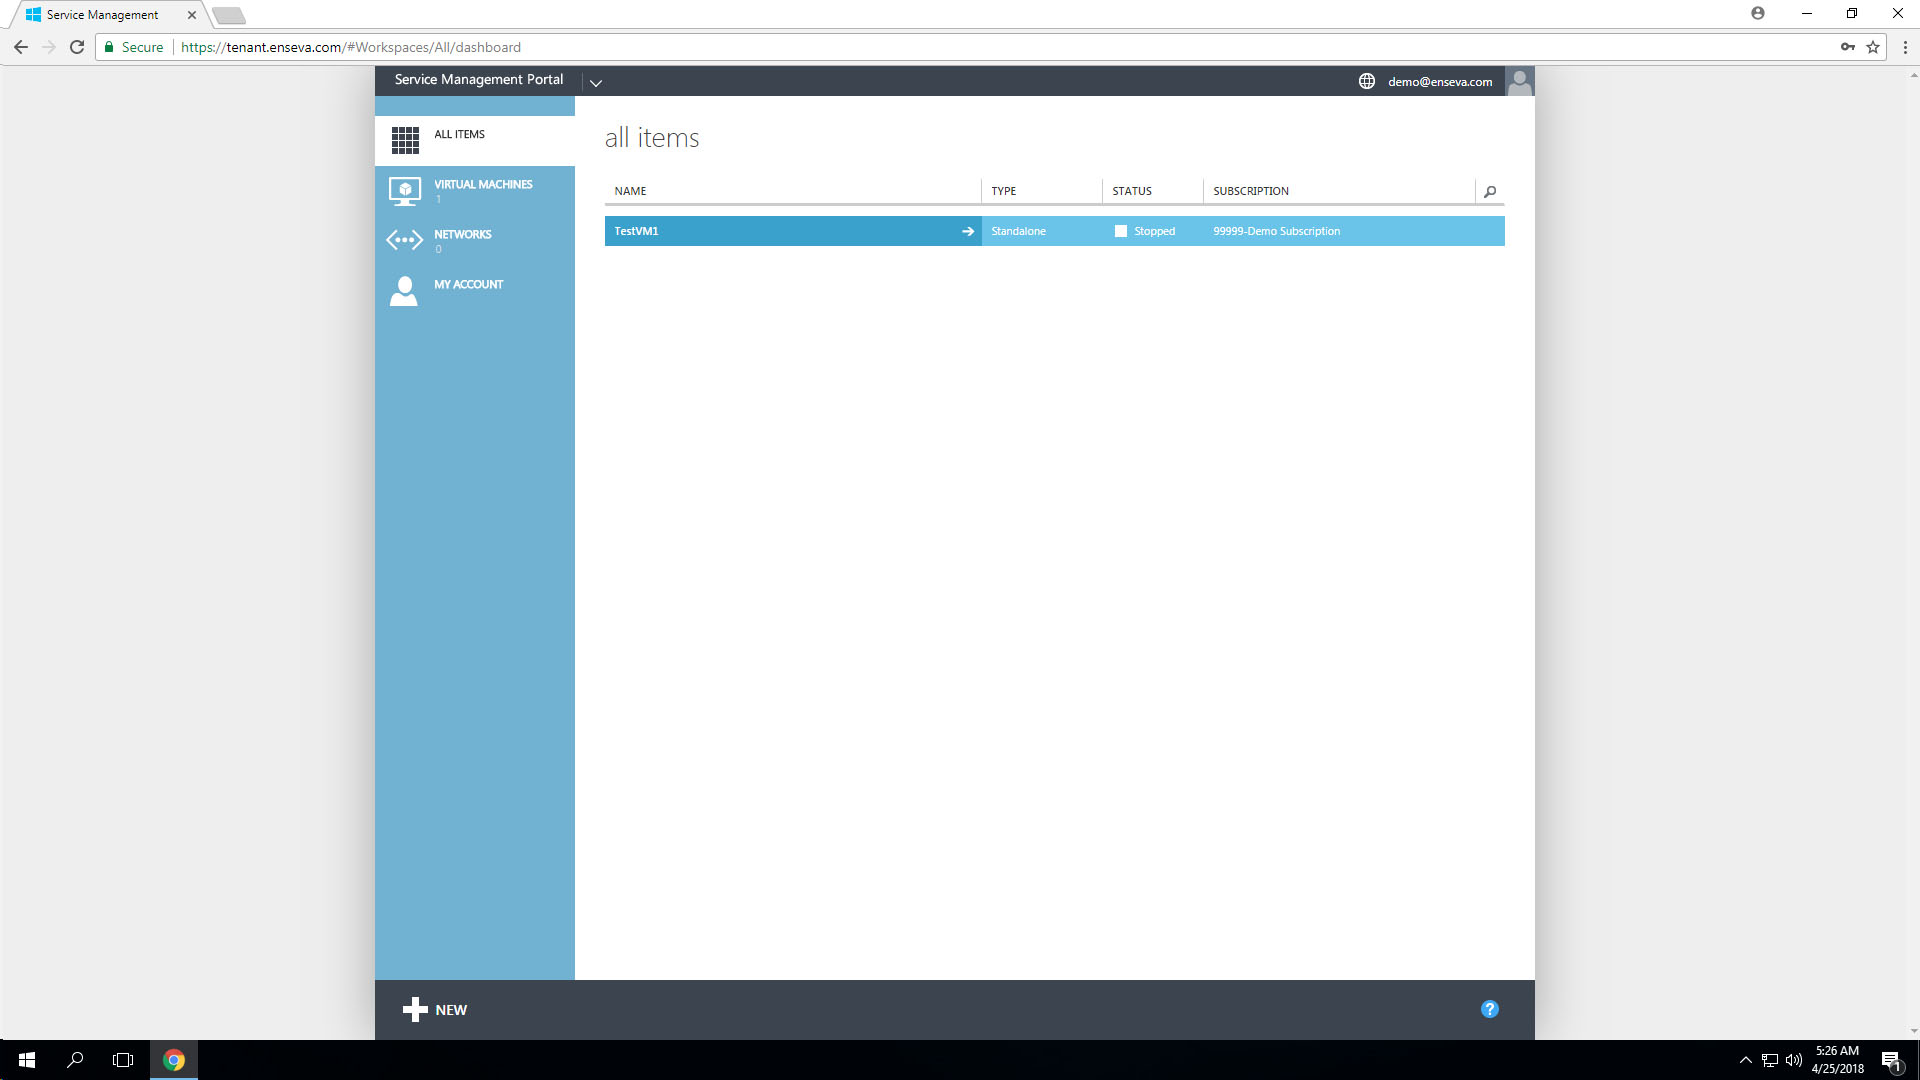
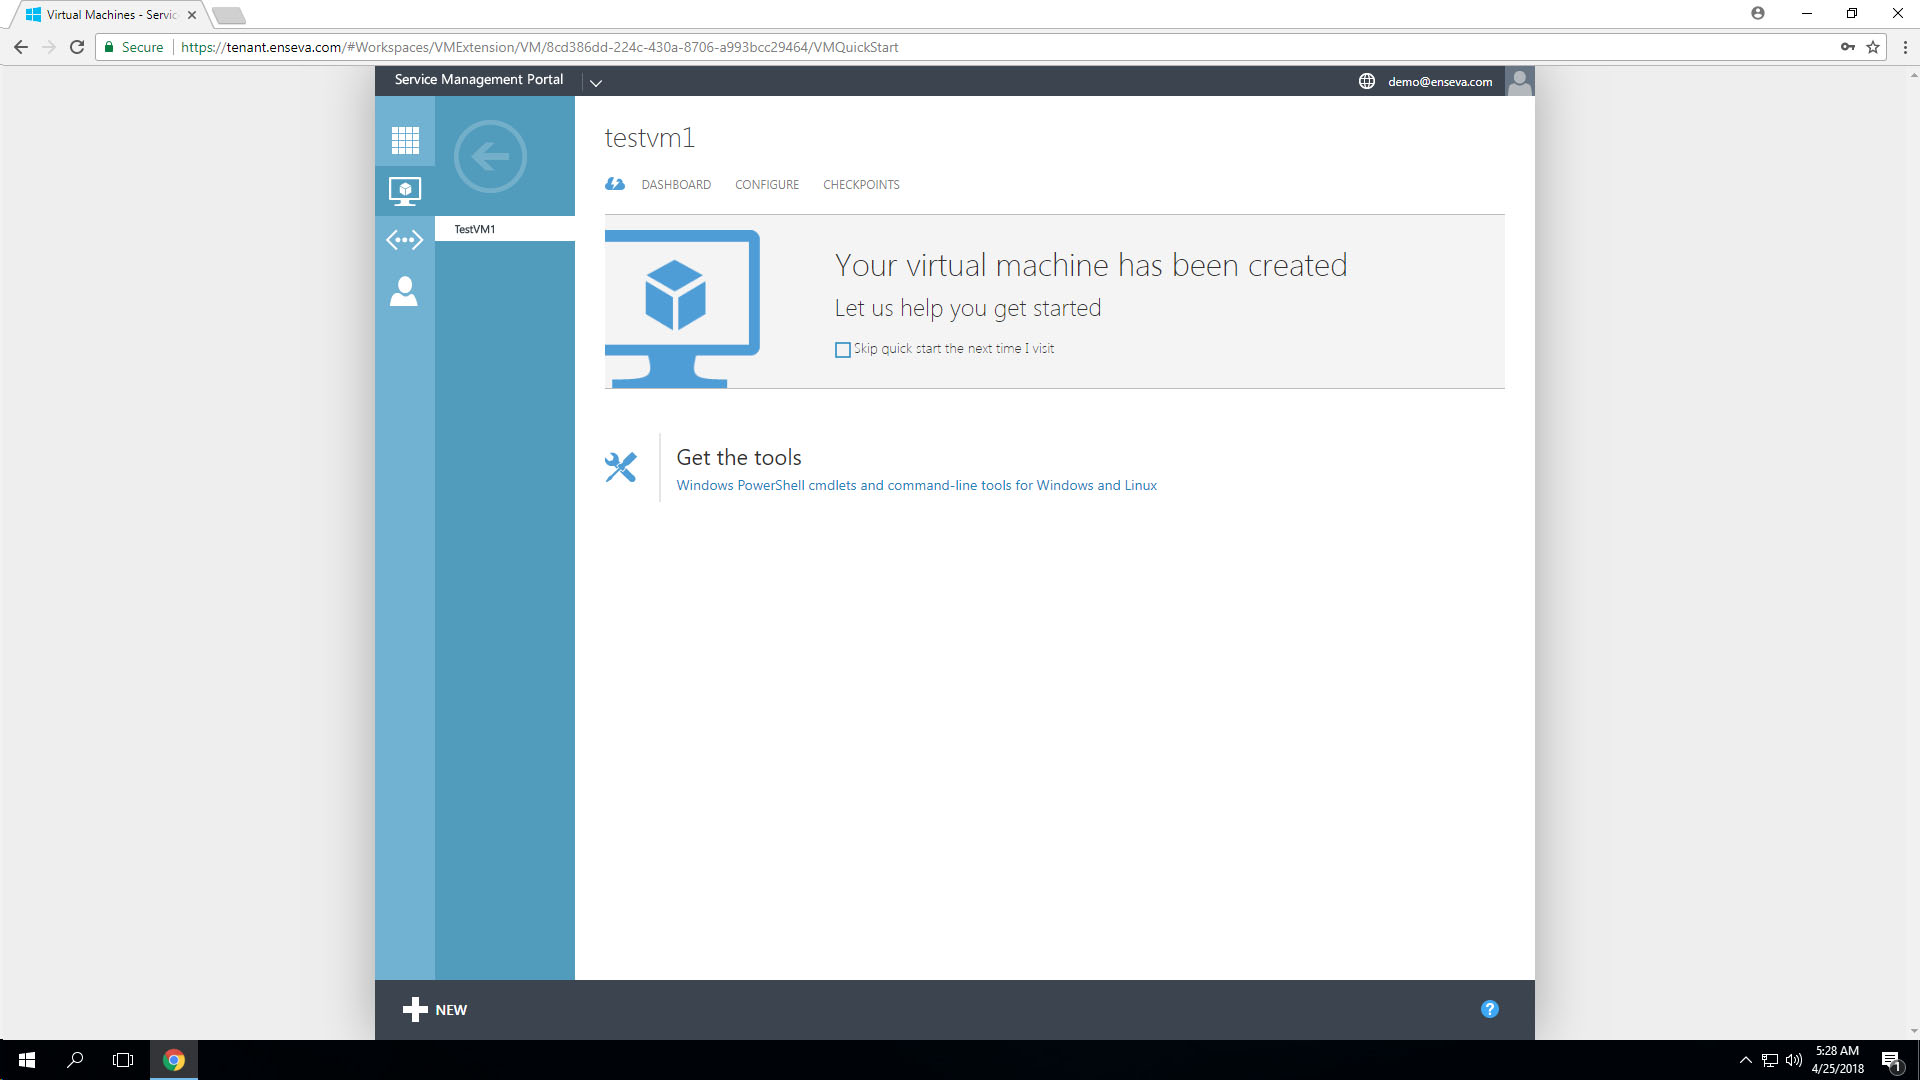
With the virtual machine instance already in a stopped state, select the item in the All Items or Virtual Machine menu. This will present an instance welcome message for the instance that was selected.

- Select the Configure button at the top of the screen to bring up configuration options for the instance. This menu includes the ability to adjust hardware profiles, add/remove network interface and add/remove/resize block storage devices.
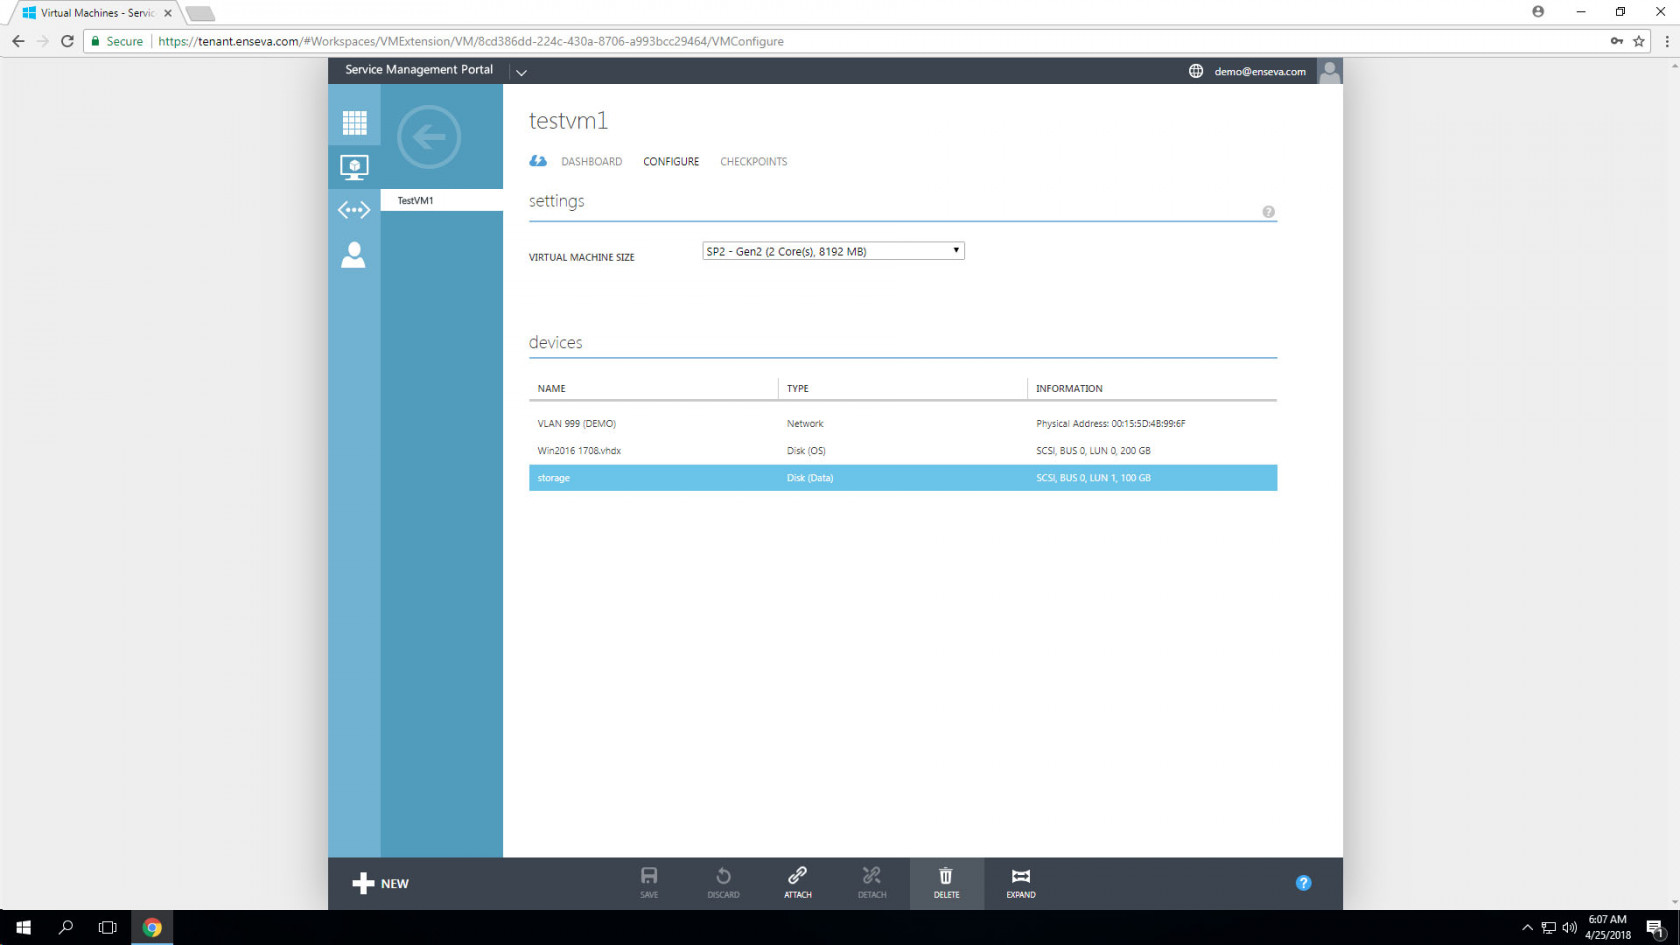
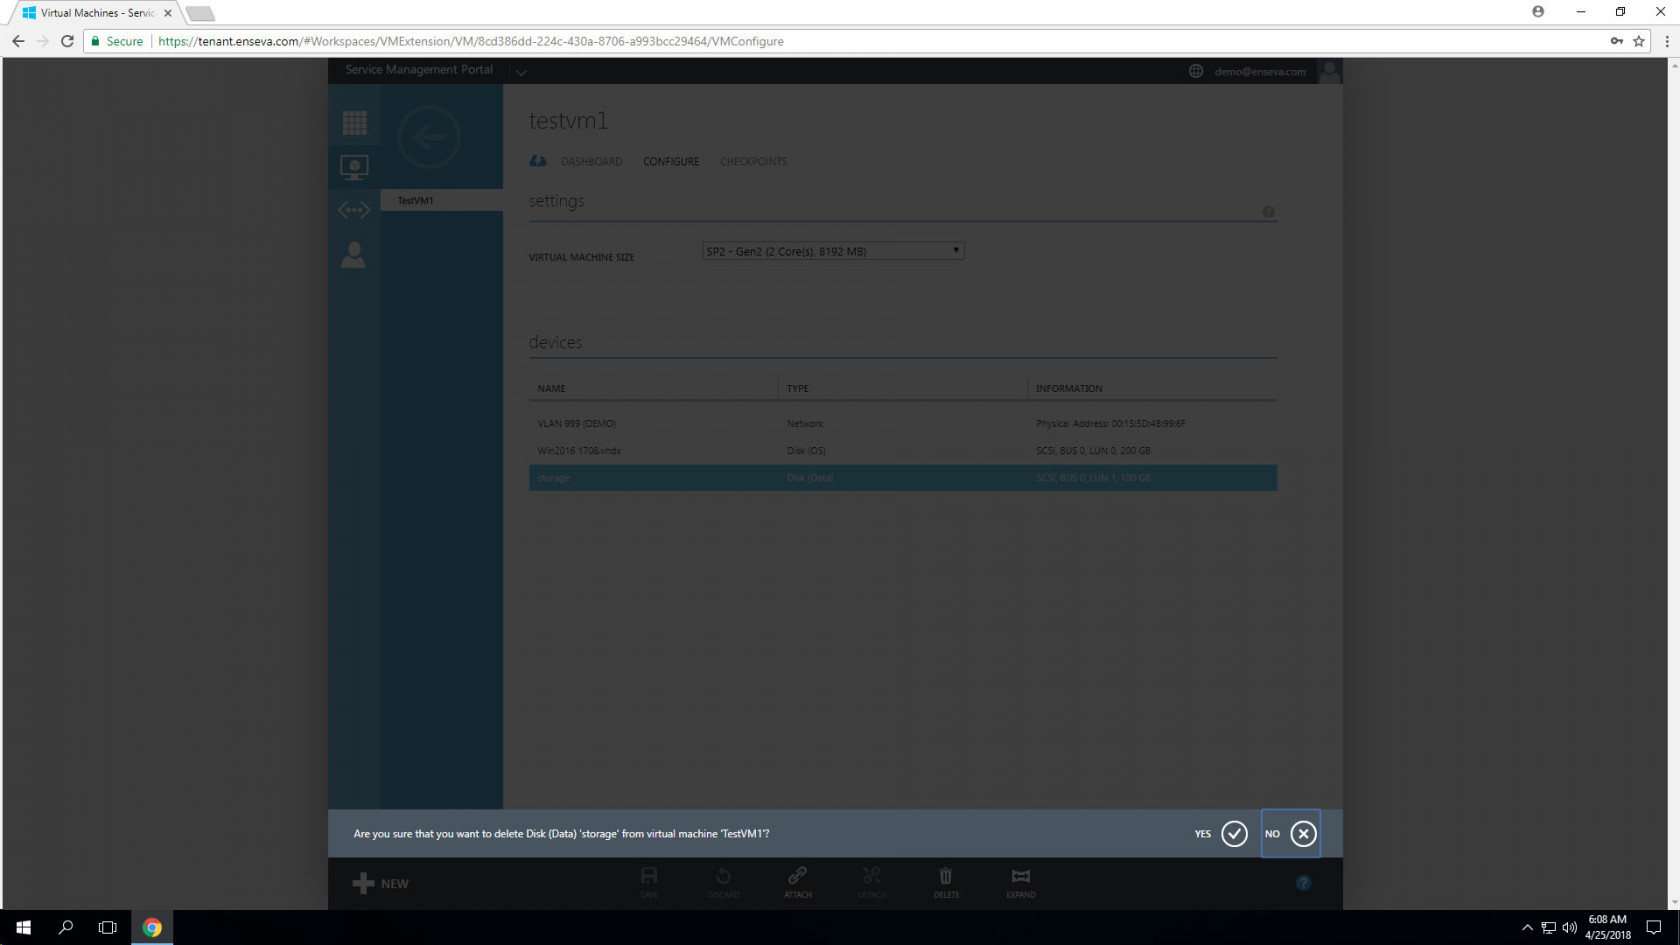
- Select the disk you would like to delete and then leverage the bottom menu to select the Delete button, this will launch a confirmation dialog prompting you to confirm you would like to delete the virtual disk. Once this action is completed, it is not possible to retrieve any data located on the disk you are deleting. Click Yes to complete the action.